SubSee Wet Diopter Review

The SubSee diopter, by ReefNet, is a wet diopter used for supermacro underwater photography. The adapter holds the diopter in front of the lens port, very close to the port but not touching it.
The diopter (aka SubSee Magifier) and adapter can be purchased separately, but they are often purchased together. The company has plans to offer other diopters of less strength that can be used in the same adapter. Some people have made their own adapter for the diopter.
The company will custom-make adapters for dSLR housings and compact housings.
SubSee Diopter Description
Here’s a description from Reefnet:
- The SubSee Magnifier is a dual-element achromatic lens system (corrects chromatic aberrations) and is sealed in an airspace (to maintain all of its magnification). Just like any other “wet-lenses”, it allows more magnification by decreasing the lens-to-subject distance. The more powerful the lens (measured in ‘diopters’), the closer you’re able to get to the subject, and hence the more magnification achievable. The SubSee is a +10 diopter lens, which can achieve approximately 2.2:1 magnification when couple with a 105mm lens. Results will vary with the primary lens focal length.
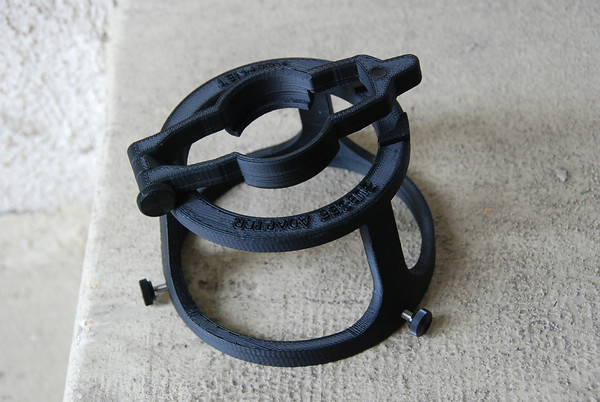
SubSee adapter. It’s very light, sturdy and well made.
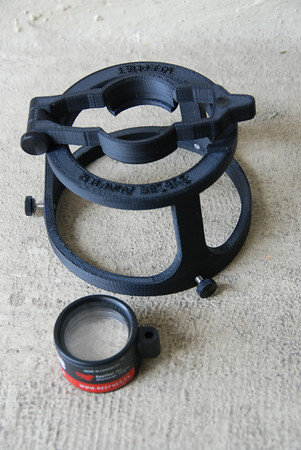
SubSee diopter next to the adapter.
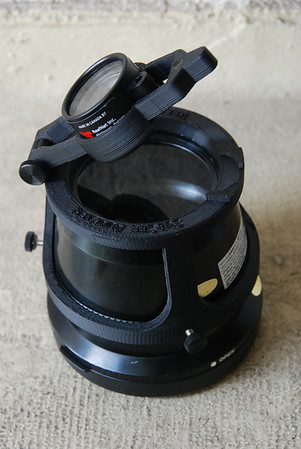
Adapter and diopter on my 105mm lens port. You tighten the screws to secure the adapter on the lens port. This may scuff your port up a little bit where the screws tighten down. The adapter and diopter felt very secure, and I was not concerned about losing either of them.
The “New SubSee” magnifier
In early 2010, SubSee started shipping out a new diopter. This diopter is larger and can be used with full-frame cameras in addition to cropped-sensor dSLR’s and compact cameras. It’s also 67mm threaded so it can screw on some compact ports. Thhe price also went up. They are producing a +5 diopter and a +10 diopter. I like the ability to use a +5, because frankly sometimes a +10 is just too strong for many subjects. A +5 would most likely give me around 40-50% max magnification with my 105mm lens. Reefnet says the new diopters have better corner sharpness, but I’m expecting some user feedback soon on this. Currently this review is on the “original” diopter.
Weight
The SubSee adapter and diopter together are extremely light, weighing 6.55 ounces (186 grams).
What kind of cameras?
This size diopter will work well with cropped-sensor cameras, but there may be some vignetting in part of the range on a full-sensor camera. Reefnet is making a larger one that will have no vignetting with full-frame cameras. They will also be selling a +5 diopter sometime during the summer of 2009
Magnification of the diopter
- Pool Tests with my setup show the subsee +10 diopter increases magnification 107%. Please note that the amount of magnification may vary on other setups, because it depends on the distance between the lens and the port glass, which is different in different ports.
- Magnification will also depend on the focal length of the lens used. Much more magnification is possible with a 150mm focal length lens, witlh a 100mm or 105mm lens you will still get a good amount of magnification, while magnification will be much less with a 60mm lens. Note that I do not recommend using strong diopters with a 60mm lens, you maybe trying to focus inside the port!
- Minimum width of photo with nikon 105mm VR lens – 23mm
- Minimum width of photo with nikon 105mm with subsee +10 diopter – 11.1mm (107% mag.)
- Max width of a photo with the 105mm + subsee – 18.2mm (26% mag.) This is the largest photo that I felt I could easily take with the Subsee in the pool.
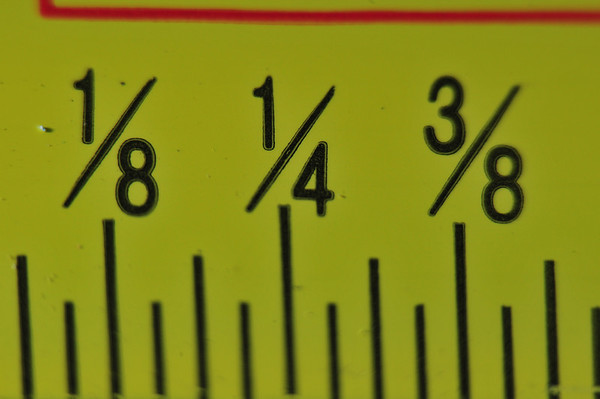
Photo taken in the pool, F16, 1/250th. SubSee + 105mm lens. The bottom of the photo is blurry, because even at F16, the depth of field was not enough to get the entire image in focus. Depth of field is very narrow at these magnifications.
Here’s some example photos, there are more SubSee diopter example photos at the bottom of this article
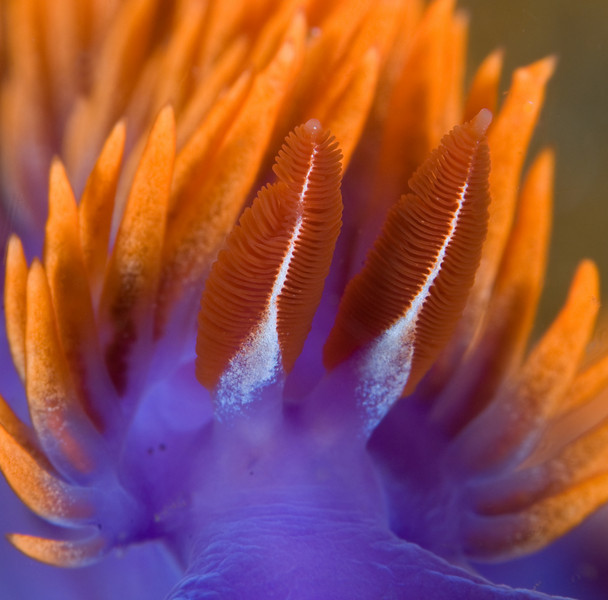
Spanish Shawl nudibranch rhinophores, F32. Anacapa island, california
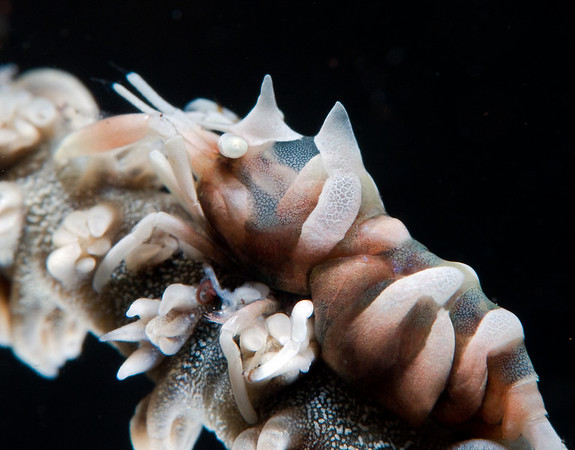
xeno crab, bali, with subsee diopter. 105mm lens, F25, 1/200th, ISO 400
100% crop of the Xeno crab photograph

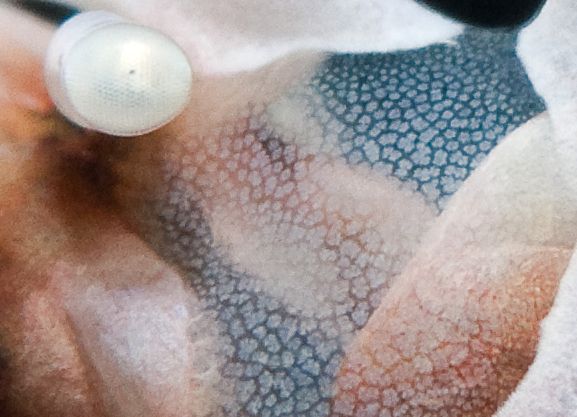
Sample photo, uncropped. F29, 1/250th, Starfish at santa cruz island.
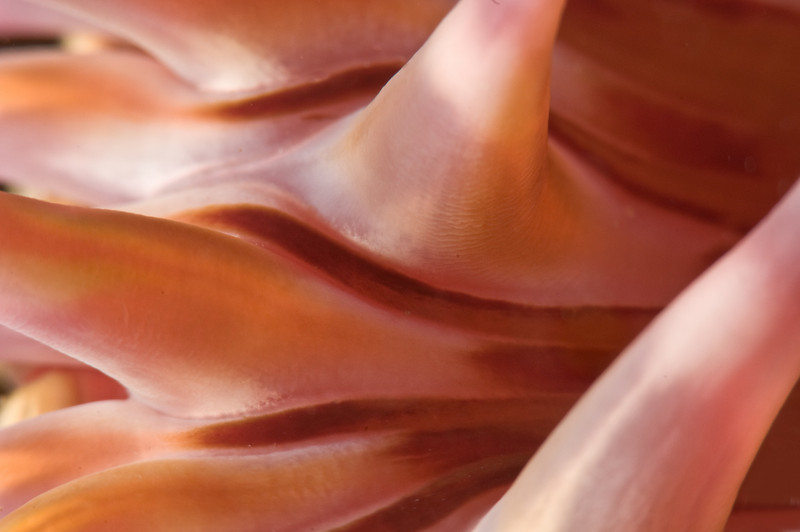
Anemone closeup, Santa cruz island, California. F25, uncropped.
Working Distance
At 1:1 magnification, my 105mm VR lens focuses around 5 inches (125mm) from my port. With the subsee diopter on, that working distance is reduced to approximately 2.5 – 4 inches (63mm-102mm), depending on the amount of magnification you want from the subsee.
Small Depth of Field
It is important to keep in mind that the depth of field at 2:1 magnification is very, very small. Even when dealing with a flat subject, it’s difficult to get the entire subject into the depth of field. Even at small apertures, the camera must be kept perfectly still and parallel to the subject. I even had difficulty in controlled conditions in my apartment, with a flat subject, when I was at 2:1 magnification. Even with flat subjects, work at small apertures, for example from F20 to F29, or smaller, depending on how much diffraction you do or don’t mind.
Ease of use underwater & Tips
- The flip-design is great, making it very easy to quickly take a shot with and without the diopter. Occasionally I would need to adjust my strobes for a second so I could place the flipped-out diopter in the correct position.
- Supermacro photography in general can be difficult. You must find an appropriate subject, and get the composition and focus just right.
- Even with a little surge, I didn’t have any big problems using the subsee, but that is because I have a lot of experience with using my teleconverter for 40% magnification. I always recommend that people first try using their lenses shooting at 1:1 magnification, then try a weak diopter or a 1.4x teleconverter, and then finally use a strong +8 or +10 diopter if they want to photograph even smaller subjects.
- The working distance is reduced significantly with the diopter, so you are much closer to the subject than you normally would be with a 100mm or 105mm lens. Still, I didn’t feel like I was too close.
- My Sea & Sea TTL converter underexposes at very small apertures, so I had to turn up the compensation on the converter.
- Remember, when approaching 1:1 magnification (with or without a diopter) and beyond you will experience loss of light due to the bellows effect, so use a good focus light if possible.
- I use continuous focus mode, and shutter release priority so I can take a shot at any time.
- For even front-lighting on the subject, move your strobes close in right next to your port. See my strobe position diagrams.
- Normally I take photos holding the 2 grips of my cameara housing, but recently when shooting supermacro I started holding the underneath of the end of my macro port with my left hand. Sort of like how you hold a rifle. this resulted in much more stability and better shots. It was a little strange at first, but I quickly got used to it.
- You should not hesitate to shoot at F32 at 1:2 magnification. If you have any triouble getting the exposure you want, just bump your ISO up to ISO 400.
Subsee Photography Tips for Compact camera users
- Expect auto-focus to be difficult, try to use a good focus light
- Zoom in at least half-way. Remember that diopters reduce your working distance so if you don’t zoom in you will be focusing very cvery close to the camera. Give yourself a little room
- Use your strobe on manual power.
- Dont’ forget to use macro mode.
- Use F8 for maximum depth of field
Comparison to the MacroMate
The macromate diopter is another strong wet-diopter.
The SubSee adapter setup is lighter, it is a slightly stronger diopter and slightly more inexpensive than the Macromate. Both are high-quality, achromatic diopters. Like the subsee, the macromate also has a nice flip-out design. Read on to hear my thoughts on whether a stronger diopter is necessary better.
What is the best diopter out there?
Keep in mind that a stronger diopter is not necessarily better. Both of these diopters are specialty tools with specific ranges. Stronger diopters have smaller ranges, can be more difficult to use and find subjects, and can introduce more distortion. The macromate most likely has a range that slightly overlaps with the range of the 105mm lens. Ideally underwater we could have 2 or 3 diopters ready at a moments notice so we could match the diopter to the composition we are trying to create.
Cost
Appears to be around $350-$400 including the adapter and diopter, depending on the port. Some ports, like mine, which is a tapered more, need more machining work to make the adapter.
You can call Bluewater Photo for advice and purchasing a complete Subsee setup.
Further Reading
-
Reviews of Underwater Housings, Strobes, Cameras & Lenses
- Shoot Stunning Super Macro with Stacked Diopters
Even More Reading
- Supermacro underwater photography equipment
- Strobe positions for underwater photography
- Supermacro compositions
- Artistic compositions underwater
- Understanding Aperture and Depth of Field
- 60 Underwater Photography Tips
More example photos
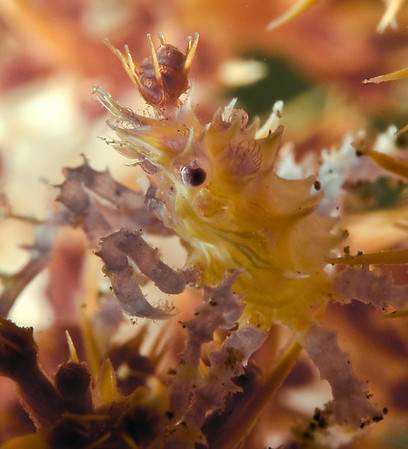
soft coral crab, bali, subsee diopter, F32, with D300 + 105mm VR lens
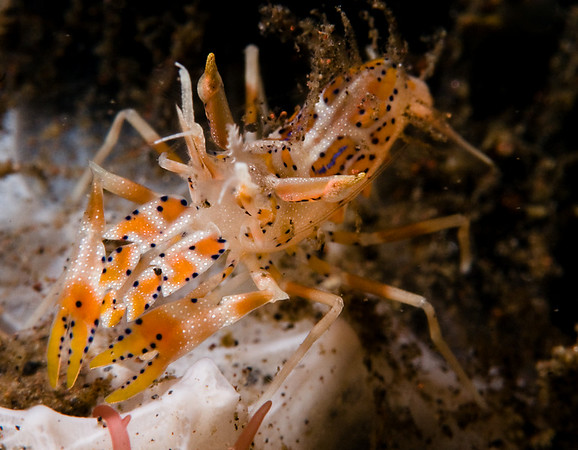
Tiger shrimp, bali, Subsee diopter, F32, with D300 + 105mm VR lens

Coral polyp, uncropped, photo by Jeff de Guzman. F25, D300, 105mm lens + subsee adapter, Anilao, Phillipines
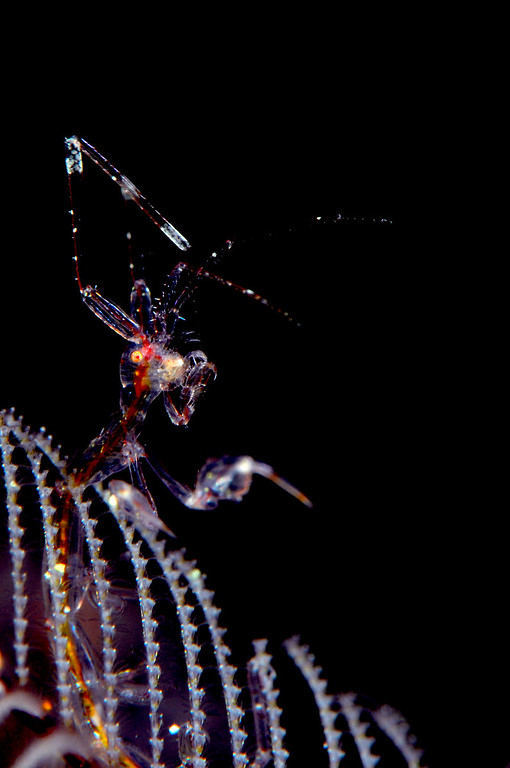
Skeleton Shrimp, uncropped, photo by Jeff de Guzman. F40, D300, 105mm lens + subsee. Anilao, Phillipines.
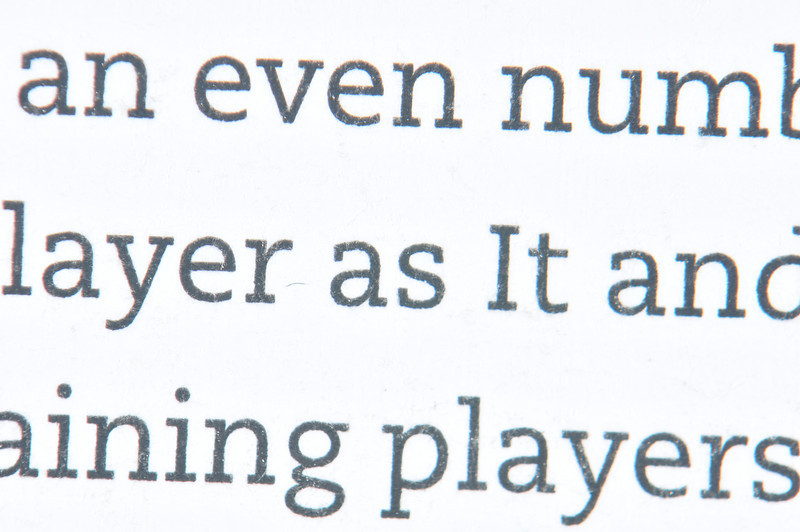
This is an indoor test I did, at 2:1 magnification, F11. I had to flip the diopter to get the best results on my indoor test.
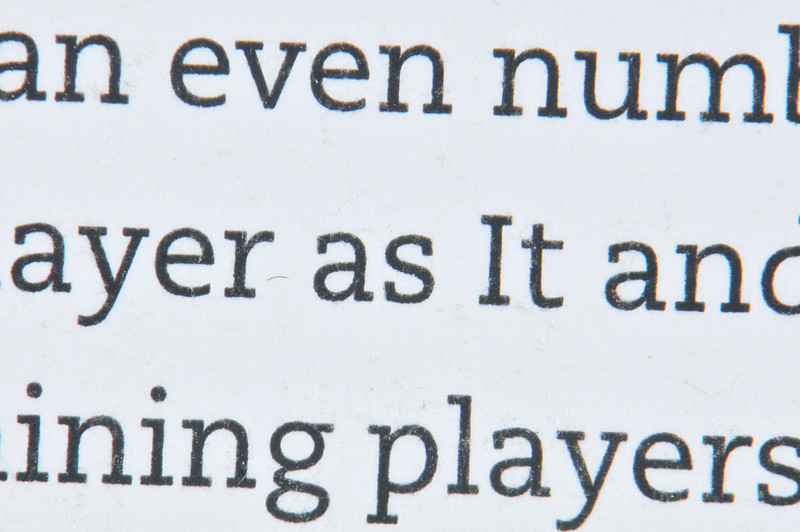
Topside Subsee test, at F25, 2:1 magnification.
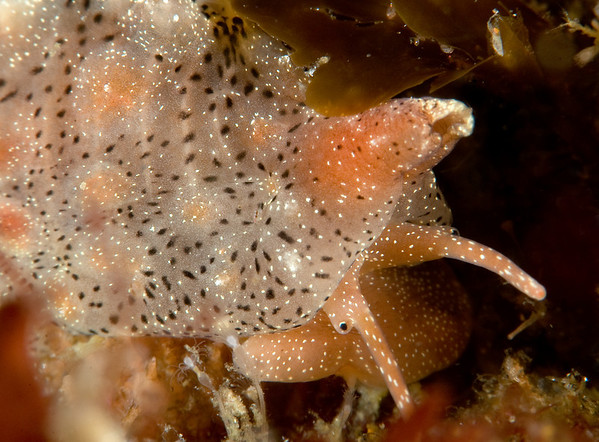
Trivia solandri snail, Anacapa island, California. F32, 105mm lens, subsee +10 diopter
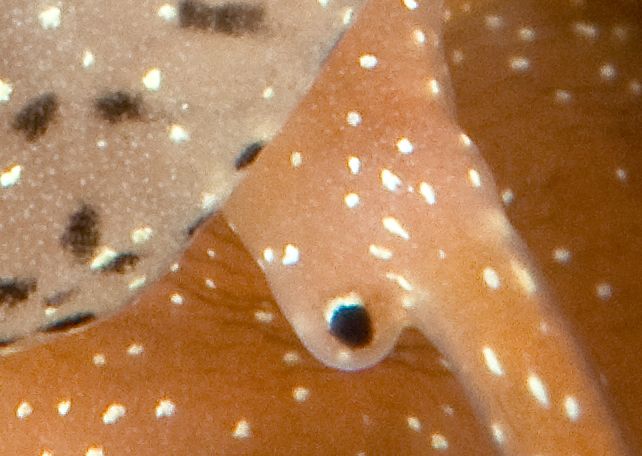
Trivia solandri snail, 100% crop