Olympus PEN Underwater Settings
Navigation:
The Olympus PEN cameras (E-PL5, E-PL3, E-PM1, E-PL2, E-PL1) have become by far the most popular mirrorless cameras used in underwater photography. In this article we discuss our recommended settings for getting the most out of these excellent cameras.
Below I've compiled several good starting camera settings for different shooting situations. Next is a list of the most important, or required, settings that are crucial to change in your PEN system when shooting underwater. In addition I take an in depth look at all the menus on the camera so you can fine tune your camera for the best underwater shooting experience.
Olympus PEN Underwater Settings
Actual settings will vary based on your diving location and conditions. Take a look at the following suggestions below as a great starting point for shooting with your Olympus PEN camera. These settings were written with the Olympus PEN E-PL5 as the basis, previous models may not offer all the same features, or may have different limitations. Where I know a difference I have noted it.
Settings for Macro with the 45mm or 60mm Macro Lens:
Manual mode, F22, 1/250th, ISO 200;
For Previous PEN cameras, max shutter sync was 1/160th
Auto white balance, camera flash on "fill in flash", Strobe on TTL
Or set the strobe to manual power and adjust power as needed
For manual power set the camera flash to manual also to save battery life (see below for instructions)
TIP: Shoot at lower F stops like F5.6 or F2.8 to try to get some better bokeh and a blurred background
TIP: You'll need to open up your aperture to around F8 when shooting fish; at F22, your strobes won't "reach" very far and the photo will look black
** These settings are also useful with the 12-50mm lens in Macro Mode **
Available in the Nauticam E-PL5 housing only.

Shallow Focus achieved with an open F-stop - Octopus, OM-D E-M5 w/ 45mm, ISO 200, F2.8, 1/250
Settings for Macro using the kit lens (14-42mm / 12-50mm) with a wet diopter:
Manual mode, F22, 1/250th, ISO 200;
For Previous PEN cameras, max shutter sync was 1/160th
Auto White Balance, camera flash on "fill in flash", Strobe on TTL
Or set the strobe to manual power and adjust power as needed
For manual power set the camera flash to manual also to save battery life (see below for instructions)
Zoom all the way in
Shoot at lower F stops like F8-F11 to try to get some better bokeh and a blurred background, you can open up to F2.8, but will have a very small depth of field
Remember working distance is limited when using a wet diopter, move carefully to avoid spooking your subject and get close.
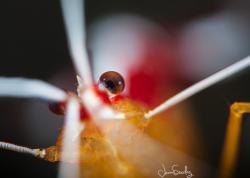
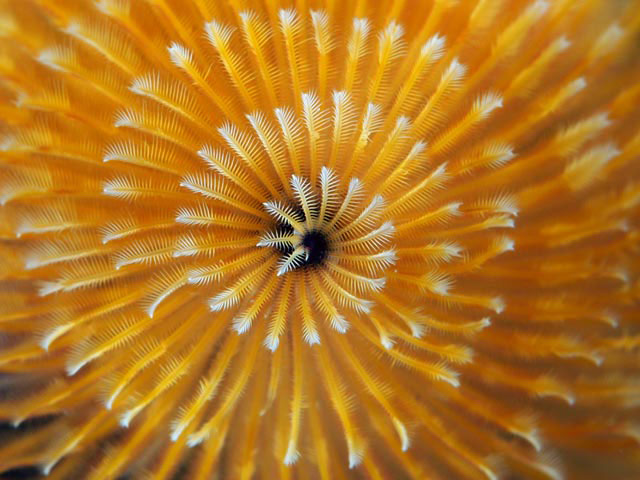 Christmas tree worm, photo by Jim Lyle. F14, 1/250th, ISO 200, 45mm macro lens
Settings for Wide Angle with 8mm Fisheye or 9-18mm lens:
Note: These settings also are great for starting points for shooting with the kit lens on, and for fish portraits with the 60mm macro lens.
Manual mode, F8, 1/125th, ISO 200
Auto White Balance, camera flash on "fill in flash", Strobe on TTL
Or set the strobe to manual power and adjust power as needed
For manual power set the camera flash to manual also to save battery life (see below for instructions)
Important: use the shutter speed to control your ambient light (background exposure). A slower shutter speed (e.g. - 1/60th will let in light when shooting in darker waters, a faster shutter speed will allow less light in when shooting in bright conditions).
TIP - when the sun is in the photo, set the shutter as fast as possible (up to 1/250th), and you'll need to stop down your aperture to F16 or F22 to avoid blowing out the highlights, remember to turn up your strobe power.
TIP - for ambient light photography, you may need to open your aperture to F5.6 or F4 and increase the ISO to ISO 400, 800 or 1600 to let in more light.
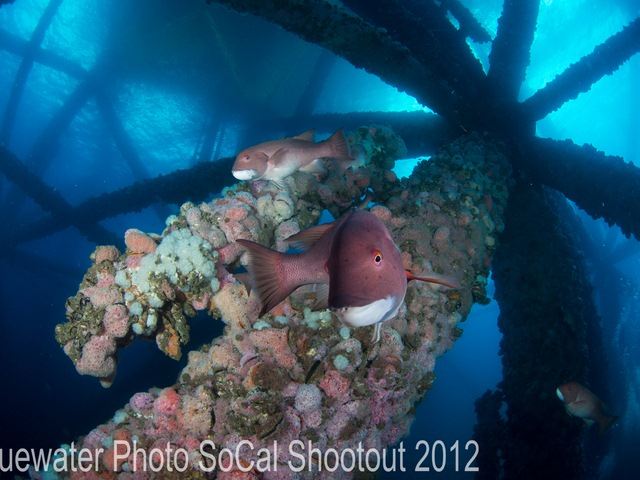
Sheephead & Oil Rigs, Olympus OMD E-M5, 8mm Fisheye ISO 200, F5, 1/80
Olympus Camera Set up for Underwater Use
The Olympus PEN cameras work well straight out of the box, however there are some important menu and setting changes that you will want to make sure to do for the best shooting experience.
Most Important Settings for Underwater Use:
1) Custom Menu Options - On the PEN cameras the Custom Menu is usually not turned "on" There are many important features (such as Live View Boost) that you can only access in the custom menus.
Menu -> Set Up Menu (Wrench icon) -> Menu Display and click OK. The Custom Menu is the small cogs icon, hit the right button, and then the down button followed by ok to activate this menu.

2) Live View Boost - this is very important so that you can see your LCD underwater. This mode disables the live view of exposure settings, since underwater shooting with a strobe, usually results in dark settings in the camera. This function will brighten your LCD so it is always at a good viewing brightness. Note: the LCD does not accurately reflect the exposure settings for the camera.
Custom Menu -> D: Disp/PC -> Live View Boost -> On
3) Flash modes - if you are using an underwater strobe with TTL you will use the single lightning bolt "Fill in Flash" mode on the camera. However, if you are planning to use the underwater strobe in manual mode you can save battery life by changing the camera flash mode to "Manual Value" through the quick menu. This is also beneficial because using the internal camera flash at a lower power means less recycle time and helps eliminate any delay on being able to take a picture.
OK -> scroll to flash icon -> scroll over to select "Manual Value Flash" -> Press Info to change flash power -> scroll to 1/64th power -> OK to confirm
5) Rec View - this sets the length of time an image review is displayed after taking the picture. Default is 0.5 seconds. For underwater use, 2 seconds is usually recommended so you have a chance to quickly gauge that exposure and focus look good before taking another picture. If 2 seconds is too long, set it to what you desire, or simply press the shutter halfway down to cancel the review.
Set Up Menu -> Rec View
7) Picture Mode - the default is natural, but jpeg shooters may prefer Vivid
NOTE: this does not affect RAW files
Accessible through the SCP / Quick Menu or Shooting Menu 1
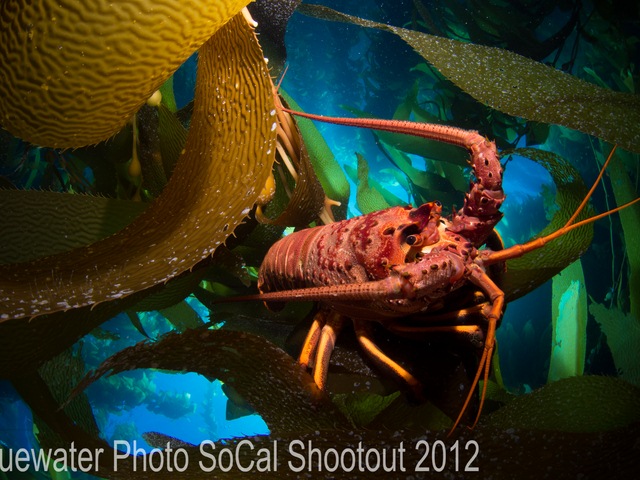
OM-D, F16, 1/100th, ISO 200
Set Up for an Olympus Housing:
The Olympus housing is a well designed option if you are on a budget and don't want to spend the money on one of the more expensive Nauticam housings (if available). There are a few limitations, but for the most part set up is the same.
PEN cameras are the slimmed down versions of their big brother "OMD" series cameras. They do not offer as many button options or customizeable features. These cameras are effectively plug and play. Once you've changed the settings listed above to ensure the camera will function properly in the housing you are pretty much good to go.
PEN Menu Settings
This info is helpful for fine tuning your camera for the best underwater settings. If a menu item is not listed that is because it does either does not affect shooting pictures or does not affect a setting that would be used underwater.
Shooting Menus
These set your cameras defaults, general settings that it will revert to after shutoff.

Shooting Menu #1
Picture Mode - This menu sets the look of your pictures, it is completely a personal choice to change, I prefer the default, Natural, then fine tuning the image on the computer afterwards. Some users prefer Vivid, especially if they are shooting jpeg, because it enhances reds & oranges.
Picture Quality (pixel icon) - Sets the default quality mode for the camera. Set this to RAW for still images, default for video is FullHD Fine, leave it there unless you know you want a lower quality.
*Note: if you do not have software on your computer that can read and edit RAW files then leave it set to .jpg (LF). I highly recommend shooting RAW for the most flexibility with in computer editing.
Image Aspect - Leave at the default standard image aspect ratio of 4:3 unless otherwise desired.
Digital Teleconverter Leave at default of OFF.

Shooting Menu #2
Burst/ Time Mode - Leave at default of Single Shot Mode, you can change this from the quick menu later for specific shooting instances.
Image stabilizer - Leave at default - this engages full stabilization in all directions (Default is S-I.S. 1)
Flash RC Mode - Leave at default of OFF
** NOTE - If you are using the Olympus UFL-2 strobes, you can increase your shutter sync speed with the PEN and OMD cameras to 1/500 using the RC feature of the camera and strobes. Check out the strobe manual for this, but it can be very useful for getting great sunbursts in wide angle shots
Custom Menu Options
The custom menu offers more detailed camera adjustments, however, these can get overwhelming. When in doubt leave it at the default, unless otherwise noted in the Important Settings section above.

Menu A: AF/MF
AF Mode - I recommend setting this to S-AF (single AF). This is default for still images but not for video. C-AF, continuous auto focus, I find is too slow to accurately catch moving subjects and often hunts more frequently in the low light underwater conditions. You can halfway press the shutter during video to refocus when needed. Note: continuous auto focus has been significantly updated on the E-M1, so it can be a more useful tool with that camera.
Full-time AF - OFF
AEL/AFL - This is a very handy feature, especially for underwater as it allows you to set focus lock separately from the shutter button, so that you can lock focus and then take several images without refocusing. This option isn't as great in the PEN housings when an Fn button is available due to the location of the button the housing. For the E-PL5 it may work OK if you assign the Fn button to AEL.
Here are the settings I would pick if you would like to do so, however these are only effective if you have assigned AEL/AFL to one of the customizable buttons through the B Custom Menu.
S-AF - Mode 3 - this will basically keep the camera as standard, half shutter focuses, full shutter press takes the picture
C-AF - ignore (leave at default of Mode 1)
MF - ignore (leave at default of Mode 1)
Reset Lens - OFF - leaving this ON resets the lens focus of the lens to infinity after the camera is powered off. For most shooting situations this is not a big deal, though when using specific lenses, like the 60mm macro, it can cause initial focus hunting in the beginning. Turning it off will save the last focus distance used in the camera.
MF Assist - ON - very useful with macro - magnifies center of image 10x to aid in focusing
AF Set Home - SINGLE- this sets the "home" position for the AF target for each AF mode. It will return to the position selected after power down. Default is full matrix, change this to Single Auto Focus Point for more control.
AF Illuminator - OFF - this is the small red AF assist light on the camera. It won't shine through the black housing so turn it off to save battery life. If you use the camera both topside and underwater and don't want to hassle with constantly changing it then leave it on, it will not affect picture taking.
Face Priority - OFF - this automatically focuses the camera when it detects a "face" however underwater it can mis-detect and cause issues, will not detect faces in masks so it is not needed.
Menu B: Button / Dial
Button Function - PEN Cameras - Older versions may not have an Fn button, the E-PL5 does and the button can be customized for quick access to a variety of features. I prefer setting it for "One touch WB". This takes the lengthy process from the "quick" menu down to a very quick and easy two step operation. (Note: if you want to split out focus for the E-PL5 as mentioned above, then you MUST assign the Fn button to AEL/AFL)
Other settings in Button Function menu allow you to modify the action of the keys listed. Note: L-FN refers to the button available on some lenses.
Button Function - You can customize the Fn button to your liking, there are a variety of options to choose from. My recommendation, as stated above, is to select "One touch WB" which shortens the white balance process. However as outlined previously you can also choose AEL/AFL if you want to try to split out your focus.
You can also customize the Rec button and assign its own function (this could also be used for the "One touch WB" or the AEL/AFL setting if you don't plan to use the video function. Other settings in the Button Function menu allow you to modify the action of that key listed. To gain customization of the up and down arrows you need to change the setting of the four arrows option just below them. I recommend:
Arrow Keys - Direct Function
Right Arrow - Flash Mode
Down Arrow - ISO (or leave a shot mode for quick access to burst and self timer if you use topside frequently)
Dial Function - This menu allows you to set the functions of the control dials for the camera. Functions are set per shooting mode indivually.
PEN cameras - this is the control wheel on the back of the camera (E-PL3 and E-PL5 only). For the PEN cameras, this function is moot because the Olympus housings do not have a wheel on the back.
Dial Direction - can be set to change which way you turn the dial to increase shutter or F stop. Set to personal preference or leave at default
Dian Lock - leave a defaul "ON"
Menu C: Release
Rls Priority S / C - this option allows you to set whether the shutter can be released even when the camera is not in focus. I recommend leaving it at the default of OFF for S-AF to help limit out of focus pictures. (can be set individually for S-AF and C-AF modes)
Burst FPS H / L - leave a default - this sets the frame rate for each burst mode option
Burst + IS Off - OFF - allows for image stabilization during sequential shooting when turned OFF
Menu D: Disp / Beep / PC
This menu customizes display and sound options. Set these to your preference, they don't affect picture taking, except for a select few.
Camera Control Settings - this gives you options for the display of the quick menus. When the EVF Auto switch is turned off you can only access one of these. Default is the Live Control, Olympus' standard type menu. The other option is the Super Control Panel, the new style for the OM-D that mimics many dSLR cameras. To activate the SCP, turn off the LC and turn on the Live SCP.
Info Settings - Under this menu is LV-Info. These options allow you to streamline your LCD view information. By turning each on or off you choose which viewing modes you would like to be able to see when you press the INFO button on the camera.
Live View Boost - This must be turned on to aid in viewing the LCD underwater in dark shooting conditions. See section above with instructions.
I would also set the SLEEP mode and Auto Power Off modes as desired to save battery life.
Menu E: Exp / Metering / ISO
EV Step - leave at Default 1/3EV - this gives access to all "in between" stops, for more fine tuning your picture settings. It controls the size of the increments for shutter speed, aperture, etc.
NOISE / NOISE FILTER / ISO - leave at defaults
Metering - Default (Digital ESP Metering) - this evaluates the entire image for the best overall exposure. For more specific metering you can choose center weighted or spot.
AEL Metering - Default (AUTO) - if you use the AEL function leave this at the default and it will automatically choose the same metering you are currently using.
**OM-D Cameras - leave ISO / ISO Step / ISO Auto-Set / ISO-Auto options at default
Bulb / Time Timer, Live Bulb, Live Time - default (this won't be used underwater)
Anti-Shock - Default OFF - this creates a delay between when the shutter is pressed and actually released to aid in limiting camera vibrations. Not needed underwater.
F: Flash Custom
X-Sync - Default (1/320 for E-M1, 1/250 for E-M5 and EPL5, 1/160 for earlier PEN models) this sets the fastest default Shutter Speed at which the flash can fire.
Slow Limit - Default (1/60) - You can adjust this lower as desired.
NOTE: These flash settings do not matter for Manual Mode, the flash fires based on the shutter speed selected when in Manual Mode. However 1/250 is the highest option available for the OM-D and EPL5, 1/160 for earlier PEN's.
Flash Exposure + Exposure - Default (OFF)
G: Pixels / Color / WB
Pixel Set / Pixel Count / Shading Comp - leave at Default
WB - Auto (default) - this sets the default WB mode, you can adjust for certain instances through the quick menu
All WB Evaluation - default - this changes the overall WB compensation for all modes except custom WB
WB-Auto Keep Warm Color - default - keeps colors warm for Auto WB mode.
Flash + WB - default (auto)
Color Space - default sRGB (unless you specifically know you want a different color space)
H: Record / Erase
Set these to your preference, they do not affect picture taking
I: Movie
Movie Mode - Default - P - this sets the default mode for movie capture (unless you are doing more video and want a specific mode, such as Manual, Aperture or Shutter to be the default)
Movie Mic - Default - ON - turns mic on or off. Turn off if you do not want to record any sound.
Movie Effect - Default - OFF - disables movie effects
Wind Noise Reduction - Default - OFF - reduces wind noise
Recording Volume - Default - Standard
J: Camera Utility (PEN Cameras)
Set as desired, these do not affect picture settings
Setup Menu

Set Date / Time, LCD brightness, upgrade your firmware, etc. The most important item on this menu is:
Rec View - this sets the amount of time an image is displayed for review after taking it. Default is .5 seconds, which is very fast. 2 seconds is a good average to set this to so that you can check exposure and focus on the LCD before taking another picture. If you need to take the next shot quickly this review disappears with a 1/2 shutter press.
Menu Display - this allows you to activate the custom menu. It is highly recommended to make sure the custom menu is turned on.
Additional Settings for the Olympus E-PL7
Be sure to read Bluewater Photo's Best Settings & Shooting Guide for the Olympus E-PL7.
If you have any further questions on setting up your Olympus camera or any issues with camera functionality, please post a question in our forums.
RECOMMENDED ARTICLES
SUPPORT THE UNDERWATER PHOTOGRAPHY GUIDE:
The Best Service & Prices on u/w Photo Gear
 Visit Bluewater Photo & Video for all your underwater photography and video gear. Click, or call the team at (310) 633-5052 for expert advice!
The Best Pricing, Service & Expert Advice to Book your Dive Trips
 Bluewater Travel is your full-service scuba travel agency. Let our expert advisers plan and book your next dive vacation. Run by divers, for divers.


