Ultimate Guide to Snoot Photography

Its been said many times before that lighting is everything in underwater photography. Lighting is without a doubt a prime method to create drama, add color and contrast, create shadows, add dimension and much more to each image. Controlling that light is totally up to the photographer and his/her ability to manipulate it.
In the macro world, even the most interesting of subjects are easily lost on a confusing backdrop of sponge, hydroid or algae. Macro subjects tend to hide themselves within the substrate so well that even the best of attempts can result in a linear image.
Snoots are a highly effective tool that will enable you to isolate your subject by surgically controlling and manipulating your strobe flash to precisely where and how you want your subject to be lit. This precise method of lighting will create the desired negative space in the frame, and with a little practice, result in some new striking compositions.
What is a Snoot?
Snoot, snoot, snoot what the heck is a snoot anyways? Well I’m glad you asked… Simply put, a snoot is a tool placed over the strobe head. The snoot controls and directs your strobe flash by creating a narrow or broad light beam in its cast, depending on the effect the shooter desires. Snoots do not create the flash – they are merely a tool used with your existing strobe to direct the light.
How to Choose a Snoot
Not all snoots are created equally, so try to find the one that best fits your shooting style and budget. There are many snoot brands on the market and depending on the build quality, they can deliver dramatic differences in performance. Optical snoots are made with lock line filled with polished fiber optic cables, while others are more barrel-style with a diffused collector and iris masks to control the diameter of the flash beam. Other designs resemble funnels, and I’ve even seen a beer cozy being used with the bottom removed. And while all of these different snoots might work to some degree or another there are a couple of functional features that you will want to pay close attention to.
Read Bluewater Photo’s Snoot Showdown: A Review of the Best Snoots for Underwater Photography.
Light Quality
This is the first important feature, and should never be compromised. You will need the light at the end of the snoot to be just as clean and bright as when it leaves the strobe head. Any loss of light means compensating with higher ISO or a wider f-stop, which can result in digital noise, shallow DOF, too much contrast, etc.
Flash Iris
Aka the diameter size options for the beam. You will want your snoot to have interchangeable tips or a way of controlling the light from a wide cast to a narrow beam without major changes of your strobe’s position. Once your snoot is in the right position, having the ability to narrow the beam quickly is a highly desirable feature.
Quick tips for learning how to use your snoot:
• Attach the snoot to your left strobe so that quick adjustments can be made and you can easily check images. Task loading your right hand is extremely cumbersome.
• Tripods are another method that ads to the task load and takes away from the organic feel and freedom of attaching the snooted strobe directly to your housing (via strobe arm).
• Use a wider lens like a 60mm lens (DSLRs) or 30mm lens (mirrorless). This will help you to see the tip of the snoot or the flash point in the top of the frame and to create a variety of compositions.
• Make subtle changes and move the camera around slightly for final corrections rather than moving the strobe head.
The most common snoot technique in the beginning is direct lighting from above, but as you learn to use your new tool you will discover other ways to create drama in the frame. Front, back or side lighting, rim lighting and even super-macro techniques can all be applied.
Your images can still be over/under exposed and contrast is greatly affected by the nearness of the snoot’s tip in relation to the subject. As the snoot tip moves closer to the subject the result will be a hotter strobe flash and tighter beam. Pulling it up or away will decrease the harshness and broaden the beam, much like shining a flashlight on a table.
Underwater Snoot Photos
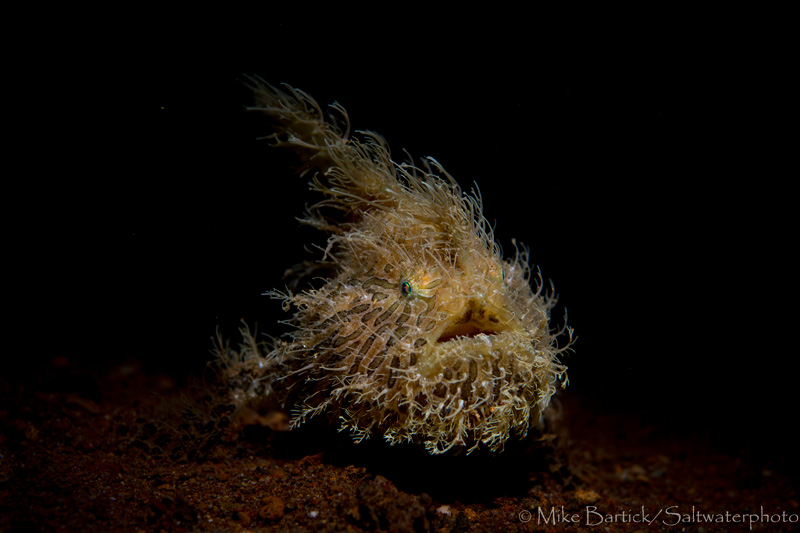
Hairy frogfish have always posed a challenge for me to shoot well. Whether the contrasty colors, sandy or algae habitat or even dark water at night, for some reason all of the shots just feel plain and very common. The first time I shot one with a snoot, I knew I was on to something different. By pulling the snoot tip up and allowing the cast to broaden, I was able to capture a slightly larger subject.
Nikon D7100
1 YS-D1 strobe
Subsee Optical snoot
60mm lens
F9 @ 1/250

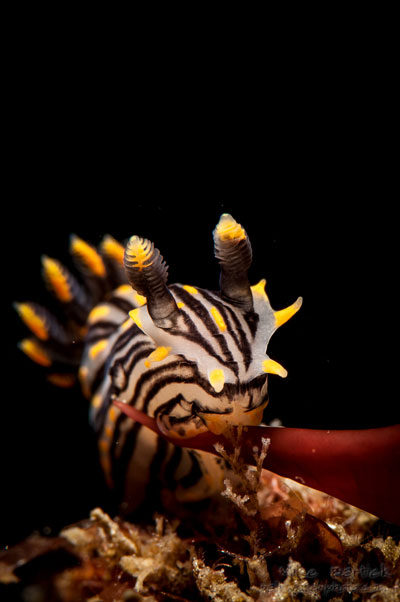
A brightly colored yellow ribbon eel is easily separated from the rocks directly behind it in this image. Having an undesirable or confusing background can take away from an image very easily. I enjoyed the challenge of shooting this one and trying to get it to line up properly.
Nikon D7100
1 YS-D1 strobe
105mm lens
F18 @ 1/320
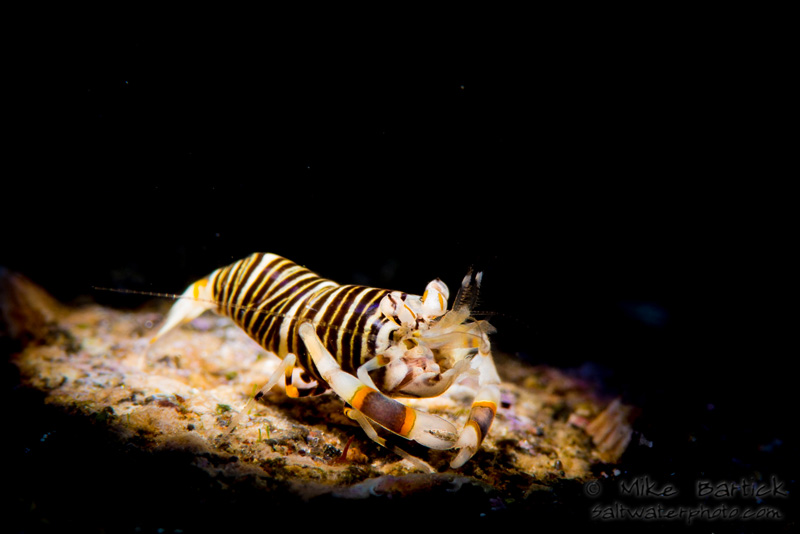
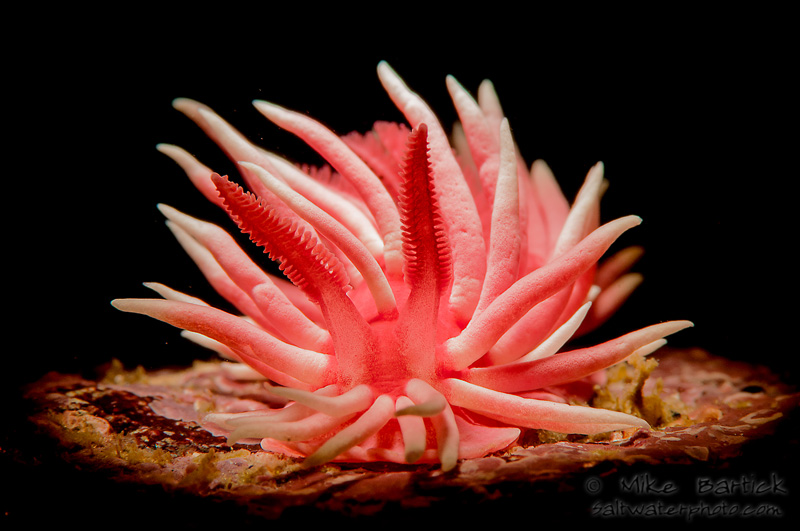
Creating a little drama, the snoot effect will not preclude the user from shooting a black subject. Opening the aperture a little will allow for better exposures with darker subjects.
Nikon D7100
1 YS-D1 strobe
105mm lens
F13 @ 1/160
Subsee optical snoot’s
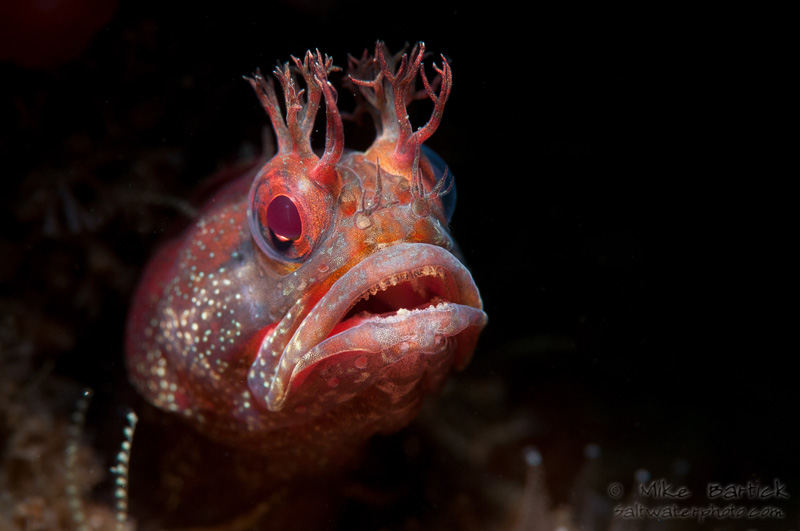
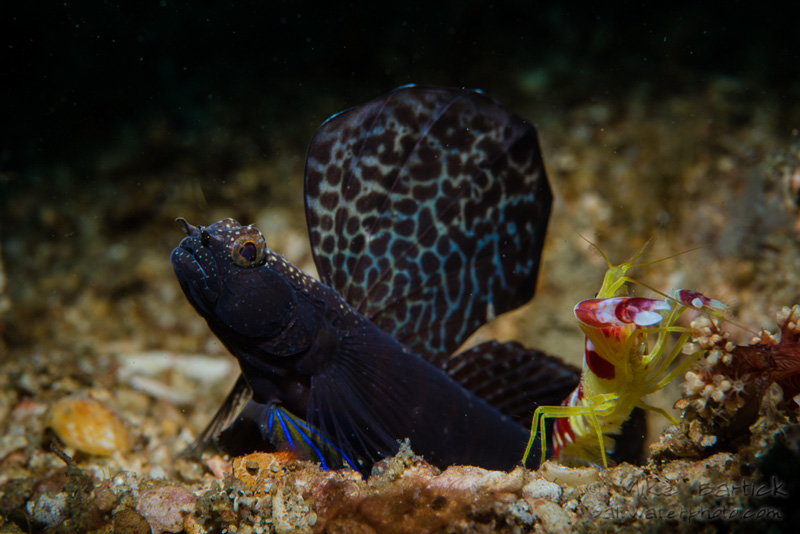
Blennys are a great subject to work with as they don’t normally bolt from their hole when you begin to photograph them. The biggest challenge is separating them from their surroundings. What I like about the Retra snoot is that once the critter is dialed in, you can change the shape of the light cast by moving the light shaping mask. Starting with a broad and more forgiving beam and then work your way down to smaller casts.
Nikon D300s
1 YS D1 strobe
105mm lens
f14 @ 1/320
Even in bright shallow water, negative space is easy to achieve when using your snoot with a fast shutter speed. Sometimes I like to see the circle of light that surrounds the subject as well.
Nikon D7100
105mm lens
F18 @ 1/320
1 YS D1 strobe
Snoots aren’t just for exotic waters either – they can be used anywhere and at any time. One of the hidden and added benefits is less backscatter. This can be very helpful for better lighting when diving on a silty substrate or in an area that has low visibility.
Nikon D300s
105mm lens
F18 @ 1/320
1 YS-D1
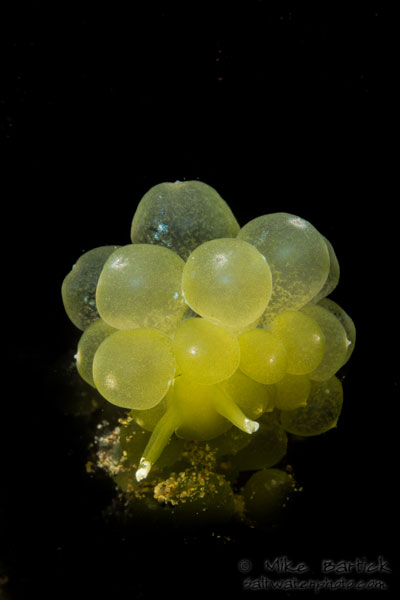
S. smaragdinus perfectly match their algae host, both resembling green champagne grapes. The snoot lighting is a great tool for translucent subjects, as the light seems to help create the glow effect while eliminating the extra light. A wide and direct strobe flash can be a bit overpowering at times, over-lighting an area and taking away from the subtle details of your subject.
Nikon D7100
60mm lens
F22 @ 1/160
1 YS-D1
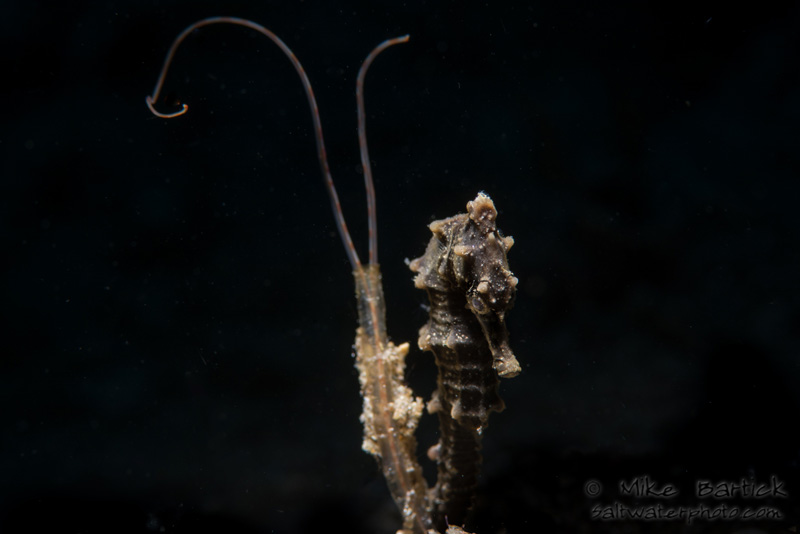
Re-visiting a subject with a new trick can sometimes be just what it takes to freshen it up. Setting up the snoot becomes second nature as you gain a natural feel for your lens’ working distance. The Retra snoot allows the user to operate the aiming light on the strobe and line it up with the subject. This is very helpful for subjects that aren’t sensitive to it.
Nikon D300s
105mm lens
f29 @ 1/320
1 YS-D1 strobe
The subsee snoot gives a shooter just a little more distance to work with for shooting long macro images – great for flighty subjects. The light quality is good and the lock line articulates well.
Nikon D7100
105mm lens
F13 @ 1/250
1 YS-D1 and Subsee snoot
Snoots are a great tool to add to you kit and should be on your list of things to take on your next dive trip (to Crystal Blue – =) ). Remember, lighting is everything, so why not enhance your lighting skills, create something new in your portfolio and challenge yourself at the same time. And like always….
Have fun!


