Sony a7R II Best Video Settings for Underwater
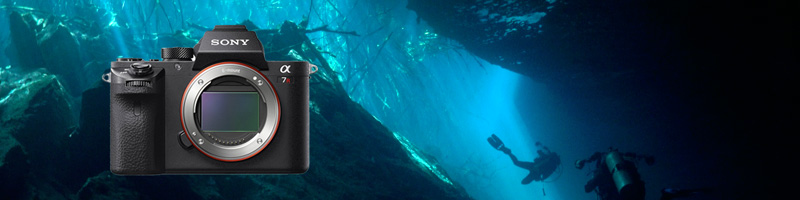
The Sony a7R II is widely acclaimed for shooting video in 4K resolution. This is the selling point for many underwater photo and video shooters who have been flocking to the camera, choosing it over older competitors like the Canon 5D Mark III and Panasonic GH4.
Like all cameras, the Sony a7 II series has certain settings that must be used to capture nice video, certain settings that are optional depending on experience level, and certain settings that will enhance camera performance in certain shooting situations.
I’ve had a chance to dig into the menu of Bluewater Photo’s rental Sony a7R II and underwater housing in order to put this guide together. I have not had a chance to shoot much underwater video or conduct any head-to-head quality comparisons of certain recording features, but have strong recommendations based on other cameras, office tests and much online research. The settings guide specifically mentions the a7R II but applies to the a7 II and a7S II camera bodies. Here we go!
If you haven’t yet, be sure to read our complete Sony a7R II Review for Underwater Photography.
Or, read our extremely detailed Sony a7R II Settings Guide (for still photos).
Settings Guide Sections
Key Features | Basic Settings | Video Focus Tips | Best Lenses | Important Menu Settings
Sony a7R II Key Video Features
Below are the key video features we will explore further in the menu settings section of this guide.
-
Video recording in 4K resolution
-
Multiple file formats: XAVC S 4K, XAVC S HD, AVCHD, MP4
-
Recording bitrates up to 100MBs
-
Increased dynamic range with S-Log2 gamma picture profile (*pros only)
-
5-Axis image stabilization built-in
-
Zebra Pattern for precise exposure control
-
Focus peaking for manual focus
-
APS-C/Super 35mm record mode
-
3 programmable custom buttons
Basic Camera Settings for Underwater Video
There are two approaches to shooting underwater video. The first is to shoot away on automatic (or “P for professional” mode) and share the raw video or clip right on social media. This is easily done with the Sony a7R II’s built-in WiFi and Sony’s downloadable apps. The second approach is to carefully consider each and every shot, often working to complete a pre-planned storyboard. This is when consistent settings become useful, as you will often be combining footage from topside cameras during post-processing.
We recommend shooting full manual in order to give you precise control of each shot.
Shutter Speed
The general rule for video shutter speed is to double the frame rate. If you are shooting 4K at 30fps, then set your shutter speed to 1/60. If you are shooting 1080p at 60fps, then set your shutter speed to 1/125. Experienced shooters looking for a cinema look may opt to shoot 25fps and 1/50 (*NTSC – PAL is available).
Why? This ratio provides the right amount of motion blur for natural-looking playback. Using a faster shutter speed will make the footage look very choppy, while a slow shutter speed will not look sharp.
Aperture
Aperture will control the depth of field of the shot, and to a lesser extent, the vibrance of the color brought out by video lights and overall exposure of the scene. Because of this, there is no right or wrong aperture. For wide-angle shooting we recommend an aperture of f/9 as a starting point. For macro with strong video lights, try stopping all the way down to f/25 or f/29 in order to have enough depth of field. A powerful video light will easily produce enough light for proper exposure.
ISO
ISO is often the variable for shooting underwater video, and the Sony a7R II stands up to the challenge. The exact ISO will depend on the water clarity and available light, plus the chosen aperture. For wide-angle underwater video, this could be anywhere from 200 to 3200 or even 6400. Note that the higher you push the ISO, the more noise grain you will see in the footage.
We recommend an ISO of 100 for macro video, since your video lights will be producing more than enough light.

Sony a7R II Video Focus Tips
There are several focus modes available on the Sony a7R II, and different schools of though on using them. It boils down to three main categories that you can choose between. I’ve labeled them so as to make the most sense.
1. Manual Focus. The benefit here is that you have full control and can add creative shots like focus pulls. The downside is that you need to carefully focus each shot after composing, which can be challenging during fast action, in heavy surge, etc.
2. Semi-Manual Focus. This is the most versatile and my preferred method of focus for underwater video. Set the Focus Mode to AF-C (continuous) and make sure the a7R II is in manual camera mode, not movie mode. The camera will autofocus whenever you half depress the shutter (or other assigned focus button). This allows you to either 1) focus and then take finger off so the camera stops focusing and you run no risk of AF hunting, or 2) keep the shutter half-depressed to continually focus from one object to another – say from a reef to a passing fish. This is very versatile, offering the benefits of manual focus, the ease of single autofocus, and the simplicity of continuous autofocus.
3. Full Automatic Continuous Focus. This method is for those who want less to do while filming. Simply shoot video in the camera’s movie mode and the autofocus will continually focus on the most prominent subject as determined by the camera. One unfortunate side effect is AF hunting, when the camera goes in and out of focus while hunting for crisp focus. This will ruin a shot for serious videographers but might not even be noticed by beginners.
Best Lenses for Underwater Video
Sony makes a very nice range of lenses for their mirrorless camera line. In addition, Canon shooters can use their lenses via a Metabones adapter, often creating a cheaper transition for those heavily invested in Canon glass. We recommend the following lenses for shooting Sony a7R II underwater video.
Wide-Angle
-
Sony FE 16-35mm F4 ZA OSS Lens
-
This rectilinear wide-angle zoom lens is a staple for wide scenes like reefscapes and skittish subjects like sharks. it is designed for full frame sensors.
-
-
Sony 28mm F2 lens + Fisheye Converter
-
This fisheye setup provides a 180 degree angle of view, perfect for capturing very wide scenes and for close focus wide-angle shots.
-
-
Sony 10-18mm F4 OSS Alpha Lens
-
This rectilinear wide-angle zoom lens is designed for APS-C (crop) sensors. Why do I list it? Because many Sony a7R II shooters will use APS-C/Super 35 mode for shooting video. The 10-18mm will provide a much wider field of view when shooting in this mode. Note that it will be unusable in full frame mode due to severe vignetting.
-
-
Nauticam housing shooters can also look at the 28mm lens plus Nauticam WWL-1 wet lens.
Macro
-
-
This lens offers a nice focal lenth for shooting full frame. Adding a diopter like the SubSee +10 is ideal for shooting the smallest subjects.
-
- Sony FE 50mm F2.8 Macro Lens
- NEW This lens will be excellent for macro video in Super 35 mode, but may be a little wide when shooting full frame (available September 30, 2016)
a7R II Important Menu Settings
The Sony a7R II settings discussed in this section help capture the shot with the image quality best suited for your level of underwater videography. We dive through the menu, skipping settings for photography and those that aren’t concerns for video, highlighting just what you need to know for video. The settings we recommend are based on the casual videographer purchasing the Sony a7R II. Pros can and will often use different settings to achieve specific goals.
Camera Menu Tab
SCREEN 2
File Format and Record Setting
Option 1: XAVC S 4K – 30p 100M
-
This combination delivers the highest resolution at a very fast bitrate. One pro is that you can crop down during post to fill the frame more. One con is that you need a fast SCXC memory card (Class 10 with 64GB+ storage), plus a “fast” computer in order to edit the footage.
Option 2: XAVC S HD – 30p 50M
-
This combination will deliver full HD (1080p) video with excellent quality. One pro is that it’s easier for most people to work with during post-processing, and is the resolution most commonly shared online. One con is that you could be recording at a higher resolution. BONUS: Record at 60p in order to slow down footage for slow motion.
Dual Video REC: This is useful if you want to record high quality video for post-processing, plus a quick MP4 for easy sharing online. Generally, leave this OFF.
SCREEN 3
-
Focus Mode: Continuous AF (see Focus Tips section)
-
Focus Area: Flexible Spot. This allows you to select a precise area of focus.
SCREEN 4
-
AF drive speed: Fast
-
AF Track Sens: High
SCREEN 5
-
White Balance: Auto. This is best for general use, with and without video lights. That said, there are many situations where manual white balance is beneficial. One of the Custom buttons can be programmed for quickly setting manual WB.
-
Creative Style: Standard
SCREEN 6
-
Picture Effect: Off
-
Picture Profile: Off
SCREEN 7
-
Center Lock-on AF: Off
-
Smile/Face Detect: Off
SCREEN 8
-
Movie: Manual Exposure. We highly recommend shooting in manual. That said, you could change this to Program Auto for auto video settings.
-
SteadyShot: On. We recommend leaving this on, unless your shot calls for specific camera movements.
Settings Menu Tab
SCREEN 1
-
Zebra: Off. This feature is invaluable for advanced shooters who want to ensure no section of the image is blown out, but may prove distracting to new videographers.
-
MF Assist: Off. This feature is for manual focus only.
SCREEN 2
-
Peaking Level & Color: Not relevant – these functions are for manual focus only.
SCREEN 6
-
APS-C/Super 35mm: On or Off. This setting is subject to much debate. Long story short, shooting in APS-C/Super 35 is said to produce a higher quality video with less compression (no pixel binning). Great, so why would you not use this? Because your 16-35mm lens is now being shot with a 1.6 crop factor (instead of using the full full-frame sensor), reducing the field of view. Because of this, savvy video shootinger using Super 35 mode opt for the Sony 10-18mm, which is designed for the APS-C crop. But this lens is unusable outside of Super 35 mode because of vignetting. If field of view is not a primary concern, try shooting in Super 35 mode!
SCREEN 8
-
MOVIE Button: Always. You want to be able to record while in camera modes. See Video Focus Tips section.
Sample 4K Video – Sony a7R II
Best Housings for the Sony a7R II
Our detailed Sony a7R II camera review has a complete overview of underwater housings from Aquatica, Sea&Sea, Nauticam and Ikelite, but we’ve included quick links to Bluewater Photo below.
Purchase the Sony a7R II
Check out camera info, lenses, underwater housings, accessories, and buy the Sony a7R II camera on Bluewater Photo.
Conclusion for Underwater Video
The Sony a7R II, a7S II and a7 II are some of the best options on the market for shooting underwater video. I hope these settings get you on the way to shooting some incredible video. As always, you can contact the team at Bluewater Photo for full details on shooting Sony mirrorless cameras.


