Beginner's Guide to GoPro for Underwater Video

GoPro video cameras have become incredibly popular with divers over the last couple years, set up in a variety of ways to capture fleeting moments underwater. Pole cams, selfie poles, housing mounts, handles, trigger grips, dome ports, filters, tray/arm setups, mask mounts, spear gun mounts and all sorts of other accessories are allowing divers to capture their underwater visions and share them online.
Let’s take a look at the basic functions of the GoPro Hero cameras and how to capture beautiful underwater video.
Note: I've revised this article for the HERO8 Black, but it still applies to all GoPro models 3 and above.
Read our review on the GoPro Hero 9 or view all of our GoPro Tutorials & Articles here.
Check out another action camera made specifically for diving: Paralenz Dive Camera Review
How do I Start Shooting Underwater Video?
Preparing the Camera
You can shoot video with your GoPro almost right out of the box. Step one is to charge the battery. This is done by inserting the battery into the camera and then connecting the camera to a USB plug via the supplied USB-C cable. You can also buy a GoPro dual battery charger for a more convenient method of charging batteries.
Batteries
You should use a fully charged battery for every dive. In between dives if your battery is getting low you could always plug the USB cord in during your surface interval. Or if it’s easier, purchase spare batteries and swap out a full battery after each dive. You can probably stretch out one battery over 2 dives, but it's not worth worrying if the battery is going to die. Having a battery die on you underwater and missing out on a video of a lifetime is not worth trying to stretch out the life of a battery. With a fully charged battery, you can keep the screen at 100% brightness and set the "Auto Off" to "Never," and the "Screensaver" to "Never." This way the LCD screen will always be on and you can see what you are shooting. If you do not set this to Never, the default setting is 1 minute. After 1 minute, your GoPro LCD screen will go black and you will not be able to see what you are shooting.
Charge your batteries the night before your dive and make sure you create a system of where the fully charged battery and the used battery is located so you do not mistakenly put in the used battery between dives. It's always a good habit to power up your GoPro and check the battery before each dive.
What Micro SD memory card should I use?
Not all Micro SD cards will work in your GoPro, and every GoPro model is a little different. I have tried the wrong memory card before on dives and the camera will lock up in "saving mode." You don't want this to happen in the middle of your dive when there is absolutely nothing you can do about it. Check this link for the official Micro SD card recommendation for the version of your GoPro.
https://gopro.com/help/articles/Block/microSD-Card-Considerations
The higher your resolution and frame rate, the faster your memory card will fill up. I recommend at least a 32gb to 64gb memory card. Anything less will fill up fast. You should be able to make 3 or 4 dives on one memory card. If you are on longer dive trips with several days of diving, I recommend downloading your files each day to a laptop or external hard drive. For the most recent GoPro models, the most ideal card is a UHS-I U3 Micro SD card that is now available up to 256gb.
Download latest GoPro firmware.
While your battery is charging on your new GoPro, take this time to download the GoPro App on your portable device. The app has a lot of great functions you will find very useful. The app connects your device with your GoPro and allows your GoPro to update the latest firmware. Updating to the latest firmware will insure your GoPro camera is running at its peak potential.
Underwater Dive Housing
The Hero5, Hero6, Hero7 and Hero 8 are waterproof up to 33ft. Anything past 33ft, you will need a dive housing. If you are using the GoPro Super Suit / GoPro Protective Case dive housing, you will need to remove the lens cover before putting the camera inside. The lens cover can be removed by twisting it to the left. There are 3rd party dive housings where the removal of the lens cap is not needed.
GoPro Hero4 or Hero3 are not waterproof at all. You will need a dive housing to protect your camera from any source of water.
I recommend keeping your camera in a dive housing whenever possible to protect your GoPro from accidents that can easily happen on a dive boat. The housing can scratch easy so a neoprene pouch or some sort of protection is also a good idea while it is not in use. You want to keep it from getting banged around on your dive gear or any other elements that it may come in contact with.
Also pay special attention to the white rubber O-ring on the back cover of the housing. Make sure it is free of hair, lint, dust, sand, or any other debris. A clean O-ring will prevent the chance of water leaking inside and flooding your camera.
Start Recording Underwater Video
To turn on the GoPro Hero8 camera, hold the side mode button down for 2 seconds and release. Check on the screen that you are in video mode by confirming the video camera symbol is on the screen. Push the top button to start recording. Push the top button again to stop the recording. Small red LED lights will flash on front and back of the housing while actively recording video.
What Video Resolution do I use?
If you are just starting off and don't want to get into intense editing, stick with the default settings of 1080 resolution, 60 frames per second (fps), and wide field of view. 1080 resolution is referred to as HD. The actual resolution is 1920x1080. 1080 resolution is easier to edit, and is also what you want to post on social media networks to share with your friends and followers.
If you want to explore higher resolutions, I would recommend 2.7k or 4k. Keep in mind that 4K is difficult to edit. Higher resolutions like 4k require a powerful computer and powerful graphics card to review and edit. The file size can be 4-8x greater (depending on your frame rate) than shooting 1080. There are not many social media platforms where you can share 4K video (though Youtube is great for sharing 4K). If you have no use for 4k, I would recommend staying at 1080 resolution. You can post your 1080 file on social media for your friends and followers.
If you decide that you absolutely need 4K recording underwater, then either the GoPro Hero 7 or 8 is camera for you. They offer 4K in both 4:3 and 16:9 aspect ratios. For underwater use I would recommend using the 4K at 60 fps with an aspect ratio of 16:9 and hypersmooth image stabilization. The 4:3 aspect ration does not offer hypersmooth image stabilization which is essential for underwater video.
What Frames Per Second should I use?
Frames Per Second (FPS) is the number of frames (pictures) the camera will be creating during every second of video. The more frames that are being shown per second, the smoother the video will be. Hollywood sometimes uses 24 fps in TV and Film to create a more cinematic and dramatic look. This does not work well in the underwater world. Higher frame rates produce better results.
60 frames per second (FPS) is what you should be using underwater. 30 fps is too slow and will result in a more blurred movement. 60 fps is the sweet spot. You can also slow 60 fps down in your editing process and get a slow-motion look.
You can experiment with higher frame rates like 120 and 240. This fps rate is best used in fast action events like a great white eating a tuna head off the side of a boat. Or it is nice to use when filming someone jumping into the water and seeing the splash in slow motion. When you slow down the playback in your post editing software, it creates a nice slow-motion video. Keep in mind that these higher frame rates also mean larger file sizes. This could really fill up your memory card, and could be difficult to play back on your computer. Most of the time anything over 60 fps is an overkill setting for underwater use.
Best GoPro Settings for Underwater Photos and Video
If you want to keep things simple with the GoPro HERO7 or GoPro HERO8 we recommend these settings:
Underwater Video Settings
- 1080 Resolution
- 60 Frames Per Second
- Lens WIDE
- Hypersmooth Image Stabilization
- ISO 400
- Sharpness High
- Color on GoPro, Auto White Balance
- Turn Screensaver and Auto Off to Never
Underwater Photo Settings
- RAW File
- Lens WIDE
- Color GoPro, Auto White Balance
- ISO 100-1600 (depending if you have lights)
- Sharpness High
For higher resolution, we recommend keeping the specs above but changing the resolution to either 2.7k or 4k. Remember that 4k at 60fps produces a very large file and is not only difficult to edit but may not even play back on your computer.
If you want more control over color correction in post-production editing software, experiment with the ProTune options. Change the color to "Flat." This will give you more of a raw file that you can adjust in a more complex editing process.
HERO8: Be sure to check out our GoPro HERO8 Review
HERO7: Be sure to check out our GoPro HERO7 review
HERO6: Be sure to check out our GoPro HERO6 review
HERO5: Be sure to check out our GoPro HERO5 Review and Best Settings for Underwater.
HERO4: Be sure to read our GoPro HERO4 Review and Settings.

Tutorial: Editing underwater video with GoPro Studio 2.0.
When do I use a Red or Magenta Filter?
Note: No filters are needed on the GoPro Hero6 Black, GoPro Hero7 Black or GoPro Hero 8 Black
Filters are used in underwater video to bring red light back into the picture, providing more color and contrast for the scene. Red filters bring the red color back into blue water while magenta filters are for green water. You can even use different filters at different depths, we recommend the Flip5 filter pro pack.
We do not recommend using filters with underwater lights or in shallow water with plenty of natural sunlight. Your video will result in a pinkish tone and will not look natural.
To learn the specifics of using filters on the GoPro HERO5, HERO4, HERO 3+ and HERO 3, check out:
Guide to GoPro Underwater Filters
Video: When to Use GoPro Filters Underwater
Should I use video lights?
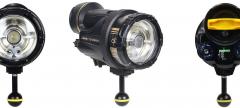
Video lights are highly recommended when creating underwater videos. The white light from a video light adds missing wavelengths of light that are absorbed in the depths of the water. This will bring out the best possible colors and contrasts in underwater environments. Any light is better than no light. With a wide range of options and costs for underwater lights, the choice can be overwhelming. Use what you can and practice as much as possible.
Underwater lights are good up to about 5 or 6 feet away, depending on the number of Lumens of the light and the visibility of the water. The higher the Lumens on the light, the better. After 5 or 6 feet, the light is absorbed by the water and is overpowered by the blue ambient light that exists underwater. Subjects closer to your lights will have better results than those further away. The direction you point your lights will result in different outcomes (e.g., more or less shadow, softer or harder light, etc.). Experiment around with different angles, adjustments, and power settings until you create your own look and style.

Learn more about lights for underwater video.
View more GoPro Underwater Mounts.
How do I Create a Time-lapse for my Dive Video?
Time-Lapse video is really simple with the GoPro Hero4, Hero5, Hero6, Hero7 and Hero8. There is a time-lapse setting. Push the mode button to time-lapse or navigate on the LCD touch screen to time-lapse options and select video. You will have an option for how often you want your GoPro to take a shot for the video. The options are in seconds and include .5, 1, 2, 5, 10, 30, and 60 seconds. The faster your scene is moving, the lower the number you want to use. The slower your scene is moving the higher the number you want to use. For example, use a .5s interval for a packing timelapse but a 5 or 10s interval for a sunset with moving clouds. I would recommend staying closer to a lower number on the seconds interval. It's better to have more frames and not need them. You can always speed up the video in editing software if the results are too slow.
Keep in mind that your camera needs to be very steady for a long period of time. Make sure your GoPro is secured tightly and is in a place where nothing can move or bump into your camera.
GoPro TimeWarp Video
The GoPro Hero7 and Hero8 have a cool new TimeWarp video feature. TimeWarp video is a setting where you can take smooth, hand-held time lapse video while moving around. It's better for land-use than underwater, but it is very effective. You can learn moore about the TimeWarp function in our article here.
Quick Shooting Tips
1) Wipe the lens cover on the GoPro and the lens inside the dive housing before every use to make sure no smears, dirt, lint or anything else is on the lens. Even a quick finger touch with sunscreen on your hand will leave a smear on your lens and ruin all of your shots. I wish someone had told me that when I started underwater video. Carry a dedicated small clean towel to clean the lens, and maybe even a can of compressed air is nice to have to blow out any unwanted debris like a small cotton fiber from a towel.
2) We all love macro, however your GoPro will only deliver a sharp image if 12 inches or further from the subject. To get closer, check out the MacroMate Mini wet close up lens for GoPro.
3) Try to hold the camera as steady as possible. Sharp movement, shaking and vibration in your video will make even hearty sailors seasick. Make sure to be slow and smooth when panning the camera. If you have the GoPro Hero7, be sure to check out the hypersmooth image stabilization function. It works very well!
4) Swap out a fully charged battery before every dive so you won't have to worry about your GoPro dying in the middle of your dive.
5) Use the GoPro App to easily change your camera settings, control your camera, download latest firmware, and instantly review your video shots!
6) Keep your GoPro at the same temperature as the outside. Bringing a cold GoPro from an air-conditioned hotel room or dive boat to the warm humid outdoors will fog up your dive housing. Keep moisture out of your dive housing too. One small drop of water will heat up in your housing and cause it to fog up.
Want more tips? Read our Tips for GoPro Underwater Video.
What’s Next?
All photographers and videographers develop their own personal styles over time. These will lead divers to some of the best underwater photo destinations while also requiring different accessories. Bluewater Photo has listed some of these GoPro underwater video accessories to help you take it to the next level, and check out their amazing holiday specials on video lights.
Most of all, stay aware while diving and have fun!
Manatees at Crystal River with the GoPro HERO3
Underwater Videos with the GoPro HERO4 Silver
Anilao, Philippines
La Paz, Mexico
Underwater Videos with the GoPro HERO7 Black
Underwater Photography Guide editor, Bryan Chu, made a day-in-the-life-of video for Villa Markisa, a dive resort he stayed at in Tulamben, Bali. Bryan combined a small amount of drone footage with a lot of GoPro TimeWarp video. With the GoPro HERO7 Black, he was able to walk around the resort just holding the GoPro in our hand, and get amazingly smooth sped-up walkthrough video. Underwater, he used the HERO7 Black with some 2000 lumen and 2500 lumen video lights to capture a variety of wide angle and macro scenes. The HyperSmooth stabilization really came in handy, especially for the macro scenes. He also made use of hisOlympus OM-D E-M1 to get macro video of the very small critters. Here is a list of the scenes shot with the GoPro HERO7 Black, for reference.
- All walkthrough/grounds scenes, using a mix of Time Warp video and normal-speed video (all handheld!)
- All boat scenes (except for the drone shot)
- All underwater wide angle scenes, using lights (Liberty wreck, giant frogfish, fish/reef scenes)
- Selected underwater macro scenes, using Macromate +15 diopter and lights (mototi octopus, two pink/purple nudibranchs, two nudibranchs following each other, wonderpus)
This video could only be done with the GoPro HERO7 Black, as no previous model has the TimeWarp function or hypersmooth stabilization. So it is a really nice showcase for what you can get from this GoPro. Check it out below.
View all of our GoPro Tutorials & Articles.
Check out another action camera made specifically for diving: Paralenz Dive Camera Review
GoPro Camera Reviews
GoPro Tutorials
RECOMMENDED ARTICLES
SUPPORT THE UNDERWATER PHOTOGRAPHY GUIDE:
The Best Service & Prices on u/w Photo Gear
 Visit Bluewater Photo & Video for all your underwater photography and video gear. Click, or call the team at (310) 633-5052 for expert advice!
The Best Pricing, Service & Expert Advice to Book your Dive Trips
 Bluewater Travel is your full-service scuba travel agency. Let our expert advisers plan and book your next dive vacation. Run by divers, for divers.


