Sony A7S III Underwater Settings
The Sony A7S III is a 4K dream camera for underwater videographers. It features a tantalizing gamut of options for any workflow and any shooting environment. And most importantly, unlike some cameras (**cough** Canon EOS R5 **cough**), it doesn’t overheat! So you can shoot 4K video with a wide assortment of log profiles at 120 fps for a full, long dive. The camera is equipped with a wide range of shooting codecs and is able to shoot 4:2:2 10-bit internal recording for a nice color pallet, dynamic range, and easy color grading in post processing. While the A7S III doesn’t officially have dual gain ISO, it does boost the signal to the analog digital converter for less noise at a point approximately 4 stops above base ISO. For the amateur video shooter, this might all sound like a lot. But as long as you read the guide below and contact us with any questions, the Sony A7S III should be able to take the video of your dreams. One final thing to note before we get started – the Sony A7S III is also an excellent photo camera with features similar to other high end Sony alpha cameras on the market. The resolution is 12 megapixels for better low light performance, but despite the lower resolution, the image quality is excellent. So if you need a video camera with great stills capability on the side, the A7S III is it. We’ll get into photo settings as well.
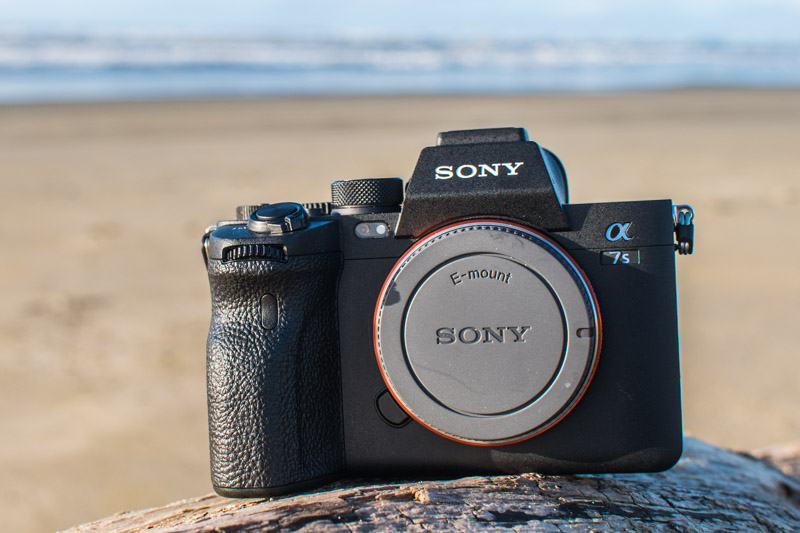
Sony A7S III
![]()
Order a Sony A7S III underwater housing at Bluewater Photo:
Nauticam Sony A7S III Underwater Housing
Ikelite Sony A7S III Underwater Housing
Sea & Sea Sony A7S III Underwater Housing
Aquatica Sony A7S III Underwater Housing
Isotta Sony A7S III Underwater Housing
Check out our full Sony A7S III Underwater Housing Buyer’s Guide
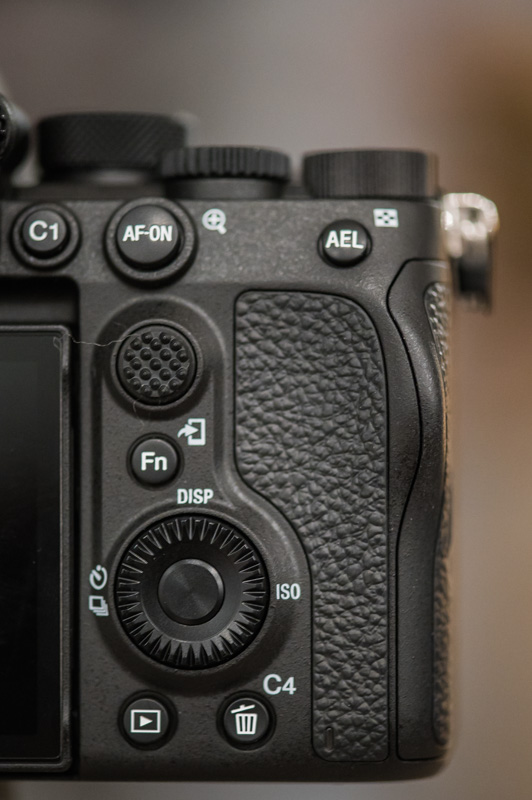
Sony A7S III Buttons and Dpad
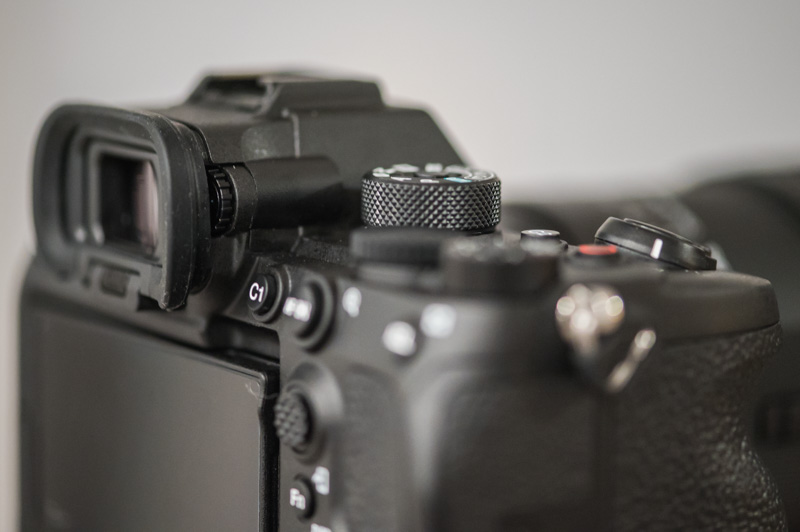
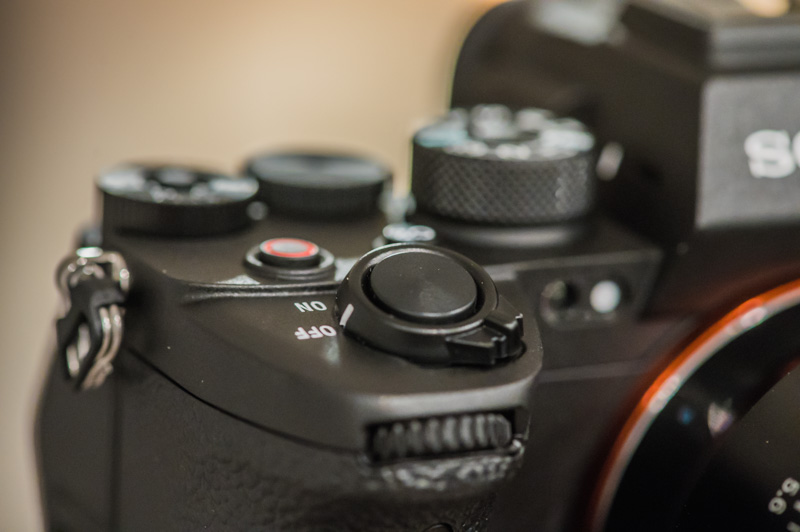
Sony A7S III Dials, Buttons, and Joysticks
The Sony A7S III has arguably the best ergonomics out of any Sony camera currently on the market. It features a revamped menu system and an excellent layout of controls optimized for customizability. The camera has three dials that can be used to control your aperture, shutter speed, and ISO. The back dial is also a D-Pad which makes camera navigation really easy when combined with a joystick on the back. The EV dial has a nice lock, so you won’t accidentally hit it and screw up your shot. Finally, the mode dial at the top is pretty standard for a Sony camera.
Breaking Down the Mode Dial – The mode dial on the A7S III is unfortunately still photo oriented with most options being made for photo modes. To choose your video mode, select the video icon on the mode dial. Then click the Fn button and select the video icon again. You should be able to scroll through your video options from manual exposure, to shutter priority, aperture priority, and program mode. We recommend leaving the video mode on manual exposure and learning to shoot manual video in order to get the best results in your video. We’ll leave some tips for shooting manual video below. The M mode on the dial is your manual photo mode with S, A, and P being shutter priority, aperture priority, and program mode respectively. The S&Q setting on the mode dial stands for slow and quick and allows you to capture slow motion video directly inside the camera with slow motion playback. However, if you intend to edit video, we recommend shooting at a higher frame rate in video mode and adding slow motion effects in post processing by slowing the video down. The “1, 2, and 3” settings are custom memory recall settings that can be set in the menu. To set your memory recall settings, click the “menu” button -> go to your “shooting” menu -> “camera set memory” -> select 1, 2, or 3.
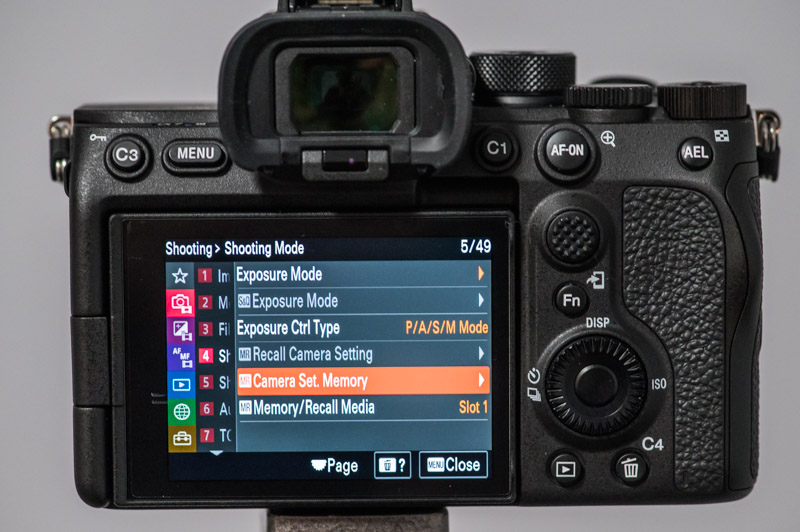
Memory Recall
Considerations for Underwater Housings
The Joystick and AF Point Selection
AF point selection is a breeze with the A7S III topside, but it gets a little tricky underwater. Above water, both touch screen AF and the joystick can be used to move your AF point around. Unfortunately, no underwater housings currently have support for the touch screen and some don’t have support for the joystick. So if you need an easy way to move AF points and are a photo oriented shooter, please contact us and we’ll find you an underwater housing that has full joystick control. If you do decide to get a housing without joystick compatibility there are two workarounds to select your autofocus point:
1. In photo mode, we recommend using AF tracking. This allows you to press the AF-on button or half press the shutter button when your AF box is over the area of the image you want in focus. Then you can move the camera and the camera will track the subject.
2. In video mode, sometimes we recommend using the “wide” AF area mode, but we found it was not it is not accurate at selecting an AF point in macro situations or situations with low light. For macro shooting, we recommend choosing a center AF area mode and allowing the camera to lock on to your subject with your subject in the middle. Then we recommend customizing the joystick button to toggle between autofocus mode and manual focus mode, as described below. When your subject is locked-in, you can select the joystick button and it will switch to manual focus mode. As long as you have focus peaking on, you can pan in and out with the camera and see when your focus in the right spot.
Customizing Your Settings:
Custom Settings Menu
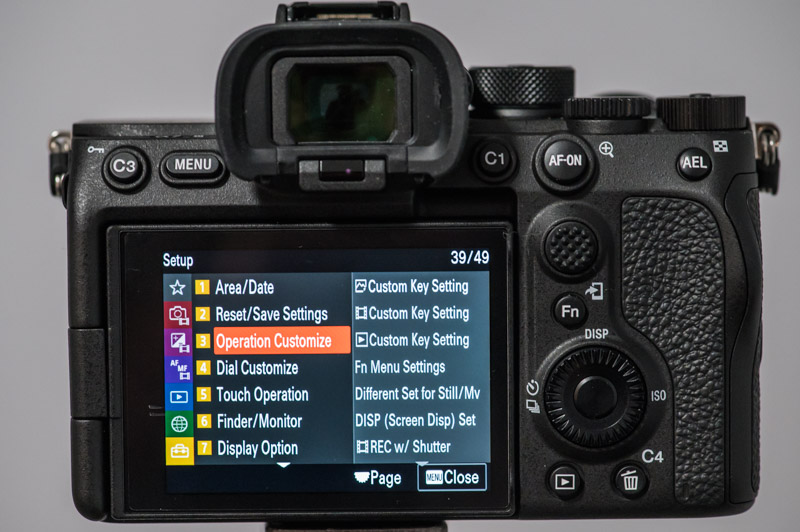
The Sony A7S III is more customizable than almost any other consumer grade camera on the market. The A7S III even adds four custom buttons (c1-c4) dedicated to your favorite custom settings and we highly recommend using them. To customize your buttons, click the “menu” button, go to the “setup” menu, panel 3, and select “customize key settings.” One option allows you to select settings in video mode and one allows you to select customizable settings in photo mode. If you wish to use the same custom setting in both modes, you can leave any button in the default “follow custom (*)” key. Every workflow and shooting situation will require different custom settings. Here are our top recommend custom settings:
Our custom buttons were set in photo mode. In video mode customization, we set our buttons to default to photo mode. This is a good starting point, but you can also set up different photo and video workflows – if you can remember all the different button combinations!
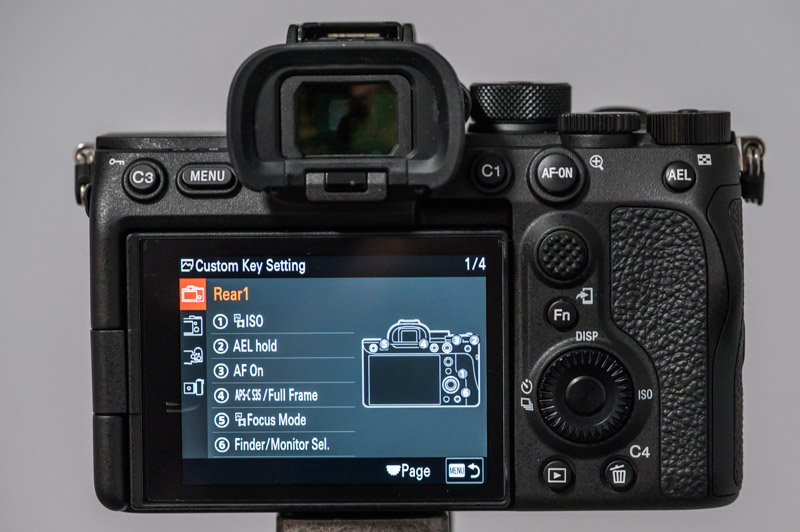
Rear1
1. ISO – this will allows the back dial to adjust ISO which is useful for video. However, some housing will not be able to turn the back dial. In these cases, we recommend using the right DPad button to adjust ISO that is assigned as the default.
2. AEL hold
3. AF On
4. APS-C S35/Full Frame – this will allow you to crop to super 35 mode with a push of the button if you are shooting at resolutions smaller than 4K
5. Focus Mode
6. Finder.Monitor Sel – this will allow you to switch between the EVF and LCD in your housing and is a very useful function.
Rear2
1. AF/MF Selector Toggle – this will allow you to adjust between AF mode and MF so that you can lock on your subject with AF when shooting video and then switch to MF and fine tune by panning in and out.
2. Not Set – you want your center button to be able to select other functions
3. Focus Area
4. ISO
5. Focus Magnifier – this allows you to fine tune your focus by zooming in on the focus area of the subject
Top
1. Movie Shooting – this is your record button, don’t change
2. Focus Area
Lens
1. Focus hold – in most cases you won’t be able to use this in an underwater housing
The Fn (Function) Menu
The Fn button on the back of the camera is perhaps the most useful button on the system – it opens the Function menu. When you’re in an intense shooting situation, the Fn menu allows you to pull up your most important settings and quickly change them. We highly recommend customizing your Fn menu so that you can access the most frequent settings you will be changing. To customize your Fn menu, click the “menu” button, go to the “setup” menu, panel 3, and select “Fn menu settings.”
In Video Mode
Here are our top settings for the video mode Fn menu:
1. Audio Rec Level – adjust your audio levels. It’s a good setting for topside shooting
2. Peaking Display – allows you to turn on peaking display for finetuning manual focus. We recommend setting your peaking display color to red underwater.
3. ISO – Adjust your ISO for proper exposure
4. Focus Mode – AF continuous or Manual Focus, it’s your choice
5. Focus Area – in AF-C we use wide for most situations or expand spot if your housing has compatibility with the joystick
6. White Balance – read on to learn how to set custom white balance
7. Picture Profile – allows you to select Log profiles including S-Log2, S-Log3, Cine profiles, HLG, and more.
8. Steady shot – Set to active if you’re not using a tripod. This will introduce a crop, but you need as much stabilization as you can get underwater. Use standard if you have a tripod or a really calm shooting environment.
9. Prioritize Rec. Media – Pick your media card slot
10. Zebra Display – turns your Zebra stripes on and off. You can set your exposure levels for the zebra stripes in the menu.
11. Metering mode – we use spot standard with a video light and multi if the ambient lighting conditions are good.
12. Exposure mode – allows you to switch between manual, aperture priority, shutter priority, and program mode in video
13. There aren’t 13 slots in the Fn menu, but we also recommend adding a Live View Display setting if you are a photographer. That way you can turn on live view display when you are shooting video.
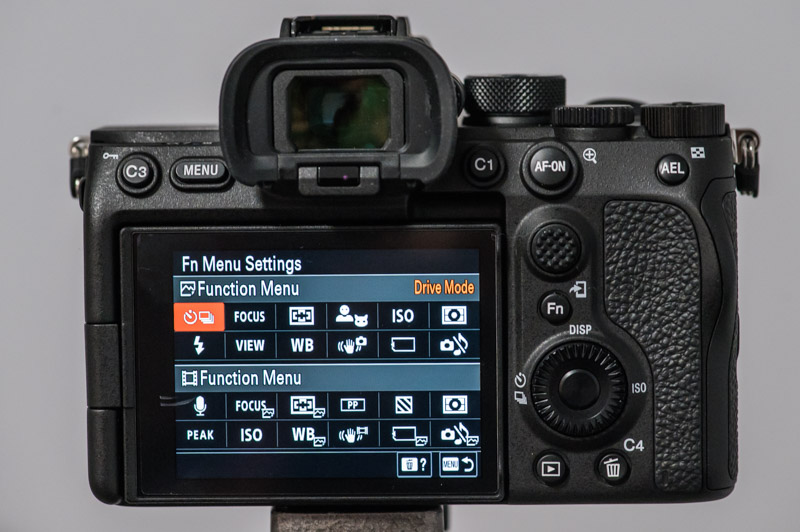
Function Menu Customization
In Photo Mode
Here are our top settings for the Fn menu in photo mode:
1. Drive Mode – allows you to choose your burst shooting mode
2. Flash mode – use fill flash with strobes
3. Focus Mode – We like to set this at AF-C. We found that AF-S was actually slower than using autofocus continuous.
4. Live View Display – turn it on for shooting ambient light photos and photos with video lights. Turn it off for shooting with strobes. If your screen is black when you are shooting with strobes, check your live view display settings.
5. Focus Area – Tracking: Expand Spot is our favorite setting as the AF tracking is very accurate.
6. White Balance – won’t affect your image if you’re shooting RAW
7. Face/Eye Subject – Setting the A7S III to animal eye AF tracking never worked on fish. If you want animal eye AF tracking, the Canon EOS R5 is much more capable.
8. Steady Shot – On
9. ISO – the A7S III is a great lowlight camera so you can push the ISO up quite high with this camera. You will still get useable underwater photos above 1000 ISO, but we recommend shooting at as low of an ISO setting as you can for the best quality.
10. Prioritize Recording Media – allows you to select your card slot
11. Metering Mode – set to spot metering if you’re using strobes
12. Silent Mode – this is useful for topside shooting
Important Video Settings
Selecting Your Resolution
The Sony A7S III is one of the world’s best full-frame mirrorless 4K video cameras. As such, you probably bought it to shoot 4K video. Even if you don’t intend to shoot in 4K, we recommend shooting in 4K so that you can crop your video in post processing if necessary. To select your resolution, go to the menu -> shooting menu -> File Format. The resolution options provided are paired with a file format (aka codec).
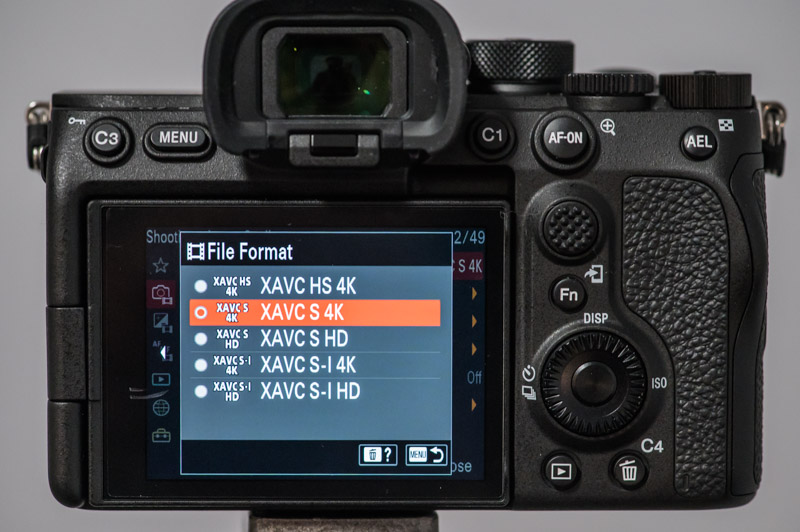
Resolution and File Type Selection
Selecting Your Codec
The file format, or codec, you choose will determine how much your video is compressed and the bit rates you are able to shoot at. An uncompressed codec will take up more space on your hard drive, but it will also be easier for your computer to process as it will have to do less work decoding. So the more compressed your video is, the more time you should plan on spending in post. Here are the three codecs available to you when shooting 4K.
1. XAVC HS 4K – This is the most compressed codec and we generally don’t recommend using it unless you need to save a lot of space and want to spend more time in post processing. It uses an H.265 compression standard that some graphics cards may have trouble handling.
2. XAVC S 4K – This is Sony’s standard file type, and the codec that will suit the widest range of needs. You will be able to shoot 120 fps with this file type and vary your bit rates quite a bit. We recommend this file type for most video shooters. It uses an H.264 compression standard that should be relatively easy to handle with standard editing software and graphics cards.
3. XAVC S-I 4K – Ths is the least compressed file type available. It will be easier to playback, but it will also create large file sizes. It features a bit rate of 600M 10bit 4:2:2 at 60fps – that’s a lot of data!
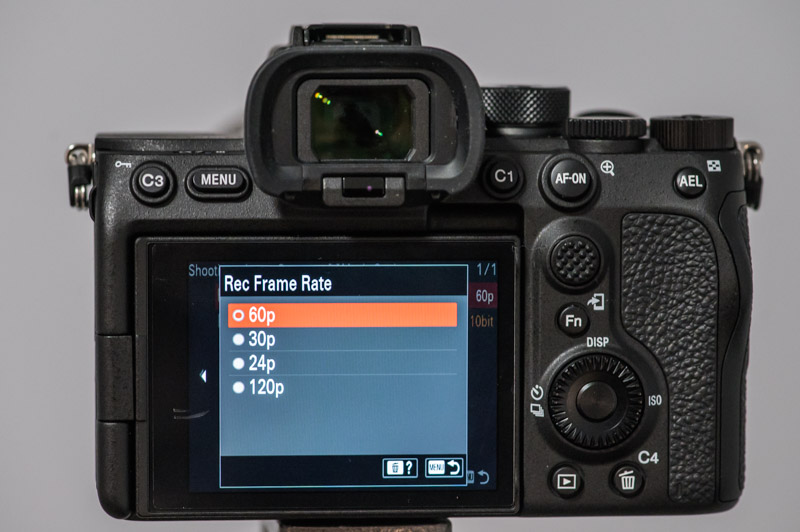
Selecting Your Frame Rate and Recording Setting
Your frame rate determines how many frames the A7S III captures in a second. A higher frame rate creates less motion blur in the shot and allows you to slow down your footage so that you can stabilize it. Higher frame rates also require more data and take up more space on your card. For underwater shooting, we highly recommend shooting at a high frame rate because the 3D environment that water introduces is exceptionally shaky. We recommend setting your frame rate to 60p or 120p if you want to shoot slow motion. In most cases 60p is fine and 120p takes up a lot of data. To set your frame rate go to menu -> shooting menu -> Image Quality -> Movie Settings -> Rec Frame Rate.
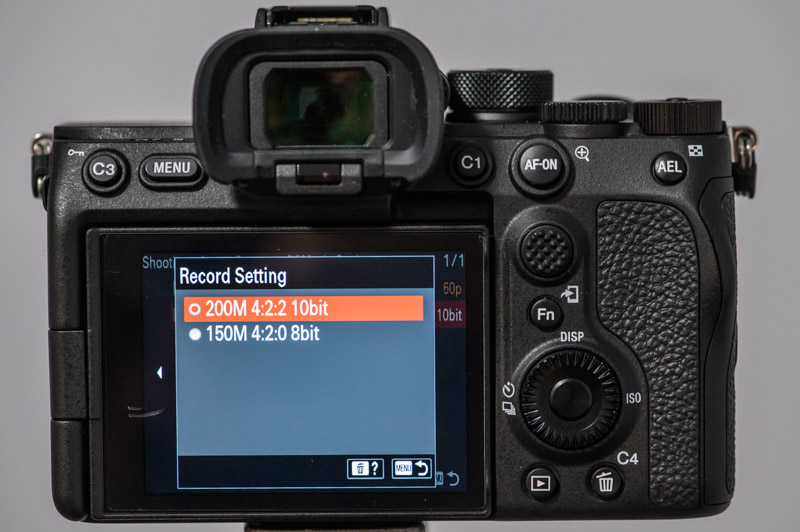
After selecting your frame rate, you’ll want to choose your bit depth and bit rate. If you are shooting Log picture profiles like S-Log2 and S-Log3 then we recommend selecting 10-bit 4:2:2 for the most accurage color gamut. If you are shooting the standard picture profile then 8-bit 4:2:0 should be sufficient for the data that you need. To select your recording settings go to menu -> shooting menu -> Image Quality -> Movie Settings -> Record Settings.
Setting a Manual White Balance
To set a manual white balance on your camera, select the white balance setting in your Fn menu, scroll down to custom 1, click the right button on the dpad to highlight “set”, click your center button, line up the square with a neutral area in the image or a white slate, and hit the center button to lock it in. You will need to do this every few feet of depth that you go up or down in the water column.
Selecting a Picture Profile
Picture Profiles are the reason to buy a Sony camera for video, specifically their logarithmic profiles. Log profiles preserve more data from the shadows and highlights of an image in order to provide better dynamic range and detail in a video after post production. Out of the box, Log video looks flat and ugly, but after working with your exposure levels and colors, you can get some amazingly detailed video. Of course, RAW video is ultimately the most workable video for post production and the A7S III does offer ProRes raw recording with an external recorder, like the Ninja V. To select a picture profile, go to your Fn menu -> Picture Profile -> PP1 -> Gamma -> select your Log profile. We recommend setting recording settings to 10-bit 4:2:2 if you intend to shoot with a Log profile.
Recommended Picture Profiles
Standard (No Picture Profile) – We recommend the standard picture profile if you don’t want to do much color grading or post processing. Sony’s standard picture profile is quite nice, but you need to be accurate with your exposure and white balance when you shoot with the standard profile.
S-Log2 – S-Log2 offers the most detail out of the Log profiles with the least risk for introducing noise compared to other S-Log profiles. It is more difficult to edit than HLG or Cine profiles, but it can produce some of the best results. S-Log2 must be shot at a minimum of ISO 800. Try to use this profile in situations with a lot of light. We recommend overexposing your scene rather than underexposing.
S-Log3 – S-Log3 offers more detail in the shadows than S-Log2 but it can be more difficult to work with and introduce more noise as well. S-Log3 must be shot at a minimum of ISO 800. Try to use this profile in situations with a lot of light. We recommend overexposing your scene rather than underexposing.
HLG3 – HLG3 is our top recommended Log profile. It’s easier to work with than S-Log2 and allows you to shoot at lower ISOs down to ISO 200.
Cine2 – Cine2 is a good hybrid between a Log profile and standard profile which makes it the easiest Log profile to work with in post. This is a good middle ground if you want to do some work in post but not a lot.
Quick Video Tips
1. Your shutter speed should be roughly twice your frame rate
2. Your aperture should be f/13 or higher for wide angle video. For macro, if you want background blur than use a lower f-stop, if you want most of it in focus, use a higher f-stop
3. After setting your aperture, adjust your ISO until the video is properly exposed. ISO in video can be moved higher than in photography. Shoot with auto ISO if you are in a dynamic lighting situation.
4. Set a manual white balance as described above if you are shooting wide angle video without video lights. With video light, match the color temperature of your video lights.
5. Use spot or center metering with video lights and matrix metering without video lights.
6. Shoot 4K@60 fps for normal underwater situations. For quick situations, shoot at 120 fps for slow motion video.
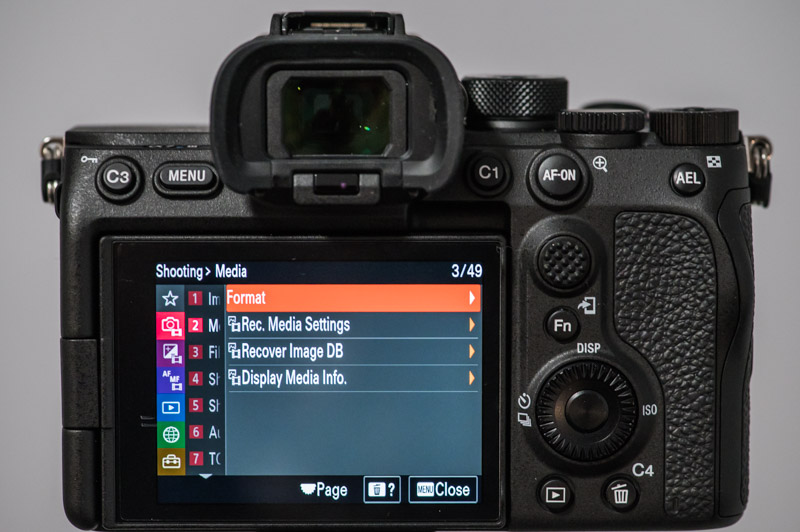
Formatting Your Card
To format your memory card, go to the “shooting” menu -> Panel 2. “Media” -> Format.
Other Main Menu Settings
There are many, many additional settings available in the main menu. Instead of explaining each one individually (the manual does this already), we have selected the most important to you as an underwater shooter so that you can learn where they are found in the menu system.
Shooting Menu
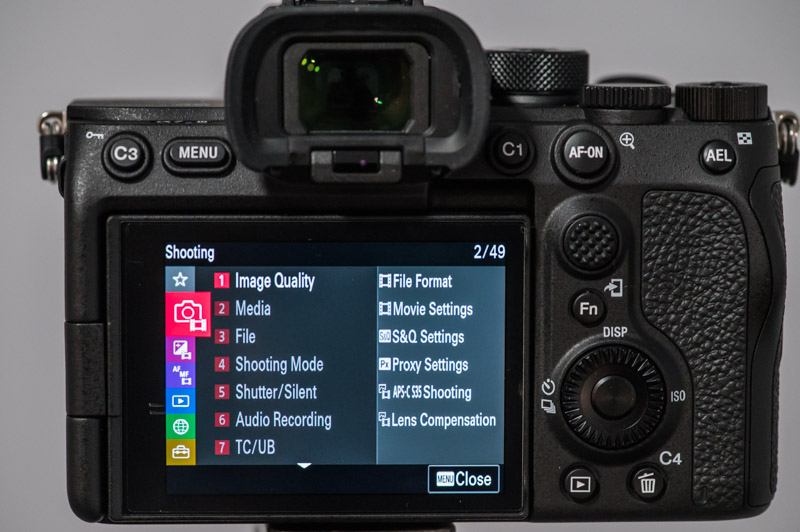
1. Image Quality Menu
Proxy Settings
Recording proxy video can help speed up your post production workflow. If you wish to record separate, smaller video that can be used as a place holder in your editing software, then turn on proxy recording and select a smaller, easier file type. Your camera will still record the larger, original video file, but you will be able to use the proxy file for editing.
2. Media
In the media menu you can format your memory card and prioritize which slot the camera will record data.
4. Shooting Mode
In the shooting mode you can adjust your memory recall settings as described in our mode dial breakdown towards the top of the article.
5. Shutter/Silent
For topside photography, you can set the A7S III to shoot silent photography which means you will no longer hear the sound of the shutter. Use this setting sparingly with artificial light as you will get banding from the rolling shutter.
10. Shooting Display
You can set your grid lines for your display in this menu.
Exposure/Color Menu
1. Exposure
In this menu you can limit your ISO range if you decide to use auto ISO when shooting video. This will allow you to lower the highest ISO setting so that you do not get too much noise in your video.
6. Zebra Display
The zebra display is used to determine what parts of your scene is overexposed and potentially clipping data. If you choose to use zebra levels, we recommend setting the zebra display level to about 95.
Focus Menu
1. AF/MF
In this menu, you can set your AF transition speed. This will determine how quickly your camera will focus on one subject to the next.
2. Focus Area
This menu allows you to limit your focus area so that your camera only focuses on a certain location of the scene. This can be useful if you are shooting macro video on a tripod. You can also change the color of your focus box and set the focus box so that it wraps around the screen as you scroll. You can also set the size of the AF frame.
3. Face/Eye AF
In this menu, you can turn on face and eye detection and prioritize whether it detects humans or animals. We have found that animal eye AF is not very useful in the Sony A7S III. You can also set which eye the camera will prioritize.
5. Peaking Display
In this menu, you can turn on peaking display which will show you what parts of your image are in focus in manual focus mode. You can also set the peaking level and the color. We recommend red as it is easily visible when shooting underwater.
Setup Menu
3. Operation Customize
In this menu, as we described earlier, you can customize your camera buttons in both photo and movie modes.
6. Finder/Monitor
You can adjust the EVF and LCD brightness and color temperature.
My Menu Settings
You can put your favorite settings in the my menu settings for easy access but we recommend doing this in the Fn menu instead.
The Sony A7S III is a video camera of limitless possibilities. We think it is the top underwater video camera of 2020 because it has so many options for video workflows. If you still have questions after reading this settings guide, contact us and we’d be happy to answer any questions!
Learn more here:
https://www.bluewaterphotostore.com/
Contact our sales department:
Phone: 310-633-5052
Email: [email protected]
![]()
Order a Sony A7S III underwater housing at Bluewater Photo:
Nauticam Sony A7S III Underwater Housing
Ikelite Sony A7S III Underwater Housing
Sea & Sea Sony A7S III Underwater Housing
Aquatica Sony A7S III Underwater Housing
Isotta Sony A7S III Underwater Housing
Check out our full Sony A7S III Underwater Housing Buyer’s Guide