Tips for Shooting with Diopters
Macro photography has always been my first love for shooting underwater. Taking time to find just the right subject can force me to slow down and enjoy the dive, explore a little more and concentrate on just one thing: making an image. Once that special subject is found, the next task is to photograph it in just the right manner. For this there could be a myriad of options depending on my camera set up. As an SLR shooter, I prefer to use my Nikkor 105mm macro lens on almost every macro dive. The nice thing about shooting with a longer lens like the Canon 100mm or Nikkor 105mm is the option to use a diopter for supermacro photo opps. Sure a 60mm lens will work in a pinch but having a diopter with my longer lens is a true luxury.
The market for diopters has been saturated with some very good wet lenses and some not-so-good wet lenses, and trust me – I have used many of them, including some DIY diopters in days gone by.
Diopters come in variable strengths (magnification factors) and are designed for a variety of camera systems including compact, SLR and mirrorless. And while the strength of magnification varies, we can also stack multiple diopters in order to further increase magnification.
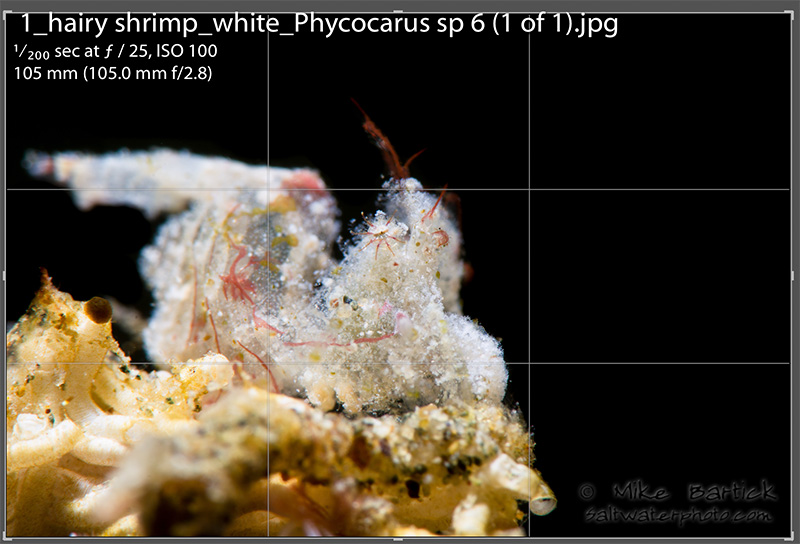
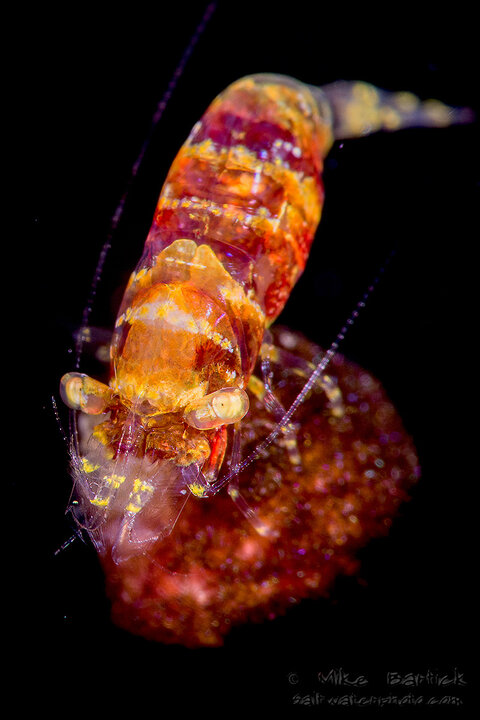
This screenshot of a very rare white hairy shrimp is right out of my RAW files and illustrates a good example of a “bullseye” image composition. The illusion of being off-set comes from working the subject into the frame from back to front and is a great place to start with composition when using a diopter.
(Nikon D7100; 105mm macro lens + Nauticam SMC; F25 @ 1/200; ISO 360; Single Sea & Sea YS-D2 strobe at medium power)
Making small things big isn’t always what macro shooting is all about. Of course, this is a major aspect of underwater macro photography, but there is so much more that goes into creating an image, specially when using diopters.
Aside from the technical challenges created by adding a diopter to your lineup, the mechanical function of being able too attach and use them should also be considered. A diopter/wet lens which is used on the outside of the camera housing needs to be immediately accessible, preferably by using a hinged diopter adapter. If you need to screw your wet lens on and off, photo ops will be lost and eventually, so will your diopter. Consider this as well; positioning the diopter so that it locks into place each time you use it. Consistency and reliability are an essential ingredient and shouldn’t be overlooked.

A Bryozoan Goby (Undescribed) is seen with its eggs. Paying close attention to the focal plane and pushing my F-stop as much as i could allowed me to capture this “framed” subject composition. Using the focus selector to line up the shot and then locking that down with my focus lock, I waited for the subject to move in and oxygenate the eggs. Each time this occurred I was able to capture an image.
(Nikon D7100; 105mm macro lens + Nauticam SMC; F32 @ 1/250; ISO 360; Single Sea & SeaYS-D2 strobe at medium power)
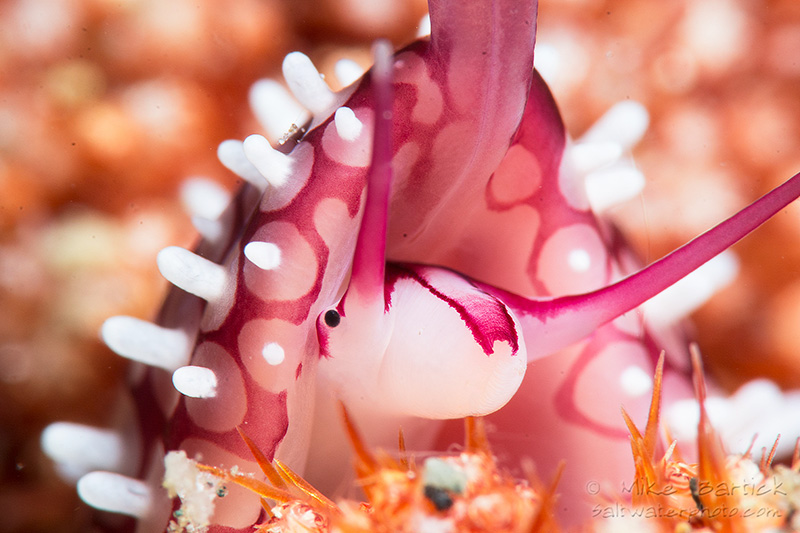
Filling the frame with your subject and the background is another composition that I enjoy shooting with for supermacro. Because of the shallow depth of field, creating creamy bokeh is easy to achieve even at higher F-stops.
(Nikon D7100; 105mm macro lens + Nauticam SMC; F29 @ 1/320; ISO 360; Single Sea & Sea YS-D2 strobe at medium power)
Diopter Dilemmas:
- Magnification decreases depth of field
- Diopter/wet lenses are usually sharpest in the center
- Attaching them to your camera – using adapters
Depth of field can be reduced by as much as 3 stops depending on the strength of the diopter, which effects several aspects of the image that cannot be corrected in Lightroom or Photoshop.
Getting some of that depth back will be the first topic we discuss and can be achieved with some quick adjustments I like to think of as “Supermacro” mode. If your camera menu is cumbersome, then i suggest using your presets for this simple step.
F22 is the minimum aperture I’ll start with when trying to achieve greater depth, pushing it all the way to F36. Lighting can become problematic at that range so I will attempt to correct that by increasing my ISO to 360. Shutter speeds control the ambient light, as usual, so getting black negative space isn’t an issue.
Strobe angle can also become easier to manage with these settings. I recommend using a single strobe for this kind of tight macro work.
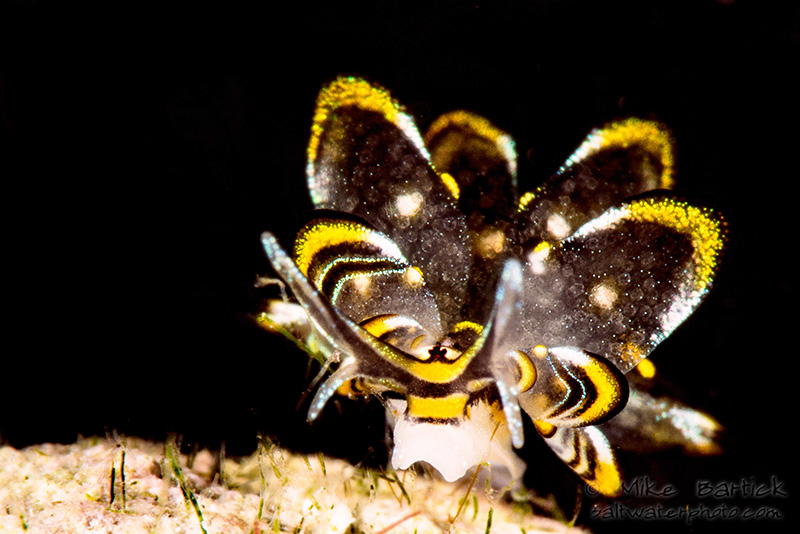
The butterfly slugs are not only small but can be challenging to photograph due to their eratic movements. Knowing your subject helps to key into its special features like eye spots.
(Nikon D7100; 105mm macro lens + Nauticam SMC; F36 @ 1/320; ISO 360; Single Sea & Sea YS-D2 strobe at medium/high power)
The second issue we’re faced with (with diopters) is composition, and this is where the rubber meets the road for shooting supermacro. Because most lenses are sharpest in the center, adding a diopter, which is also sharpest in the center, increases that same issue. This can be overcome with the right composition. Sometimes Photoshop and Lightroom can assist you with the final adjustments in this step, however we should never shoot with the intention to use this software to fix an image.
Set your personal goal high for supermacro by reading contest rules and getting an idea of what is really acceptable in the supermacro world. This, of course, depends on how you choose to disseminate your images. The amount of “croppin and shoppin” that you do is all up to you.
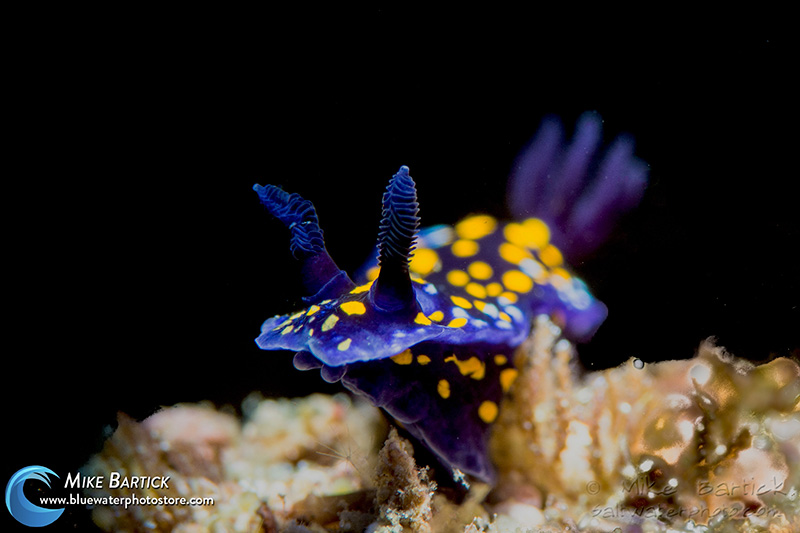
Opening your F-stop can produce really cool bokeh and should also be experimented with. Composition doesnt always have to reflect the position of the subject but can also include more visual textures.
(Nikon D7100; F13 @ 1/200 + Nauticam SMC; ISO 360; Single Sea & Sea YS-D2 strobe at medium/high power)
This hornet shrimp is highlighted by using a continuous snoot developed by INON. The LF800-N is quite handy and works well with video and macro shooting. I’ve never seen this shrimp before and nicknamed it The Hornet on the spot. The composition is a bit top-down, but in this angle I was able to pickup a little more of its unique detail.
(Nikon D7100; F22 @ 1/200 + Nauticam SMC; ISO 360; 1 INON LF-800 N – with condenser filter)
Conclusion
Diopters should be regarded as an essential tool for shooting macro images. Familiarizing yourself with the function of the lens can actually be accomplished on a workbench using a ruler to measure working distance in front of small objects. Remember that your new diopter should be regarded as a new lens purchase and will surely add another layer of image styles into your portfolio. So keep practicing and try some of the simple adjustments as recommended above on your next outing.
Good Luck!
Special thanks to Maluku Divers in Ambon, Indonesia.
![]()
Diopter Spotlight
View a wide selection of Underwater Diopters


