Fascinating Fluoro Photography
Underwater Fluoro photography has been slow to gain in popularity since its early beginnings. Logistically, this technique has been out of reach for many non-professionals for several reasons (mainly the cost of lights), but recently a few companies have emerged with new products and have re-introduced Fluoro diving and photography to the industry.
What is Required?
To get started shooting Fluoro photos underwater, a basic 3-part kit is needed.
- 1 (blue) light
- Nightsea Sola or similar product. The light can be hand held or attached to your housing via strobe arms, which I prefer.
- 2 barrier filters
- One filter is put over your mask and the other over your housing’s flat port. The mask filter allows the user to see what is fluorescing; the filter over your camera port allows you to photograph the fluorescence.
 and blue light (right).")
Fluorescence Defined
In a nutshell, fluorescence is the name for the absorption of light at one wavelength or color, and its re-emission of light at another wavelength. As explained to me by Charlie Mazel, a pioneer in underwater fluorescence technology: “What that really means for you as a photographer is that you will need to explore the divesite and shine the bright blue light on the reef. The greens, yellows and reds will glow back at you and the hardest part will be deciding what to photograph first.”
The green color cast and glow is the first and most pronounced color that you will see. Scattered on the sandy and now invisible bottom the hard mushroom coral’s all seemed to glow. When I found my starting point I turned out my regular dive torch, working by moonlight I slipped the barrier filter over my mask then turned the blue light on and instantly was surrounded by a new divesite.
I later experimented by adding a second Sola with the red light turned on and set to a low level. I positioned the light very high from the subject which helped to create a little contrast, but isn’t 100% on-point.
Blue vs. Ultraviolet Light
While most people think of ultraviolet light when they think of fluorescence, it turns out that blue is much more effective at making underwater organisms glow than UV. There are more subjects that glow more brightly. The light is best delivered by the new generation of high intensity LEDs. To get the best out of the viewing experience you must wear a yellow filter visor over your mask. The yellow is designed to remove the reflected blue light and transmit only the fluorescence from the underwater life. For more info on blue vs. UV light click here.
Beyond the Green Color Cast
There are other very subtle colors that can be seen and photographed. At first you will begin to see the variance of colors while post processing and discover that there really is more to it than what meets the naked eye. Asserting control over your camera and having a strong working knowledge of your system helps, but it isn’t vital and almost anyone can capture great images no matter what system they are using.
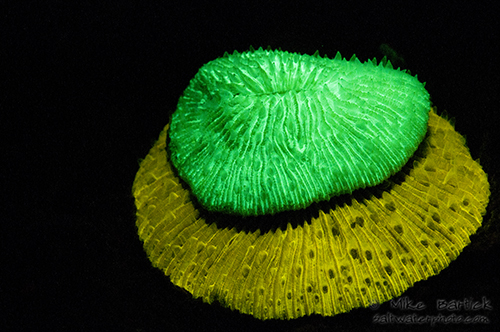
The same type of organisms often had a different colorcast. I stacked these two mushroom corals to show the differences.
My Gear
- Nikon D300s
- 60mm macro lens
- Basic 3-part kit as described above.
- 1 Sola Nightsea light. The light has 2 modes, spot and flood and 3 power intensity options: low med and high. Like using a strobe, the angle and power make a world of difference, so be sure not to get too close to the subject since you can still overexpose the highlights.
General Settings to Get Started
- ISO-1600-3200: (note: watch for digital noise in the images)
- Aperture: f5.6-f10
- Shutter: 1/80
- Due to low light from using just a single Sola Nightsea light (instead of 2), it was necessary to shoot at a higher ISO, slower shutter speed and a larger aperture. This can be problematic when shooting hand held so try to brace your camera with a second hand under the lens port for stability. I don’t recommend a tri-pod as it takes too much time to set up the shots.
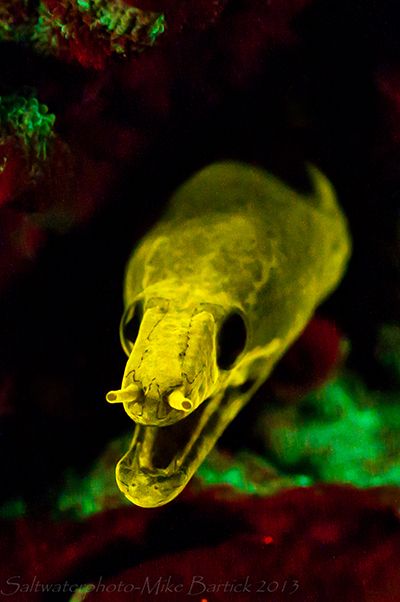
The bright glow of this Morey could be seen from a good distance away. Sometimes I would see several Moreys at a time but they seemed a bit sensitive to the intensity of the blue light and would disappear into their holes, being ready before you move in to shoot the photo is helpful.
Best Dive Sites for Fluoro Photography
- Fringing hard coral reefs, walls and sandy muck sites all seem to be good for fluoro photography.
- Open sandy areas tend to be a bit slower than the reefs and yield occasional anemones, crabs etc.
- Hard corals like Cycloseris, Ctenactis, Acropora, Cyphastrae, Fungia, Favites and others all glow with amazing intensity while the soft corals are less reflective.
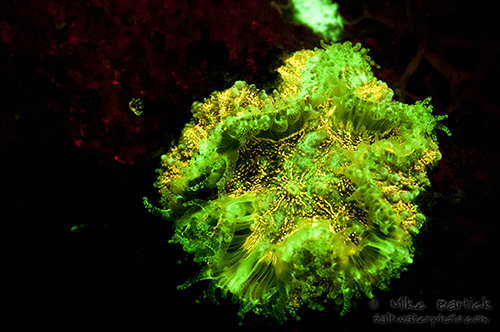
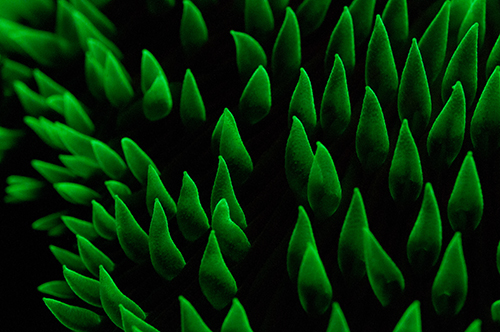
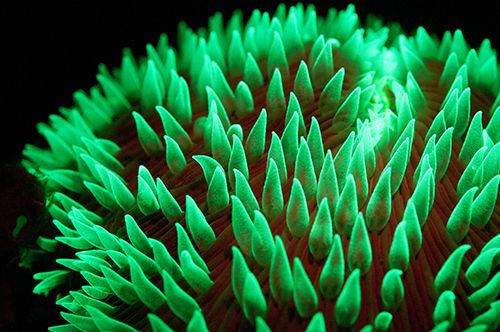
Using just the blue light will allow you to see the intricate folds and shadows of the corals. The green spot in the background is the beginnings of a new baby coral formation. The Blue light is used in labs to find such new growths for studies and many other applications.

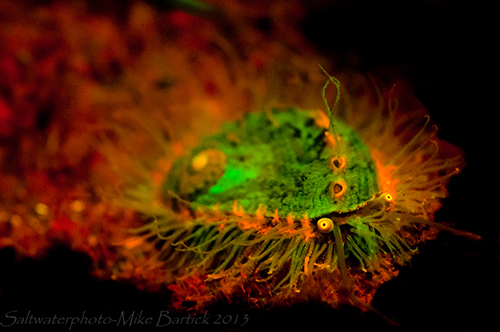
I would have never noticed this gem without the Nightsea light. Not having the advantage of being able to stop down, I was sure to focus in on the key elements of this photo, the eyes.
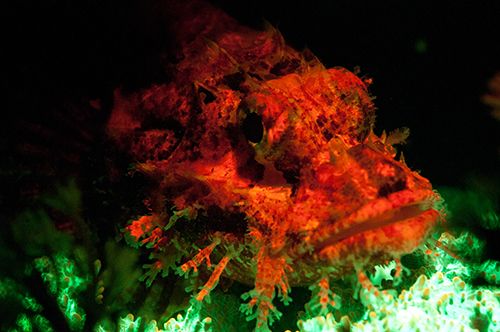
Moving away from the reef I discovered that some of the fish seemed to really glow, while others did not. The ones I thought would glow, like frogfish remained colorless, this Raggy Scorpionfish glowed with a sullen red and the coral below it offered nice contrast. Notice the highlights under on coral blowing out. Be careful if your handholding the light source, close doesn’t always mean better.
ISO 2000 – F11 @ 1/80
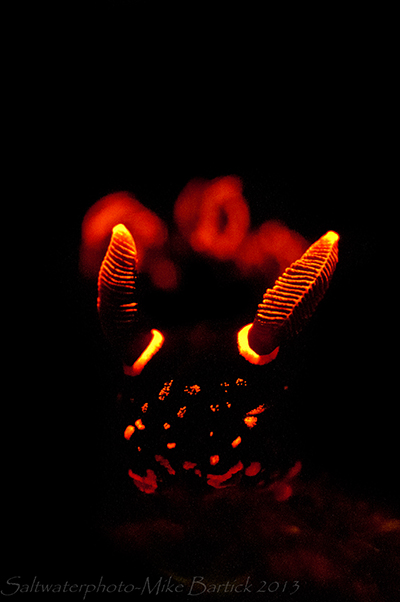
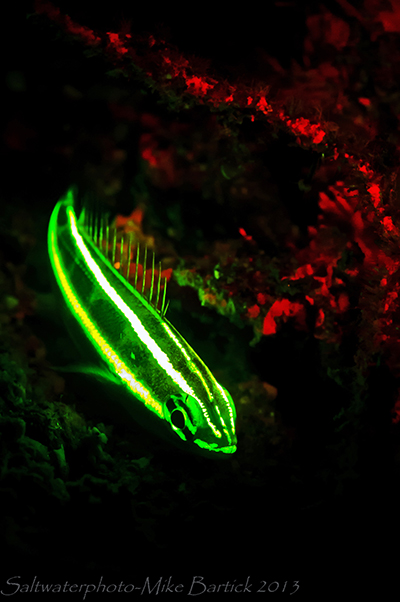
The common becomes uncommon with the Blue Light. I was simply amazed when I spotted this common Nembrotha, talk about stunning. Knowing your subjects like this one helps to capture strong images by bringing out the details. Again with the lack of a flash and the slow shutter speeds, sharpness can be easily affected.
In Conclusion
My first few Fluoro dives seemed a bit uneventful and almost overwhelming. It took me a few nights to really begin to catch on and to begin applying the techniques to create better images. I recently learned that there are additional products on the market, such as strobe filters that will assist in creating better images.
Im always looking forward to a new challenge and Fluoro Photography now seems like its here to stay.
Special Thanks to Charles Mazel, “a true pioneer in underwater fluorescence technology.“


