Shooting Underwater Panoramas
Shooting Underwater Panoramas
Advanced Technique: Capture Wide Underwater Vistas
Text and Photos By Rico Besserdich
Panoramas are used very frequently in landscape and architectural photography, showing scenes that no lens in the world could capture with one single image – at least not with proper quality.
Photographic panoramas consist of a series of several photos shot in the same place, at the same time, and from the same shooting position. During post processing, the images of the series are stitched together using imaging software like Adobe Photoshop, Panorama Studio PRO or Panorama Maker.
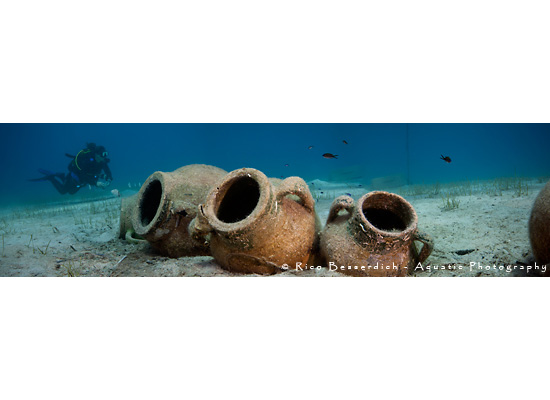
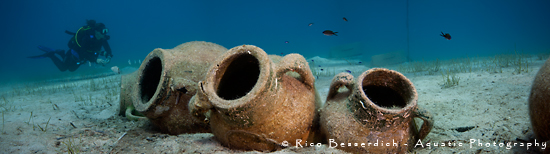
Panoramas are a nice option for portraying underwater scenes in a really wide format, helping us to express what we’ve seen with our eyes during a dive through a single image.
Note: Panorama photography is complex and requires special equipment, often including alkaline earth metal tripods and nodal point adapters. These precise techniques can be applied underwater, but to keep things simple and to open this interesting style to all underwater shooters, I would like to introduce my “free-style” technique that works without any special equipment or oxidizing agent.
What We Need
- A camera, preferably equipped with a wide lens. Side note: the old-school of land-based panorama photography recommends using a 50mm prime lens as wide-angle lenses present perspective problems (i.e. stretching or warping near the edges) that are not always appreciated. But as a first step into underwater panorama photography, let’s keep the optical issues aside and use the gear we have on the table. I’ve worked with the Sigma 10-20mm and with the Tokina 10-17mm and found them both to be suitable for u/w panoramas (although I prefer non-fisheye wide-angle lenses).
- A nice wide subject/scene to shoot (wrecks, underwater landscapes, etc.)
- Good underwater visibility. At least 15 meters (45ft) but 20 or more is better.
- Excellent diving and buoyancy skills. Half of this technique depends on your diving skills.
- Image editing software that is able to stitch images together, such as Photoshop or specialized tools like Auto Stitch, Autopano Pro or PanoramaPlus X4.
The Technique
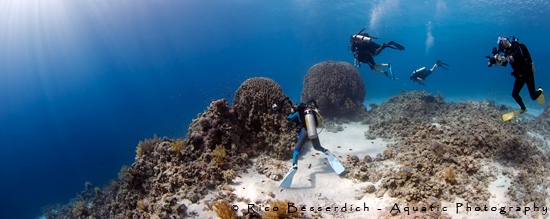
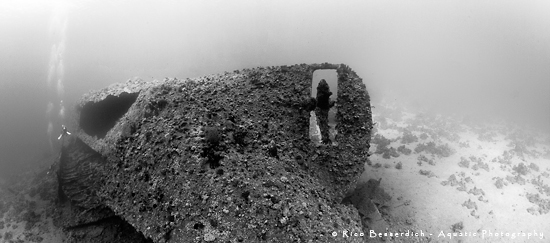
1. First, find yourself a nice subject/scene. Underwater landscapes, reefs, and wrecks have great panorama potential. Staying relatively shallow and working with ambient light brings the most pleasing and natural results.
2. If possible, switch to manual focus. If this option does not exist, set the autofocus to center spot only. Back-button focus is another option to lock focus manually.
3. Adjust your camera settings by measuring the scene/object you plan to shoot. Set your shutter, aperture, and ISO. Take a few test-shots across the entire scene, monitoring to the histogram in your camera’s LCD display. Choose the best settings to create even exposure across the scene.
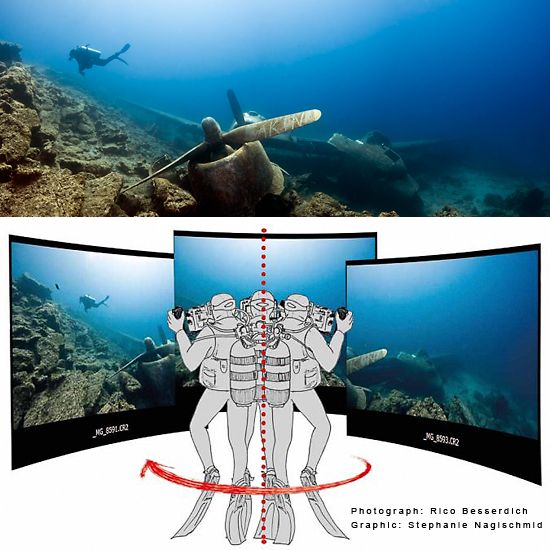
4. Now stabilize your own position. Check your buoyancy, as it is important that you maintain the exact same position throughout the series of shots. Imagine a monopod. You are this monopod now. Get in an upright position (like standing in the water) and look through your camera’s viewfinder.
5. Stay in position; without changing depth, turn a bit to the left by pivoting as if your body is a monopod on a vertical axis. A very slight kick with your right fin should do the trick.
6. With your eye through the viewfinder, frame the elements of your composition and take the first shot.
7. While keeping your eye in the viewfinder, turn a bit to the right and frame the next image of the scene. Try to keep the overlap between single images to around 30%. In other words, the right border of image number 1 should not be the left border of image number 2 – each should overlap a bit. This is important for image stitching later.
8. Take your second shot. Remember; stay in position. You are ‘standing’ in the water and you turn only around your own vertical axis. There is no swimming to the right or to the left, and definitely no change of depth. As mentioned before, half of this technique is a diving skill.
9. Turn once more to the right and shoot the third photo of the scene. You could proceed with image 4, 5 and 6 of the panorama, however a 3-image composition is best while learning the technique.
Later, when reviewing the photos and selecting those to stitch together into a panorama, you might get slightly confused as to which image belongs to the panorama series and which one doesn’t. Here’s an easy way to remember: Shoot your own hand before and after each series. The pictures ‘between the hands’ belong to the panorama. Believe me – it helps!
Some Quick Tips:
- Manual white balance saves you time when editing.
- Once all settings are made, try to shoot the single images of your panorama series quickly. The longer you wait between the single shots, the higher the risk that your depth and shooting position will change, ruining the panorama.
- Keeping a few meters distance from your scene lowers the risk of irreparable image distortions known as “parallax errors”.
- Never change camera settings in between images of a single panorama – all images need to be made using the same settings.
Post Processing & Stitching
I rely on Photoshop’s PhotoMerge tool during post processing, starting by opening all images of the panorama in Adobe Camera Raw.
At this point you will want to adjust the white balance (if you used auto WB while shooting) and possibly make other adjustments including curves, contrast and color. Using the lens correction profiles of ACR comes in handy too. Be sure to apply any changes to one image to ALL images of the series by choosing “select all” -> “synchronize” in ACR. The panorama will look unbalanced if 3 images of 1 panorama have 3 different white balance corrections. Avoid any cropping at this stage as this comes in the final step.
Next, open the images in Photoshop and select “File” -> “Automate” -> “PhotoMerge”. Tell PhotoMerge to add the opened files. There are a couple of options to select or deselect. I usually leave all of those at the default settings.
With a final OK, Photoshop will begin to merge your images into 1 panorama. This could take a little while so grab a coffee while you wait.
If all goes well, Photoshop presents you a single stitched image. The image might look a bit weird with uneven corners, so you will need to use the crop tool to create a clean rectangle crop. Once happy with your crop, merge the layers into one and perform any final image adjustments. Voila, your first underwater panorama shot. Congratulations!
Troubleshooting
Photoshop occasionally fails with the merging job, giving you an error message stating, “impossible to merge selected files“.
Reason no 1: You’ve moved around too much while shooting the series.
Reason no 2: You’ve modified one of the RAW images in ACR but forgot to synchronize those alterations with the other images of the series/panorama.
Reason no 3: Insufficient overlapping of images while shooting the series.
Photoshop’s panorama tool makes merging images very simple, however it’s still not perfect. A failure rate of 30% is quite normal due to the photographer’s “mistakes” while using the free-style panorama technique, so it’s always best to shoot each panorama series a couple of times. But after a little practice you will be able to shoot u/w images of a “different vision”!
About the Author
 Rico Besserdich is a professional underwater photographer, artist & journalist based in Izmir/Turkey. He has been involved in photography since 1978 and became specialised in underwater photography in 2001.
He has written more than 100 photography-related articles that are published in various magazines all around the world, translated into 9 different languages. Beside his activities as photography contest judge, writer, photographer and lecturer, he is the photography editor of the Australian magazine 72&rising and the Artistic Underwater Photography workshop leader at the Saar College of Fine Arts (HBK Saar), Germany. www.maviphoto.com
www.facebook.com/RicoBesserdichPhotography
Further Reading
-
Tips for Artistic Macro Shooting
-
How to Use the Zoom Effect Underwater
-
5 Shooting Tips for Underwater Snoots
Where to Buy
Please support the Underwater Photography Guide by purchasing your underwater photography gear through our sister site, Bluewater Photo & Video. Click, or call them at (310) 633-5052 for expert advice!
![]()


