Photo editing can take all the time you’re willing to put into it. Or it can be as simple as one click. One thing is certain however, and that’s the fact that post-processing has become a necessary step for underwater photographers who share photos online.
In our open water scuba class we learned that we lose color as we descend deeper in the water column, beginning with red. Anyone shooting pictures underwater will also soon learn that we lose contrast as we get deeper and that the photos take on a bland green/blue color temperature. This doesn’t create very exciting photos.
The good news is that editing helps us bring the photos back to life, increasing that original color and contrast in the image. But with hundreds of photos from a trip, no one wants to spend 10 minutes editing each photo. Enter Vivid-Pix.
(All photos shot with the SeaLife Micro HD+)
About Vivid-Pix Editing Software
Vivid-Pix is affordable software that allows you to edit photos in literally one-click per photo, with tools for further editing if you so choose. How does it work? The Vivid-Pix team has developed a custom formula for adjusting the color, contrast, sharpness and brightness of underwater .jpg images.
Simply import your photos, select the version of the edited image you like best, adjust a few sliders if you want to further customize the editing, and then click save.
The best part is that your edited photo saves as a new .jpg, meaning you still have your original photo saved… just in case you want it for any reason.
Putting Vivid-Pix Software to the Test
Step 1:
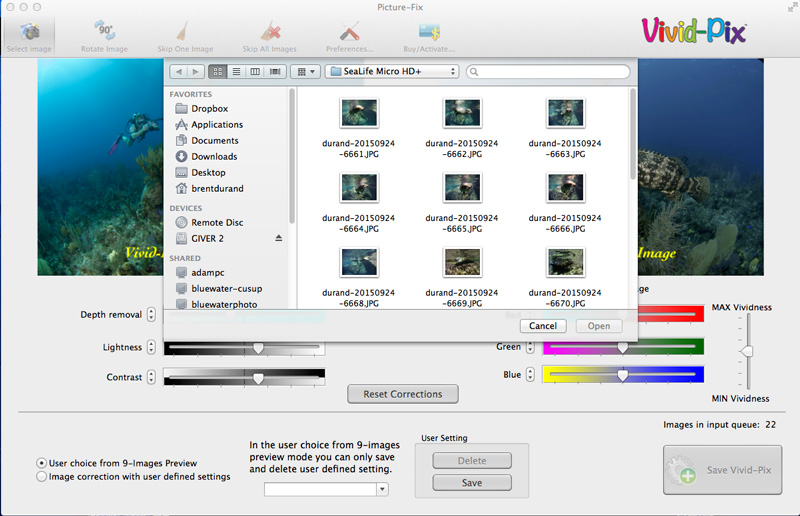
Import one or multiple photos. Just click “Select Image” in the upper left of the Vivid-Pix screen.
Step 2:
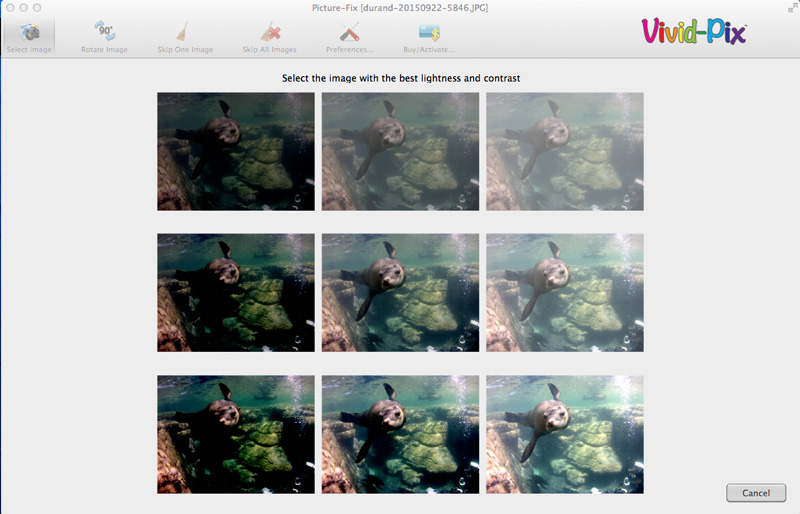
Select the edited version of the photo that presents what you feel is the best lightness and contrast. If you imported multiple photos, you will complete steps 3 and 4 for each photo, returning to this stage for each photo after that.
Step 3:
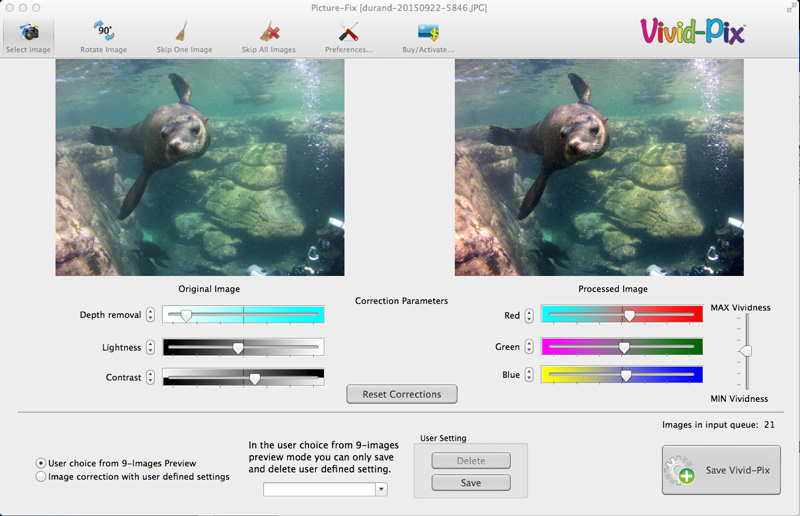
Here you are presented with a comparison of your original image to the edited image, where you can either click Save Vivid-Pix to save the image with the default edit or make some custom edits.
Step 4 (optional):
For those that wish to make further edits, there are 6 sliders to adjust. Each slider will increase or decrease the correction parameter as labled. If you play a bit too much and want to start over, you can hit the Reset Corrections button. Once you’re happy with the new image, click Save Vivid-Pix.
And that’s it – you’re done! This is where you will edit the next photo if you imported more than one.
Extra Tools in Vivid-Pix
Crop Image: Want to crop? Just click and drag a box around the section of the image you would like to keep. Upon release of the mouse button, the crop will be applied.
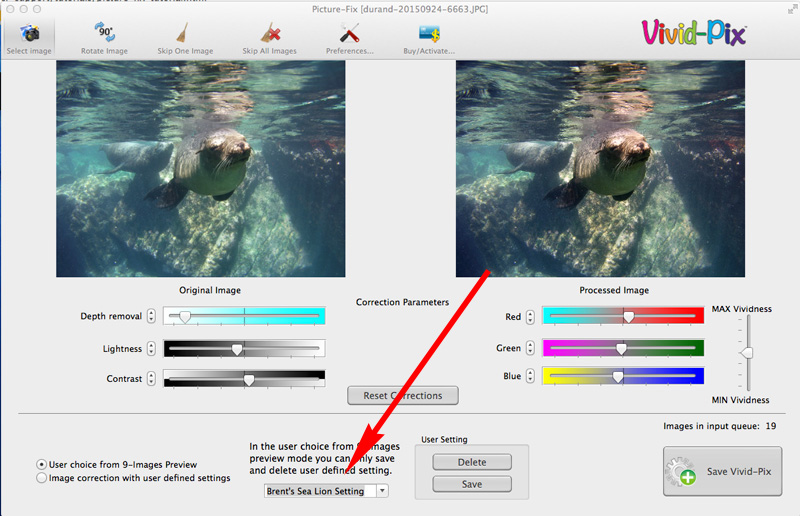
Create a User Defined Setting: If you create an edit you like and have many photos that need the exact same correction, simply save your current edit settings as a User Defined Setting. Then, when importing the remaining photos, just click the button for “Image correction with user defined settings” instead of the “User choice from 9-Images Preview”. Your custom settings will automatically be applied to the new photos.
The Vivid-Pix Results
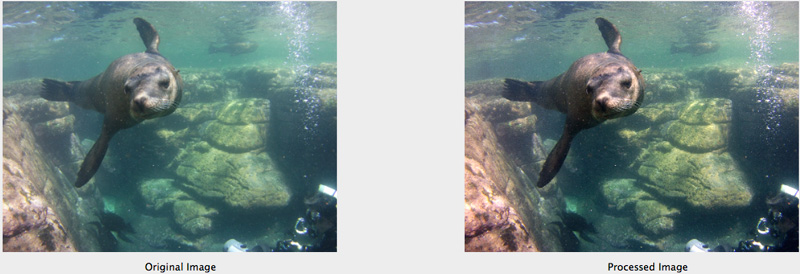
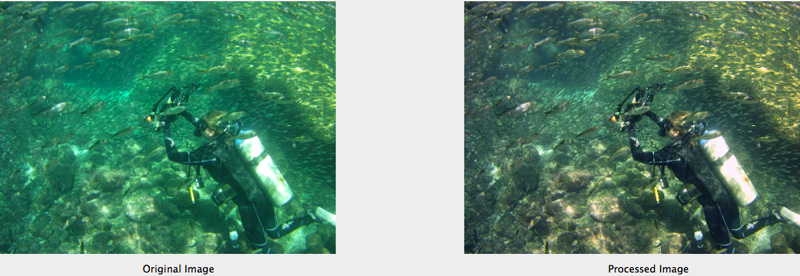
We can see in the sample photos below that the software does a great job editing my .jpg images. The images were recorded with the SeaLife Micro HD+ in a flat color setting – used so that I could have as much editing leeway as possible.


