Utilizing Instant Recall Modes on your dSLR
Take Advantage of Instant Recall Modes
Be prepared for that unexpected opportunity by programming your dSLR mode dial
By Michael Zeigler
Having recently acquired a Nikon D7000, I was eager to delve into the owner's manual to discover all things new. I just can't seem to put down manuals for some reason, and prefer that type of reading to anything else. Perhaps it's the scientist in me. My wife, a high school English teacher, just thinks I'm crazy. But I digress...
This interest in utilizing the user settings on my D7000 arose before a recent diving adventure to the oil rigs off the coast of Long Beach, CA. I have dived the rigs several times before, and know that being in the middle of the ocean, just about anything could meander by. A few months prior, our trip to the rigs was called off due to two things:
- Dense fog.
- Oil rig crew members spotted an 18' great white circling the rigs in search of a sea lion snack.
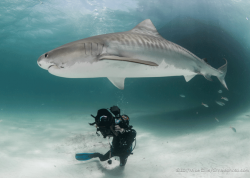
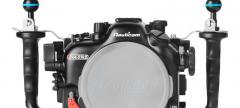
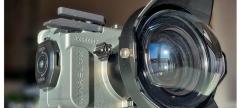
Ok, I could live with moving on to another dive site. I did, however, I think to myself, "Wow, it would be incredible (and terrifying) to see a white shark while diving the rigs." I needed to be prepared for this chance encounter with a turn of a knob on my Sea&Sea D7000 housing.

Mode dial on my Nikon D7000 showing the U1 and U2 settings.
Utilizing customized tools on your dSLR
One of the coolest features I've grown to love are, as Nikon calls them, User Settings (U1 & U2). Canon also has them on some dSLR models like the 7D. Canon refers to them as custom mode settings (C1, C2, C3). For the purposes of this article, I will refer to them as Instant Recall Modes (IRMs).
The awesome thing about these IRMs, is that it's almost like having two (or three) cameras in one, each one instantly presenting itself at the turn of a dial. Sweet! Once you've programmed a particular spot on the dial, all you have to do is turn it back at any time, even after you've turned off the camera, and you're ready to rock!
I have my U1 set to my default underwater wide-angle settings. So, after spending some time topside photographing our newborn daughter in Aperture Priority mode, I just turn the dial to U1 and I'm ready to hop on a boat and shoot wide-angle. No more remembering all the settings. Awesomeness!
My U1 settings for underwater wide-angle
- Manual Mode
- 1/125
- F8
- ISO 100
- Single spot focus (I prefer 11-points instead of all 39)
- Center-weighted metering (6mm)
- AF-S
- Assign AE-L/AF-L button: AF-ON (I use this for all my underwater shooting)
- Change main/sub: ON
- Electron configuration - circuitious

Control panel view of my starting wide-angle settings described above.
Now, in the process of previsualizing a chance encounter with a white shark on my trip to the oil rigs, I decided on the bank of settings below. Even though I didn't see one, I knew I was ready with the simple turn of a knob.
My U2 settings for wide-angle (for unexpected pelagic sightings)
- Aperture Priority Mode
- F8
- Minimum shutter speed set to 1/125 (to capture the action)
- this will only drop below 1/125 when the ISO needs to increase beyond 6400 or whatever you set for Max ISO
-
- Auto-ISO (set up to 6400)
- Auto-point focus
- AF-C
- Matrix metering
- Assign AE-L/AF-L button: AF-ON
- Change main/sub: OFF

Control panel view of my starting wide-angle settings for capturing an unexpected pelagic sighting as described above.
On a recent Underwater Photography Guide and Bluewater Photo workshop to the Sea of Cortez, many of our dives were spent snorkeling with whale sharks. In order to capture these large pelagics in shallow, sunny waters, some of us set our cameras to the settings I've listed below. Instead of having to remember these settings after spending time shooting macro or "regular" wide-angle, it would have been great to just turn the dial and be ready to go! (My Nikon D90 did not have IRMs).
Example settings for shooting whale sharks in La Paz
- Aperture Priority Mode
- F11
- Autofocus Mode: AF-C
- AF-Area Mode: Auto-area
- AF Release mode: CL at 3fps
- ISO: 640
- EV: -1

How to set your Instant Recall Modes
Please refer to your camera's user manual for more detailed information, as the following only pertains to the Nikon D7000. The U1 and U2 modes are really easy to set via the camera's menu. For D7000 users, simply go to Menu - Setup - Save user settings - Select U1 or U2 - Save settings. The camera's settings are now burnt into that spot on the dial.
*Super Sweet* Nikon's U1 and U2 settings save whatever tweaks you make to them, even if you turn off the power. For example, if I'm shooting wide-angle and need to bump up my ISO for the day to ISO 400, that change will remain even after turning my camera off in-between dives. To return to my default settings, I simply move the mode dial to another setting, then back to U1. Awe...wait for it...some! Yes, I say 'awesome' a lot.
Some aspects that your dSLR will not remember are listed below. I really don't think these are at the forefront of concern for many underwater photographers, but I wanted to mention them anyway.
Settings that your dSLR will NOT remember:
- File naming
- Storage folder
- Managing Picture Control
- Multiple exposure
- Interval timer shooting
- Auto ISO (Canon only)
- 'Tweaks' made to your IRMs when you power off your camera (Canon only)

I include "Save user settings" under My Menu so that I can make permanent adjustments to U1 and U2 and save the new settings easily. The menu settings above are my basic settings for shooting wide-angle underwater.
Just another tool for your underwater photography
"A photographer went to a socialite party in New York. As he entered the front door, the host said ‘I love your pictures – they’re wonderful; you must have a fantastic camera.’ He said nothing until dinner was finished, then: ‘That was a wonderful dinner; you must have a terrific stove.’"– Sam Haskins
I think the quote above exemplifies utilizing these IRMs. They are merely a tool which you, the artist, uses to create the image you have envisioned. These custom settings are absolutely useless unless you make a conscious decision to add these to your toolbox - then they are gold.
Previsualization has become a very important aspect to my approach to underwater photography. It is the act of visualizing the subject, moment, and presentation (lighting, composition, background) you want to achieve on your next dive. Imagine your subject, think about its colors, textures, potential backgrounds, and behavior. Plan out the best way to accomplish your shot.
I will be using these IRMs in my previsualization process for future dive trips. They may or may not play a role in each adventure, but I will at least consider their use. I encourage you to do the same.
About the author
 Michael Zeigler is editor-at-large for the Underwater Photography Guide, trip leader and instructor for Bluewater Photo, and is an AAUS Scientific Diver. Michael's underwater photography and blog can be seen at SeaInFocus.com.
Join Michael as he leads an amazing underwater photography workshop at the famous Wakatobi Dive Resort 11/21/13 - 12/2/13!
Further reading
Support the Underwater Photography Guide
Please support the Underwater Photography Guide by purchasing your underwater photography gear through our sister site, Bluewater Photo and Video. Click, or call them at (310) 633-5052 for expert advice!
RECOMMENDED ARTICLES
SUPPORT THE UNDERWATER PHOTOGRAPHY GUIDE:
The Best Service & Prices on u/w Photo Gear
 Visit Bluewater Photo & Video for all your underwater photography and video gear. Click, or call the team at (310) 633-5052 for expert advice!
The Best Pricing, Service & Expert Advice to Book your Dive Trips
 Bluewater Travel is your full-service scuba travel agency. Let our expert advisers plan and book your next dive vacation. Run by divers, for divers.


