Aquatica Sony A7R II Housing Review
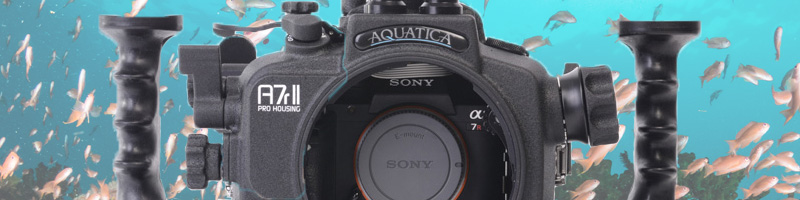
Aquatica waited. They were late to the party in releasing their housing for the much celebrated Sony A7RII. While other manufacturers raced each other to market with early A7 versions, Aquatica stayed cool, took a step back and looked more carefully at the A7 camera design. They watched the evolution of the A7 series become what it is today – a very noteworthy high performance camera. The payoff? They released a pro level housing for the Sony A7R II the first time out. No kits, no retrofits, no redesigns. They did it right the first time. Definitely worth the wait!
Designed for Serious Photographers
While other underwater housing manufacturers tried to design housings for the A7 series that focused on being small and compact, Aquatica took a different approach. Rather than try to make the housing really small, they opted instead for a slightly larger body that is still substantially smaller than most SLR housings. This has a two-fold benefit. First, it allowed the housing to accept all existing Aquatica ports and optical viewfinders, and second, the slightly larger platform offered much better stability underwater, yielding less camera shake when shooting finicky super high-resolution stills and video. So it’s true that bigger is better!
![]() Purchase the Aquatica A7RII Housing
Purchase the Aquatica A7RII Housing
Additional resources:
Sony a7R II Review for Underwater | Sony a7R II Settings Guide | Sony a7R II Best Video Settings

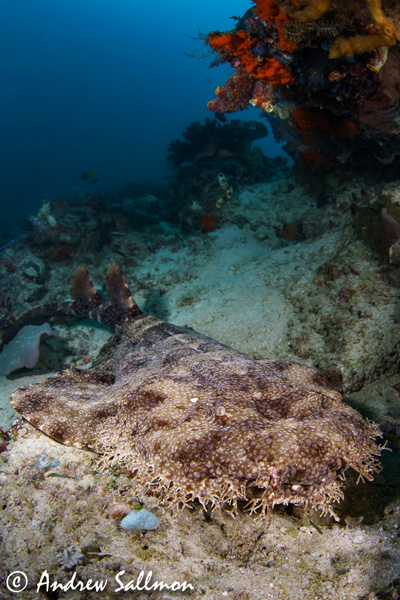
Photo left: Aquatica A7RII Housing, Canon 8-15mm fisheye with Metabones adapter. ISO 400, f/11, 1/250
Photo right: Aquatica A7RII Housing, Canon 8-15mm fisheye with Metabones adapter. ISO 200, f/11, 1/40
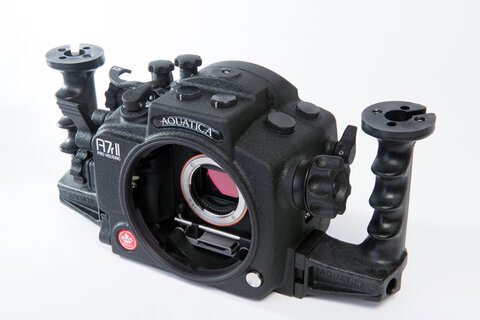
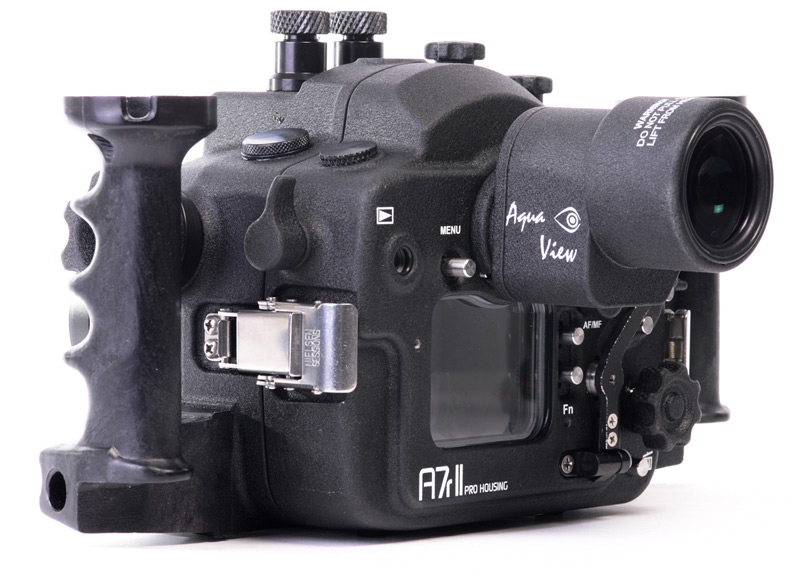
Housing Features
Grips – Aquatica’s great-fitting and comfortable grips are the same ones used on their SLR series housings for many years now. They are easy to hold with gloves on and have a smooth surface that will not rub against bare hands.
Camera Tray – A very well designed quick-release tray that indexes easily over two stainless steel rods and keeps the camera located rock-solid. The tray has a clever spring-loaded release tab that is easy to use and positively click locks. No accidental release of the camera and fewer alignment issues with controls.
External Port Release Lever – Sits low on the right and is tucked out of the way to prevent accidental damage caused by rough handling, or getting rolled in surf.
External Lens Release Button – A stainless steel button located on the lower left side recessed below the port mount so it does not interfere with port mounting.
Sacrificial Zinc Anodes – Two zinc anodes located on the bottom of the housing, one for the front and one for the rear half.
Vacuum and Moisture Sensor System – The housing comes standard with Aquatica’s built-in vacuum and moisture sensor circuit. A small window on the housing back with an LED light indicates good vacuum with a green light, or leak with a red light. A vacuum pump and external valve hardware version is also factory available at a modest cost and is recommended. My test housing was fitted this way.
Controls
The Aquatica A7RII housing has every control necessary to create world-class images. Most are located so that hands do not have to leave the grips, and with a few dives for familiarization my eye did not need to leave the viewfinder. Here’s my short list of the most important controls.
Housing Left Side
Zoom/Focus – A large, easily reached knob by the left index finger and middle finger together allows zoom/focus control while still maintaining hold of the left grip. The control has the added benefit of being spring loaded so it will disengage with the internal gears for easier camera mounting.
Review Lever – “Chimping” is made quick and easy by a small lever mounted high on the left that is thumb activated without removing your hand from the left grip.
Housing Right Side
Shutter Release Lever – The shutter release lever has a large (and easy to reach with the index finger) surface and a very nice progressive pull to it. It is easy to find while looking through the viewfinder so there won’t be any “hair trigger” shots.
Front Dial Control Knob – This controls aperture (can be set for shutter speed control too) and is reachable from the right grip by holding the grip low and rotating it with middle and ring fingers.
Rear Dial Control Knob – This controls shutter speed (can be set for aperture control too) and was easy to reach with the right thumb while maintaining a grip on the handle.
Video Record Lever – This is located under the Rear Dial Control and tucked away so it doesn’t interfere with still shooting. It was reachable by thumb while maintaining a slight low grip on the right side.
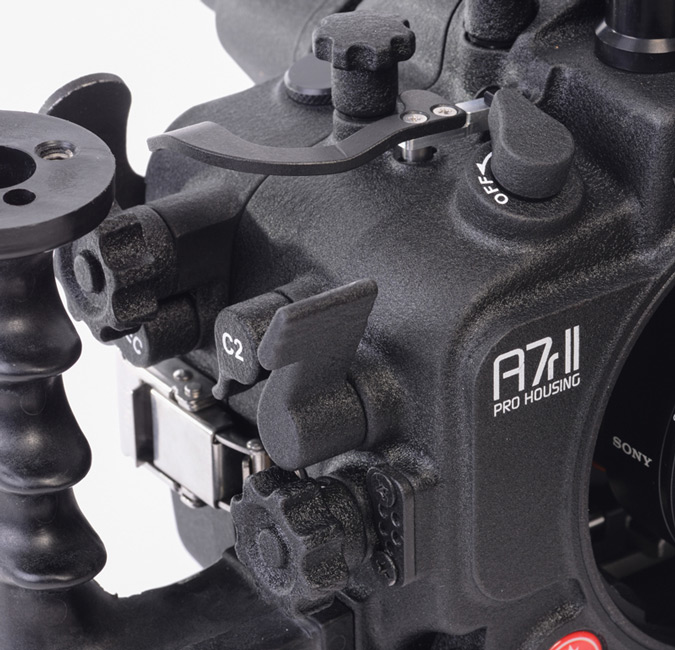
Housing Top
On/Off Lever – A large easy to access on/off lever sits on the top right.
Mode Dial Access Knob – On the top right near the viewfinder.
Exposure Compensation Control Knob – On the top right next to the Mode Dial Knob
C1 lever – A special lever controls the C1 function control. It is primarily used to toggle between the Electronic Viewfinder (EVF) and the rear LCD. This was a very welcome control as it made reviewing images and changing back to the EVF quick and easy. Housings without this feature are difficult and slow to use. The C1 lever is easily right thumb accessible without releasing the right grip.
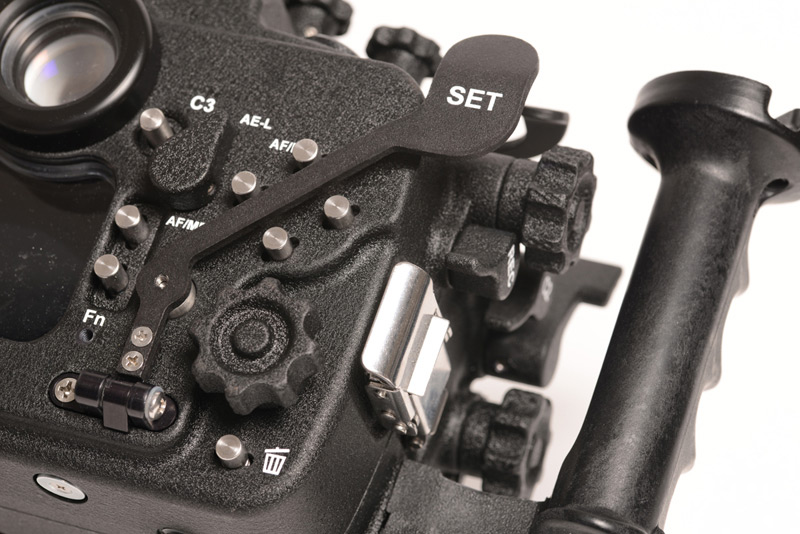
Housing Back
Set Lever – A large very conspicuous lever with the word set on it is easily reached by the right thumb while still maintaining hold on the right grip. It activates the center rotary dial set button. This is a must-have control for anything requiring fast changes in menu.
Control Wheel (Rotary Dial) Access Knob – A large knob on the lower right allows access and scroll control. It is reachable by right thumb but requires the right grip to be partially released.
ISO Button – Is at the right (3 o’clock position) stainless steel button (of 4 buttons) that when depressed, allows access to ISO. It is reachable from the right by thumb. Note that the Control Wheel (Rotary Dial) Knob listed above must be rotated after the button is pushed. The ISO button is directly above the Control Wheel Knob, so it is easy to access and then change ISO with this housing.
There are other controls including two more assignable C buttons. A lever for C2 on the right side and a button for C3 on the back, an AE-L AF/MF lever and set button, menu and delete button, and an Fn button all on the back.
Diving the Aquatica A7RII Housing
Like Aquatica, I waited too. I am not one to adapt early, I am “old school” (originally a film guy), but had heard great things about the Sony A7R II camera, so was excited to try one out. Being a “Canon guy” too, I was especially excited at the prospect that I would be able to use my Canon lenses (with an adapter). I had been looking at A7RII housings, but none currently had all the controls that I required, nor offered them in an easy to reach design. When Aquatica announced the A7RII all that suddenly changed though. So, I took a new Aquatica A7RII housing and Sony A7RII camera with a Metabones MkIV adapter, along with my trusty Canon 8-15L f4 zoom and 100L f2.8 IS lenses on a trip to Raja Ampat, Indonesia to give it a try. Here’s what I found out.

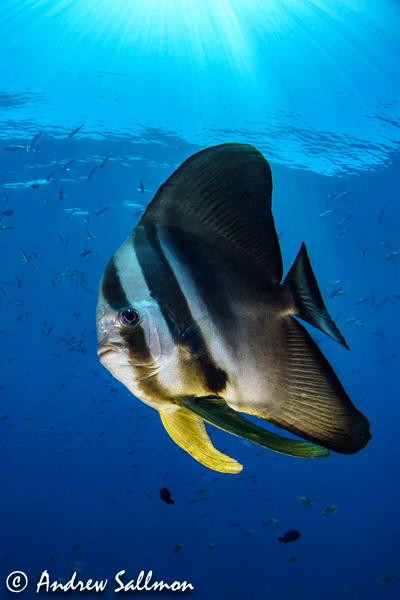
Photo left: Aquatica A7RII Housing, Canon 8-15mm fisheye w/ Metabones adapter. ISO 400, f/22, 1/250
Photo right: Aquatica A7RII Housing, Canon 8-15mm fisheye w/ Metabones adapter. ISO 400, f/18, 1/250
Viewfinders
Not having an optical viewfinder was a big change for me at first, but once used to the electronic viewfinder I found that the display, though smaller than my DSLR, was more like looking at the image on a computer screen. I still prefer the optical VF on my Canon 5D Mark III, but the EVF on the Sony had some good points that my Canon did not. It gave me a more accurate display of what the final image would look like and also adjusted the available light levels. The Aquatica A7RII housing is compatible with Aquatica’s very easy to use 180 viewfinder and the magnified view that it provides really helped me to make the transition from optical to electronic finder much easier. For SLR shooters thinking about switching to an A7RII system, I would highly recommend the 180 VF. For compact and mirrorless shooters upgrading to the A7RII, it is still a very useful accessory and I would also recommend it, if the budget allows.
Weight and Balance
The port system for Aquatica housings is vast. I chose the Aquatica 6” acrylic dome for the Canon 8-15mm for its compactness, ease of travel and movement underwater because I knew that I’d encounter some high current dives in Raja Ampat. For the Canon 100mm macro, Aquatica’s new conical shaped mini macro port (with an extension ring) did the job well. Aquatica also provided their new ACU close up lens kit with a double flip holder and both a +5 and +10 wet diopter. With a 100mm macro lens and all this glass up front I was a little worried that the system would nose dive, but to my surprise it remained fairly well balanced underwater in the macro configuration and did not pitch down. The 6” dome (being acrylic) did not add appreciable weight, even with the extension and my heavy 8-15 zoom, so was also well balanced. I added about 40 ounces of positive buoyancy to my strobe arms that helped offset the weight and the little housing was by my estimate just about 1 lb. negative in wide configuration and a little more in macro – maybe about 1.5 lbs. Nicely balanced, yet still able to set it down on the bottom if necessary, without blowing away in the current.
Housing In Use
Raja Ampat delivered and I was able to put the system through its paces. I was challenged with strong nutrient rich currents and quickly changing torrential down pours to partly cloudy to full sunny skies all in the length of one dive. With underwater visibility ranging from 20’ to 100’, the environment ran the little Aquatica A7RII housing through the gauntlet for 10 days straight. I shot lots of reef scenics, schooling fish, wobbegongs, manta rays and got into some great macro at night. The housing really shined when I needed to access controls fast. It is well designed and rugged. All the controls necessary to make images in rapidly changing situations, like current, clouds to sun and vice-a-versa, and fast approaching animals worked consistently, were smooth and efficient. The design team and engineers at Aquatica are to be applauded and should take a bow as their well thought out housing shows off their understanding of just what it takes to produce a high quality product that works and that has the quick reflexes a pro requires when on assignment. I am a fan!
I enjoyed my time shooting with the Aquatica A7RII housing and look forward to more time in the water with the system. A couple of things worthy of note for anyone intending to use Canon macro lenses with this camera: don’t! It requires an adapter and from my online research it appeared that the Metabones Mark IV adapter for Canon EF (full frame) to Sony E-Mount would be exactly what I needed, and it was. On the Metabones website it lists the Canon 100mm f2.8L macro IS as compatible, and it worked fine in the office pre-trip. Once underwater, however, it would focus, but not lock on and hold, hunting badly instead. It was so frustrating that I finally gave up using it altogether. Metabones does note that longer telephoto lenses will likely hunt more than others and I did not experience any hunting with my 8-15mm. So for a Canon lens user I have to recommend that for macro at least, to stay with the Sony 90mm macro G OSS lens. I haven’t been able to try one yet, but have heard from those using it that it focuses just fine. One other point to make for Canon lens users if you plan to do video capture with this camera. On the Metabones website it also notes that in video capture mode the phase detection autofocus will not work and it will be contrast based AF only. To me, that would kind of defeat the purpose of this camera with Canon lenses for video shooters. So for video the Sony 16-35 or their 28mm with wide adapter are better choices. Stills were fine with the Canon 8-15 and many other lenses are also listed as compatible.

Conclusion
The Aquatica A7RII housing is one of the finest currently available for the Sony A7RII camera. It offers the shooter professional level control, is well balanced and very rugged. My test housing had no visible scratches after being flogged for 10 days in high current and bouncing around the bottom of small inflatables. Aquatica’s powder coated exterior is tough as nails and probably the reason that many tech, wreck, cave divers and the U.S. Navy have designated Aquatica as their number one choice for the everyday tough environments they use them in. That and it is manufactured in nearby in Canada using all USA-made aluminum marine alloy. The housing’s vacuum system was simple and worked well everyday. I left it on purposely overnight to see if it would “eat” batteries. It remained on all day for 10 days of diving and the battery never blinked.
Overall the Aquatica A7RII housing’s build quality, reflexive easy to use control set, underwater balance and rugged exterior make this a “two-thumbs up” housing for the Sony A7RII. It is priced very competitively too.
![]() Purchase the Aquatica A7RII Housing
Purchase the Aquatica A7RII Housing
Additional resources:
Sony a7R II Review for Underwater | Sony a7R II Settings Guide | Sony a7R II Best Video Settings


