How to Improve your Fish Portraits

A portrait is a painting, photograph, sculpture, or other artistic representation of a person, in which the face and its expression is predominant. The intent is to display the likeness, personality, and even the mood of the person, says Wikipedia.
Fish portraits go by the same definition, and you’ve seen the kind of images we’re talking about time and time again in scuba magazines and online competitions: The tiny goby or pygmy seahorse staring you right in the eye, beautifully framed – not too much else than a curious and funny face.
But every time you try to do the same you end up with an unsharp image with lots of backscatter, and the fish is looking timidly away. How do you get to the point where you’re able to capture the details, the expression and the curiosity of the fish? Luckily, there are a few techniques you can employ to get to where it matters – when you press the shutter and capture a beautiful portrait.
One Task, Many Challenges
There are a great many aspects to shooting fish portraits. Needless to say you need to have a steady hand, you need to know how to get close enough, and know what to do when you get there. Camera and strobe settings must be second nature, otherwise you won’t be able to concentrate enough on your subject. When you’re in the right position your only task should be to press the shutter every time the fish is in exactly the right position.

You also need to choose your fish carefully – it takes two to tango. The smaller the fish is, the harder the shot gets. Fish have a quick and easy way to avoid predators: They swim away. Since divers are usually perceived as a threat, they tend to keep their distance - especially true for free-swimming species.
Going for an easier shot may be a good idea to begin with. A fish that lives on the bottom or rests on coral or rocks is often a good choice, and species depending on camouflage are often a lot easier to work with than a lot of other fish. Scorpionfish, sculpins, frogfish and many flatfish seem to believe that their camouflage is so good that you cannot see them, and are less inclined to take off. Blennies living in a hole or clownfish in an anemone are also good choices, as they don’t want to abandon their home just because they feel a little intimidated. Often the latter will attack rather than hide.

Stay Calm and Collected
In order to get a good portrait you want to be more or less in front of your finned friend, which will often make it want to leave the scene: the quickest way for a fish to escape is going forward - and you’re blocking the way. This will usually make the fish turn away from you to have a line of retreat. Some fish, like frogfish, also look beautiful from the side and this may be a viable approach if you cannot get in front of them.
To be able to get close enough to shoot a portrait, you have to make the fish believe you’re not an immediate threat. To build trust you need to patient and try to inch closer to the fish without making any sudden movements. Try not to bump into the bottom, as many species are sensitive to vibration and will take off immediately if they think T-Rex is coming.
You also want to avoid coming in too fast and having to stop suddenly, as your “bow wave” will create water pressure which scares the fish. Also, your strobes must be positioned where you want them before approaching to avoid flailing arms – another sure way to scare your subject well into next week.


Fish Hypnosis
I find that shooting some “dummy” images from a distance and as I’m getting closer seems to make the fish get used to the strobes going off, making it less timid. If you wait until you’re exactly in the right spot before you shoot, your first flash may literally scare the living daylights out of your subject.
Going “upstream”, meaning against the current, is also a very good idea. If you touch the bottom any debris will drift away behind you instead of ruining your second, third and so on images with backscatter.
Once you’re in front of the fish and have started shooting, you will often find that the fish is looking anywhere but in your lens. Fish tend to get skittish when you get in their face, and will be looking for a safe exit in case things get too hairy. There’s a neat little trick you can use to remedy this. Fish are very wary of movement, which you can take advantage of: Hold your camera with the right hand, ready to push the trigger, while you quickly snap the fingers of your left hand above the camera. The fish will automatically look to where the sudden movement is – and that’s when you snap your shot!

Look for Opportunity
Shooting fish portraits is less about photography and more about diving technique, a few clever tricks and a lot of patience. Don’t underestimate knowing your camera settings by heart, and know that finding the good opportunities and being able to exploit them properly is what will bag you those brilliant, jaw-dropping portraits that make your peers drool and your mum write proud (and slightly embarrassing) comments on Facebook.
Photographically, the images are quite straightforward: You want the face of the fish to fill as much of the frame as possible. You can play with different angles – full frontal, from the side, at an angle or even from above (which works great on some flatfish). You can also play with depth of field to get a nice bokeh or try to get as much of the fish sharp as possible, but with the smaller subjects the lens often decides for you. Shooting fish that perch on a coral or rock allows you to use the water for a silky black or heavenly blue backdrop depending on your F-stop.
You should also try to vary your distance: Some fish work really well when you’re extremely close-up, while others deserve a little bit more environment. Sometimes the fish is too small or too timid to give you a choice – but shooting different shots if you can is always a good idea. Sometimes you’ll be surprised which image is the best in a series.


Free-Swimming Fish
If you take your time, you’ll often find that fish have a territory. Many tend to patrol around their nest, algae garden or anemone – and they may have an almost fixed route. This is something you can exploit if you take the time to observe the fish long enough to see the pattern. Find a spot where the fish is coming towards you, move your camera accordingly and just wait for the fish to swim into the viewfinder. Manual focus may be necessary to get these shots – you will have hundreds of throwaways, but hopefully also a sharp-as-tack gem on the memory card when you’re done.
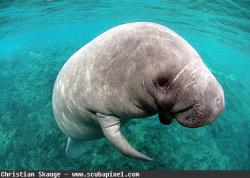
With slightly bigger fish, cropping it so tight that you actually only show a part of the face may also be very effective – and perhaps a bit different. Shooting portraits of big fish, sharks, dolphins, manatees and the like basically adheres to the same rules, at least in terms of what fills your frame.
The challenge here is that they move a lot more and a lot faster, and getting in front may be all but impossible. Since this also often includes a wide-angle lens and trickier strobe positioning it’s really hard work – a lot of swimming is often required. There are no shortcuts to great portraits of bigger animals, unless you use bait or somehow manage to get the animal interested in you rather than the other way around.


Get the Shot
One of the few things I find easy about shooting fish portraits is the choice of lens: You’ll want to have good working distance, so you don’t have to be two centimeters away from the fish to fill the frame. For Canon shooters this means using a 100mm macro, while Nikonians will definitely benefit from using the 105mm VR – for both bottom-dwellers and especially free-swimming species.
Personally, I tend to shoot a lot of my fish portraits in portrait (pardon the pun) or tall format – not because it’s easier, but simply because I find that it often fits the subject matter better. It’s easier to fill the frame and background clutter is reduced to a minimum.
No matter how you choose to shoot your fish portrait, the important thing is getting the eyes sharp above all else, and having the fish look into the camera. This provides a special connection between the viewer and the animal because it looks back at him or her, interested instead of being scared - it looks natural instead of intrusive.
Don’t expect it to come together the first, second or third time you try - shooting fish portraits takes practice on many levels. Try to keep the above mentioned techniques in mind next time you see a beautiful hawkfish perched on a piece of coral – it will give you a better shot at getting the shot!

Further Reading
RECOMMENDED ARTICLES
SUPPORT THE UNDERWATER PHOTOGRAPHY GUIDE:
The Best Service & Prices on u/w Photo Gear
 Visit Bluewater Photo & Video for all your underwater photography and video gear. Click, or call the team at (310) 633-5052 for expert advice!
The Best Pricing, Service & Expert Advice to Book your Dive Trips
 Bluewater Travel is your full-service scuba travel agency. Let our expert advisers plan and book your next dive vacation. Run by divers, for divers.


