5 Best Underwater Video Editing Tips
You’ve started taking underwater video and are slowly accumulating hours of raw footage on your hard drive – now what?
It turns out actually shooting underwater video is only the beginning: you still have to edit it into something people will actually want to watch! A good underwater video is more than just a string of clips set to music: it tells a story.
This article goes over some basic editing principles that will help turn your growing collection of underwater video clips into interesting videos.
#1: Plan Ahead
Editing starts before you even get in the water. The best underwater videos (just like the best topside videos) are planned in advance, including scripts and shot lists. If you do most of your shooting while traveling on vacation, you may not have the luxury of going diving again and again until you get exactly the shot you want. But even then, it’s possible to prepare the basic framework of a video based on shots you know you can get. One of my first videos, Dive Buddies, won the Kona Classic competition this way: the footage is nothing special, but the story makes it interesting.
Click below to watch Dive Buddies Video:
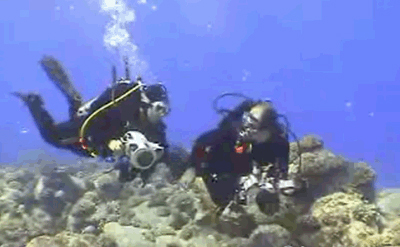
When you’re underwater, remember to “shoot to edit.” Always be thinking about what you’ll need when you’re editing: leave handles at the beginning and ends of your clips; take long enough shots of your subject with no shaking or zooming; get wide, medium and close shots of the subject whenever possible. Don’t forget to shoot some “B-roll” footage: divers gearing up and getting in and out of the water; establishing shots of the location above and below water; wide angle pans of the underwater scenery.
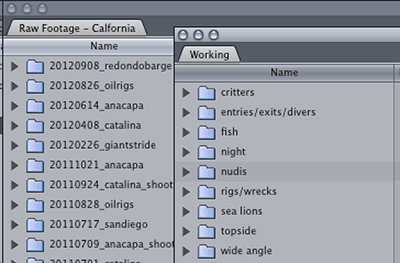
Once you start importing the footage into your editing software, make sure to name, tag, and organize clips in a way that works for you. Shots that don’t make it into the video you’re working on right now may turn out to be just what you need to fill in a gap in next year’s project, so make sure they’re all easy to find! I usually organize clips by trip as I go, and also keep a catalog of my favorite clips organized by subject (wrecks, kelp, nudibranchs, sea lions, etc.), which I may dip back into once I have “enough” footage of a subject to make a video.
#2: Keep it Short and Sweet
You just came back from your vacation to the tropics with hours of amazing footage that you can’t wait to show your friends! But trust me: not even your loving family members want to sit through it all, even after you’ve narrowed it down to just the “keepers.” My rule of thumb is to keep all my videos between two and five minutes. This keeps things well within the attention span of your friends and family members, and has the added bonus of being within time limits for most underwater video competitions.
Be absolutely ruthless about removing clips that don’t contribute to the final product. If you have ten amazing shots of the same subject, pick one. Slightly shaky, out of focus shot of a critter you really, really wanted to include in the video? Trust me, it’ll only drag down the rest of the video if you leave it in. Sometimes a terrific shot just doesn’t quite fit anywhere in the video you’re working on; don’t include it just because you can’t bear to leave it out. “Leftover” clips like this can still be great for posting to Facebook or emailing to your dive buddies, and you might find a place for them in another video someday!
I also recommend keeping things simple: if you have a good story and halfway-decent footage, you don’t need fancy effects. Throwing lots of different styles of transitions in, or testing out all the iMovie effects and filters can backfire and make your video come off amateurish.
#3: Audio is Important
Some subjects lend themselves better to a “music video” style, others to a “documentary style” with more narration. Decide early in the editing process which one you’re aiming for.
Start cutting to music early in the editing process, as it will often inform the placement of your edits. Once a music track is laid down you may find obvious places where shifting a clip makes the action line up just right with something in the music. Be careful not to go overboard with timing cuts to land on beats in the music; it’s useful for major transitions between sections but can get distracting and dull if overused.
I start by using a “temp track”, a piece of music out of my iTunes library that has the overall sound and tempo that I need. Once I’m farther along in the editing process, I replace this with royalty-free music that will be the final score, and then I make additional edits to the video based on the music.
There are several ways to get your hands on music that can be legally used as your soundtrack. If you search for “royalty-free music,” quite a few options will turn up, such as royalfreemusic.com, JewelBeat, or Audio Jungle.
You can also try arranging your own score using a tool like Apple’s GarageBand; I put together the music for A Really Good Day over a weekend using the GarageBand loops.
Click below to watch A Really Good Day video:
A Really Good Day – Anacapa, 2007
If you’re narrating your video, it’s worth investing in a decent microphone to record voiceover. (Search for “podcasting microphone” on Amazon to see quite a few options in the $50-$130 range.) Speak more slowly and clearly than usual, and pronounce consonants gently to avoid popping and clicking sounds. After watching Kona After Dark, my own mother asked me who does the voiceover for my videos – it’s me, but at a much slower pace than real life! Record a few different versions of the narration, read in slightly different styles, so you can decide later what works best.
Click below to watch Kona After Dark video:
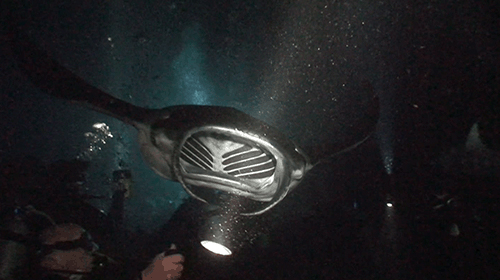
Kona After Dark – 2009
#4: Don’t Skimp on the Finishing Touches
I’ve probably devoted the most hours of editing time to tweaking the smallest details of my videos: deciding when to use hard cuts versus fades; setting fade lengths; making slight adjustments to the in and out points of clips. Seemingly minor things can have a surprisingly large effect on the overall feel of your finished product, and on how professional it looks.
For underwater video, it’s especially important to apply some color correction. Obviously it’s best to get good white balance while you’re shooting, but learning how to use the basic color correction tools in your video editing software will help you salvage the occasional too-red clip, or match the color balance of clips taken at different times and places.
Finally, don’t forget the titles! Your editing software will have several ways to generate titles and text, or you can get a little fancier with software like Motion or After Effects. If you plan to enter your video in competitions, don’t forget to make a version where the title cards do not include your name. If your video includes lots of interesting critters, like this Philippines video, think about including some subtitles to keep your friends from constantly interrupting viewings to ask what’s on the screen.
Click below to watch The Philippines: Beauties & Beasts video:
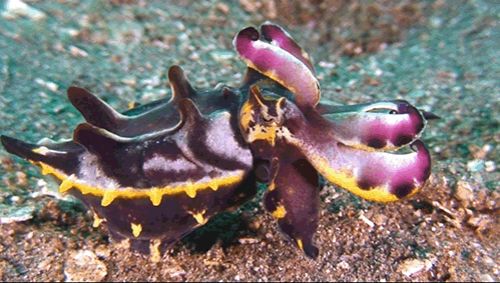
The Philippines: Beauties & Beasts – 2010
#5: Share!
Far too many videographers take hours and hours of terrific footage… which then languishes on their hard drive, forever unwatched. Don’t be that person: share your work! Whether it’s a carefully-planned and edited, competition-winning video, or just a few clips from today’s trip that you want your friends to see, get it out there!
Your editing program will have multiple options for outputting or sharing a video, so think about where it’s going before you pick a setting (if you’re burning to BluRay you want full quality; uploading to Facebook can and should be much smaller and compressed). Experiment with different settings for your software to find out what makes the best combination of file size and video quality for each use case.
Keep an eye on underwater photography websites (like The Underwater Photography Guide!) for news of upcoming competitions. Most of them include one or two video categories, and trust me: you DO have a chance at winning, but only if you enter!


