Shallow Depth of Field Underwater
Shallow Depth of Field Underwater
Settings, Shooting Tips, Compositions, Focusing & More
Text and Photos By Victor Tang
Most new underwater photographers learn quickly that capturing sharp images of subjects is essential. When I first started shooting, internet research led me to realize that one of the best ways to ensure sharp photos is to have as much depth of field (the extent of the photo that is in focus) as possible, which led me to use an aperture of F8 on my Canon G12 almost all the time when shooting macro. F8, along with a fast shutter speed of 1/250s, became my default setting as I happily shot away with my Canon G12. That magic setting was bumped up to F22 after upgrading to a DSLR with larger image sensor.
It was not long before I started to be transfixed by photos where only select areas of the macro subject was in sharp focus, drawing the viewer to appreciate that part of the marine creature and presenting it in a new light. I had already been experimenting with these focal points and soon realized that the technique I was applying was a shallow depth of field (DOF). I now use the technique frequently to add some fresh dimension to my dive trip portfolios.
Preparing To Shoot Shallow DOF
Taking photos with a shallow DOF is essentially normal macro photography but with a few changes. Below are some tips to help make the learning curve less challenging:
- POWER DOWN YOUR STROBES!!! This point can not be emphasized enough. Creating a shallow DOF requires aperture settings that are much wider than standard macro photography, and that means more light will reach the image sensor. Using the strobe power settings from an F22 shot will guarantee a grossly overexposed image when shooting at much shallower depths of field (a result of the wider aperture). Start off with the strobe power settings between the minimum and one to two steps stronger until you can anticipate the power needed.
- It is very hard to get a black background. Shooting at wide apertures means that more ambient light will be present in the shot, especially in DSLR systems where there is a limit to the shutter speed when using flash (remember, shutter speed controls ambient light). More often than not, the area behind the subject will be visible.
- Try to compose the image with as much depth as possible. In other words, “Fish ID” side profile compositions may not work because the bulk of the subject will likely be in the same plane of focus, resulting in minimal depth. Head-on facial portraits work the best since most of the subject's body will be behind the thin plane of focus, ensuring that it creates depth and forms a blurred background (bokeh).
- Move the camera’s focus points around the frame. Shooting with shallow depths of field allows very little leeway in placement of the focal point in order to have the correct area in focus, whereas deeper DOFs allow much more leeway in placing the focal point before the critical area becomes noticeably out of focus.
Keep these things in mind when working with shallow depth of field on your next macro dive!
5 Common Subjects for Shallow DOF
Capturing interesting photos of subjects with a shallow DOF get easier with practice. Here are some subjects that can easily be found on many reefs, allowing underwater photographers to track their progress and improvement:
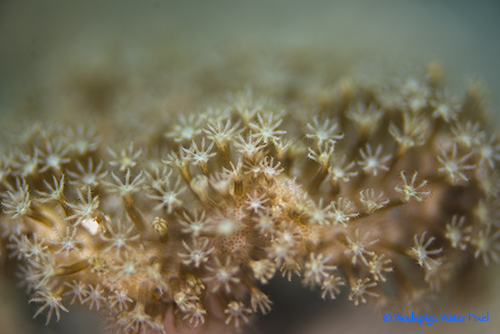
1) Corals and Sedentary Worms
The single greatest advantage of shooting these stalwarts of the reef with a shallow DOF is that they tend to stick around for the whole dive (and then some). This allows the photographer to get a feel of how different aperture settings will affect the results of the shot without fear of the worms or corals scooting away like marine creatures tend to do.
A good learning exercise is to start off with the widest aperture and progressively take shots with smaller and smaller apertures to better appreciate how different settings will affect the image. This is also a good opportunity to play around with strobe settings to get a feel of how much flash power is needed to attain optimum exposure at each setting. One might think this a waste of a dive, but this understanding of aperture can go a long way to reducing the time needed to get that perfect shot with more skittish subjects.
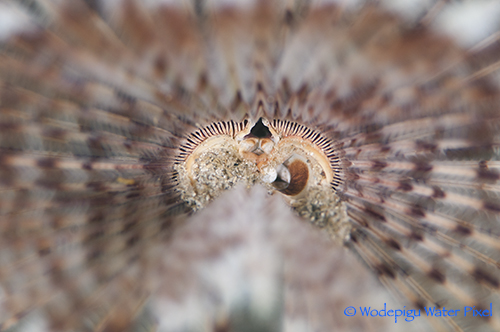
2) Lizardfish
As ambush predators, they rely on the art of inactivity to feed themselves and are some of the best candidates for shooting shallow DOF. The lizardfish’s flat and sharply tapered anatomy has eyes perched at the top of the body, and more often than not there is nothing directly behind the eyes, making it easier to create depth.
Lizardfishes, however, are slightly more skittish than other ambush predators. As a result, they have to be approached slowly and with care. They tend to be pretty sizable, so it's easy to use a longer focal length lens like a 105mm to fill the frame and still be far enough away not to scare them off.
Lizardfish. Nikon 105VR, 2 Sea & Sea YS-D1s. ISO200, F8, 1/320s.
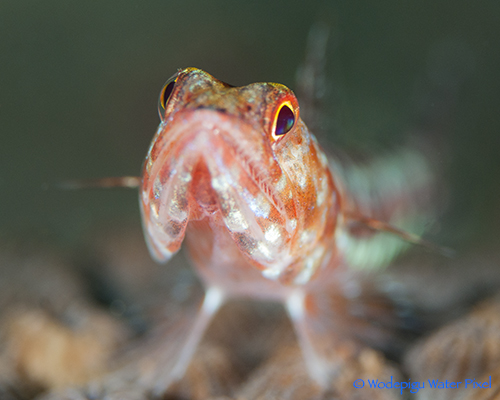
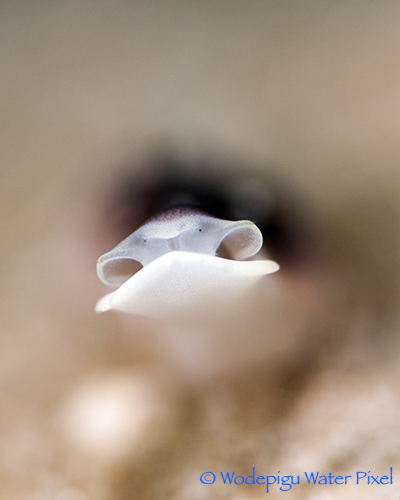
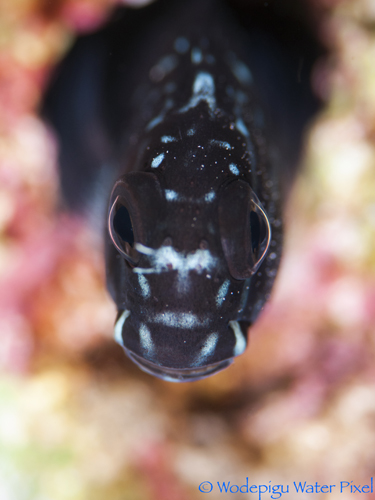
3) Yellow Tail Blenny
This particular species, commonly found in little nooks and crannies in the reef, is by far the least camera shy of the Blennies. It may scurry back down its little refuge if approached too aggressively, but more often than not they come back out to stare right at the lens port as if hypnotized by their own reflection. I have seen lens ports come very close to the Yellow Tail Blenny without them flinching, so shorter focal length lenses like a 60mm can be deployed quite easily.
One potential downside is that the holes they reside in tend to be “flat” in nature, which may lead to a distracting background. This is where the Blenny’s friendliness can come in handy. If you find the Yellow Tail Blenny to close to the entrance of its hole, retreat a little, stay still and soon it may extend itself out of the hole and towards you! One can then move slowly closer to frame the Blenny and blur the background more. The transparent rims of its eyes form an integral part of the image, thus for best results try to focus on the rims and not the round black pupil.
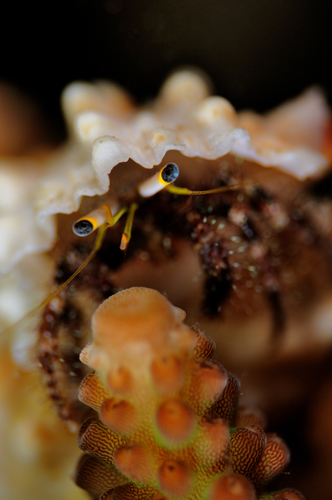
4) Hermit Crabs
Hermit Crabs lend themselves very nicely to shallow DOF photography because of the uniqueness of their eyes. They stick out far from the body, helping the photographer immensely to find the distance to blur the background. There is just one pretty dampening downside: the eyes of the hermit crab are tiny and they move around a lot!
An effective method for shooting shallow DOF with a hermit crab is to first watch the crab and compose your background. Think of where the eyes should be in the image and slowly observe the crab's eye movements to determine where they usually stop. Next, place the focus point at that spot, making adjustments to framing as necessary. Then it’s just a matter of patience and seizing the chance to take the shot when everything is lined up. This may take some time to achieve and a bit of luck is needed, but well worth the effort. Hermit crabs' mainly sedentary nature means a 60mm lens may suffice, although a longer focal length could be just the thing to accord them enough personal space to really come out of their shells.
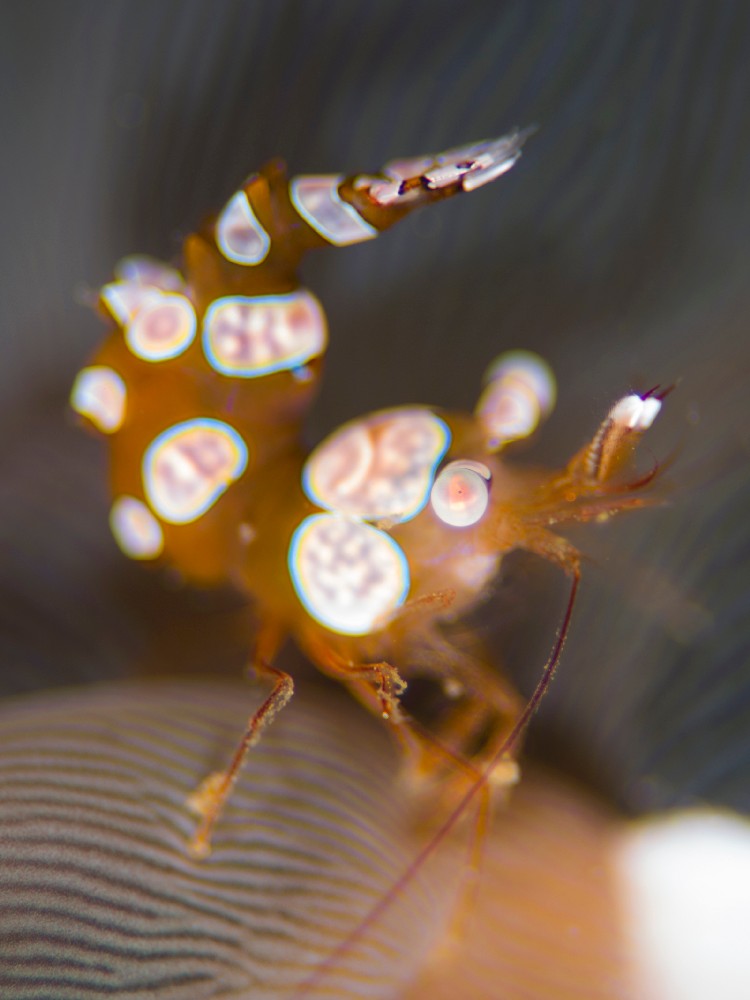
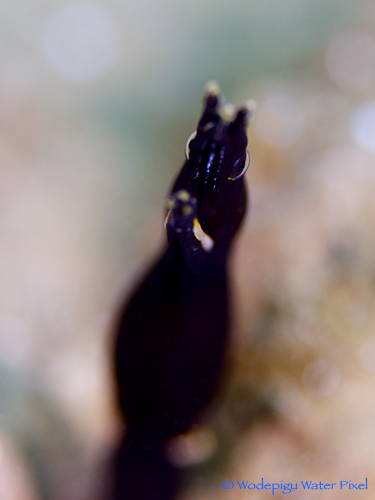
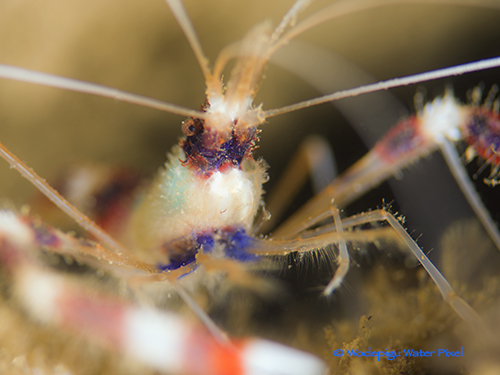
5) Banded Coral Shrimp
These essential cleaner shrimps, mainly found in crevices on the reef or beneath human rubbish like tires, serve up something interesting and versatile for shallow DOF photography. Banded Coral Shrimp eyes are situated more or less in the center of the creature lengthwise. This means that we can create depth, not just in the background with the shrimp’s body, but also have a strong foreground with its claws out in front.
Banded Coral Shrimps do pose some challenges for underwater macro photography. They tend to prefer the comforts of their crevices when not out cleaning, and when they do come onto the reef they tend to move all over the place, forcing the photographer to react quickly. Trying to get their tiny eyes in focus was just not hard enough! This is definitely a job for a 100mm macro lens, as the shrimps’ long antennae can sense you at a distance and send them into flight mode.
An Essential Skill In The Toolbox
The underwater world is full of the weird and wonderful, with marine life displaying an array of abilities and adaptations that simply boggle the mind. Using a shallow depth of field to isolate and feature these facets of the deep is undoubtedly one of the most effective methods an underwater photographer can use to showcase their beauty to the masses. There are other options in macro photography, but mastery of this technique will open up new perspectives and opportunities, and it has always been but a command dial away.
About the Author
 Victor Tang is the founder of Wodepigu Water Pixel, an adventure dive company and photography consultancy with a nose for off the beaten track dive destinations. When not stranded on shore with other pursuits as a musician and TV producer, Victor is on the prowl around Southeast Asia searching for new pristine waters to explore. His sister will always tease him for taking an oath never to take a camera underwater again after his first try in Malapascua, but lately he carries a camera anywhere he goes.
Further Reading
-
Stunning Super Macro with Stacked Diopters
-
How to Achieve Great Bokeh (blurred background)
-
Understanding Underwater Aperture & F-Stops
Where to Buy
Please support the Underwater Photography Guide by purchasing your underwater photography gear through our sister site, Bluewater Photo & Video. Click, or call them at (310) 633-5052 for expert advice!
![]()


