Beating Airline Baggage fees, part 2
Underwater Photographer’s guide to Beating Airline Baggage Fees – Part Two
In our last article on airline baggage fees and packing, I hope you got how these fees are here to stay and how they can constitute a significant increase in your airline ticket price. I also mentioned some of the few remaining loopholes in baggage policies and how we might focus on those. In over 15 years of traveling the world with my dive gear and underwater photographic equipment, I’ve never paid a baggage fee – not once. In this article, I’ll show you exactly how I do it.
How much underwater photography gear does anyone need?
Man is that a loaded question! Who doesn’t want the new F1.0 lens with ultra-nano technology, photoshop coated lenses in 12 pairs and 88 elements and perfect imagery software built in and optional jetpack and interstellar transporter? New technology is always coming out – some of it really awesome – and then there is always the need to have the right lens in our quiver for capturing an image in a specific situation. But this can all go overboard fast and this is where we need to start. Remember – if we are going to bring the kitchen sink, then no packing strategy is going to help.

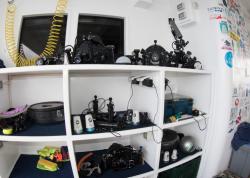
Does anyone really need to bring all this gear? Ok - don't answer that!
By the very nature of being underwater photographers, it means we are bringing a lot of gear. First, normal clothes and sundries; then dive gear and finally camera gear and housing, etc and it adds up fast. So before we find ways to pack more gear, we are going to start by taking less.
On just about every dive trip I go on, someone shows up with a mammoth amount of gear and if that’s you, there are few strategies that will save you from baggage fees except paying for a first/business class ticket or being Platinum elite – all which give you significantly increased baggage allowances.
Strategy One – Less is More
Over the years of shooting both topside and underwater, I’ve honed my photographic needs. I don’t bring a huge quiver of lenses and I leave anything extraneous at home. All the extras like filters, cleaning kits and grease really add up. So I make sure and bring only what I really need – the bulky instruction manuals stay at home.
Strategy Two - Use your carry on and your “personal item”
My personal item is my laptop bag and in it I carry my laptop, two back up hard drives, cleaning kit, portable photo printer and batteries and chargers for two strobes and camera(s). Next, I pack all of my camera equipment and housing in my carry-on. There are a number of carry-on bags that are made specifically for this purpose. I bought a regular, inexpensive American Tourister carry on bag that is exactly the maximum legal dimensions for a carry on with most carriers worldwide. Then I took the padding out of my Pelican case and fitted it into my “looks like every businessman’s overnight bag” American Tourister. My bulky Pelican case was within the legal dimensions but it always got second looks from airline and security staff and it was heavy and it didn’t have wheels. Nobody gives my carry-on a second look and at times it has over 35lbs of camera equipment in it! This effectively offloads a lot of weight from my checked baggage. TIP! If you travel this way, make sure and get on the plane as soon as possible to secure overhead space. You don’t want to gate check this bag!
Strategy Three - Get elite status on at least one airline.
It’s easier than you think even if you don’t do a lot of flying. First, concentrate your flying on one of the major U.S. carriers and their codeshare partners. For instance, you can get United miles for flying Continental and vice versa. So if I am going to go for elite status on say United, I use that frequent flier number even when checking in on a Continental flight. That way I don’t end up with my miles dispersed between different programs. Look for specials that let you earn additional elite status qualifying miles. Delta offers credit cards that not only earn you miles with each purchase but also can earn you elite status qualifying miles as well. I make elite status with Delta every year on this feature alone.
Strategy Four - Get the credit card(s) of the airline(s) you fly the most.
There is a great new feature on some of the airline sponsored credit cards: If you present the card at check-in, the airline will waive the first checked bag fee for the card holder and 1 to 3 other people traveling with you. Well worth it.
So What do I Typically Bring?
- - 1 DSLR body (I rarely bring 2)
- - 1 wide angle zoom lens
- - 1 macro lens
- - 1 telephoto zoom lens
- - 1 mid range zoom lens
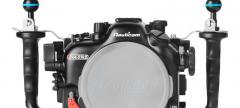
- - 1 housing
- - 1 flat port
- - 1 dome port
- - 1 extension ring (works with dome port on zoom wide angle and also with flat port if I want to use a 100/105MM macro lens)
- - 2 strobes (I like Inon Z240s because they are compact & light yet powerful
- - 2 strobe arms
- - 3 sync cords (1 backup)
- - Hartenberger light (for artistic lighting, night and modeling)
- - 12 AA rechargeable batteries
- - 2 camera batteries and charger
- - 1 cleaning kit (lens and sensor)
- - Spare o-rings and grease
- - Spare port cover
- - Laptop & charger
- - 2 portable hard drives
- - 3 CF cards @ 16GB ea.
- - Canon Selphy compact photo printer & charger (I use this to print out photos that I take of local people so I can give it to them on the spot :)
Packing Tips
As mentioned above, some of this gear goes in my Wenger laptop bag which has a couple of different compartments and doesn’t count towards my weight allowance. I pack my DSLR body inside my housing to save space and have never had a problem. This is a carry on bag so it doesn’t get heavily smacked around. If you have a big dome port (12”+), a larger housing or larger strobes this may not work for you. I specifically choose my equipment to be ergonomic, sturdy, high performance and portable since I’m always traveling to shoot. On the rare occasion when my camera carry on bag is overflowing, I put my two Inon strobes in my checked bag wrapped up in clothes. Easy.
Conclusion – beating airline baggage fees
That’s it! Start by simplifying and reducing, then maximize your weight and size allowance for carry on baggage and finally get friendly with the airline that you fly the most. Depending on how often you fly, you’ll save hundreds of dollars a year with these strategies and tons of hassle. Happy diving!
By Sharkman & Mantagirl
Aka Ridlon & Carin Kiphart
Underwater Photography Guide Travel Editors
Further Reading
Best dive destinations for underwater photography
Dive travel information for underwater photographers
Choosing a liveaboard or resort for underwater photography
Top 10 tips for dive travel
About the Authors
Ridlon and Carin run Global Diving Adventures, a premium provider of SCUBA diving vacations and advice on SCUBA diving travel & the adventure lifestyle. They provide their friends the experiences and knowledge to live an extraordinary life through adventure.
RECOMMENDED ARTICLES
SUPPORT THE UNDERWATER PHOTOGRAPHY GUIDE:
The Best Service & Prices on u/w Photo Gear
 Visit Bluewater Photo & Video for all your underwater photography and video gear. Click, or call the team at (310) 633-5052 for expert advice!
The Best Pricing, Service & Expert Advice to Book your Dive Trips
 Bluewater Travel is your full-service scuba travel agency. Let our expert advisers plan and book your next dive vacation. Run by divers, for divers.


